DeepAffex™ Developers Guide
This guide will help you effectively use NuraLogix™ DeepAffex™ technologies. Here you will find step-by-step instructions to get you started and also more detailed references as you delve deeper.
The Introduction illustrates the principle behind Transdermal Optical Imaging and explains the DeepAffex™ architecture.
Chapter 2 walks through an example that can extract facial blood-flow, send it to the DeepAffex™ Cloud for processing and display results. Chapter 3 and Chapter 4 go into more details about the DeepAffex™ Cloud API and Extraction Library respectively.
Chapter 5 showcases the capabilities of the DeepAffex™ Dashboard.
Chapter 6 is a guide for troubleshooting any issues you run into.
Finally, we have some appendices - Measurement Questionnaire, Available DFX Points and a Glossary.
Last updated on 2024-03-01 by Vineet Puri (v1.26.0)
Disclaimer
DeepAffex™ is not a substitute for the clinical judgment of a health care professional. DeepAffex™ is intended to improve your awareness of general wellness. DeepAffex™ does not diagnose, treat, mitigate or prevent any disease, symptom, disorder or abnormal physical state. Consult with a health care professional or emergency services if you believe you may have a medical issue.
Introduction
Transdermal Optical Imaging (TOI™)
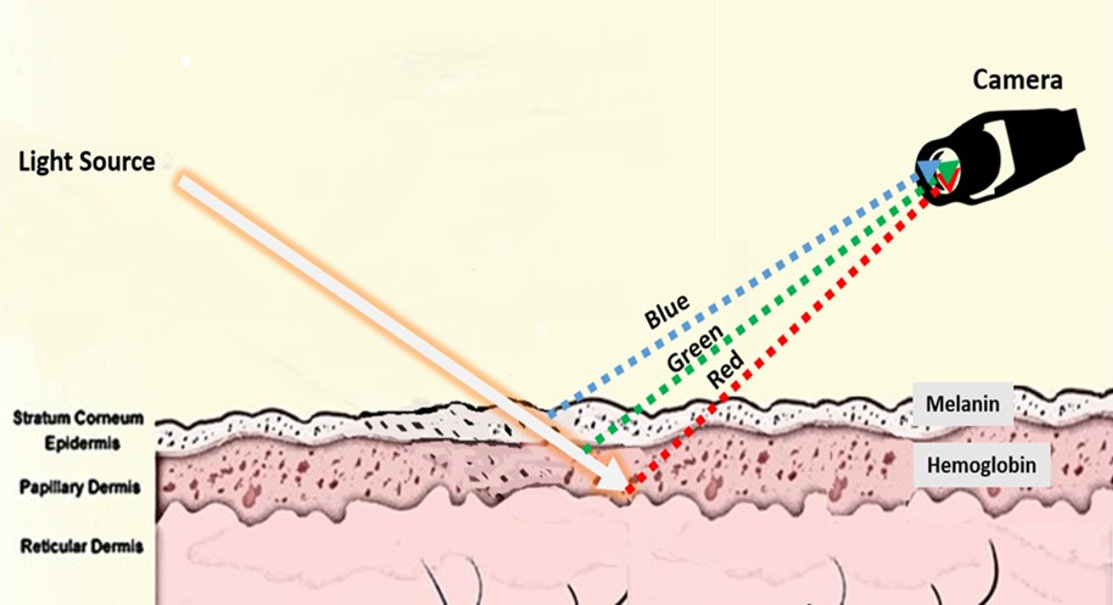
Transdermal Optical Imaging™ (TOI) is an imaging technology by NuraLogix that uses a digital camera and advanced image processing to extract facial blood-flow data from a human subject.
As a person's heart beats, the color of their skin undergoes minute variations. TOI™ captures and amplifies these variations and uses them to extract blood-flow information. When done from biologically significant regions of interest of the person's face, the result is called facial blood-flow information.
There are three pre-requisites to extracting useful facial blood-flow information:
-
A continuous sequence of images of a person's face (typically produced by a camera or a video file)
-
Accurate image timestamps (typically produced by the camera or read from the video file) and
-
Facial feature landmarks (typically produced by a face tracking library)
DeepAffex™
DeepAffex™ is NuraLogix's overarching solution for extracting and processing facial blood-flow information.
For desktop applications, you can extract facial blood-flow information using the DeepAffex™ Extraction Library which implements TOI™. Then you can send it to the DeepAffex™ Cloud to estimate several biological signals such as pulse rate, heart rate variability and more. NuraLogix™ has also developed several neural network models that can also predict biosignals like blood pressure or health markers like stress index.
The figure below shows the architecture of a DeepAffex™-based desktop application:

In addition to the DeepAffex™ Extraction Library, you will need a method of producing a sequence of images (a camera or a video file,) a face-tracking engine and networking code that communicates with the DeepAffex™ Cloud, either using HTTP REST or WebSockets.
To develop iOS or Android apps, you should use the higher-level Anura Core SDK. On the web, you should use the Web Measurement Service.
The next chapter walks through a simple Python example that can extract facial blood-flow, send it to the DeepAffex™ Cloud for processing and display results.
Getting started
This chapter walks through dfxdemo - a simple Python-based demo that
demonstrates how to use the DeepAffex™ Library and DeepAffex™ Cloud API.
dfxdemo can extract facial blood-flow from a video file or webcam, send it to
the DeepAffex™ Cloud for processing and display the results. It can also be used
to display historical results. In this chapter, we will focus on video files.
To begin, please clone the demo from its GitHub repo and follow the instructions in the README.
Understanding dfxdemo
dfxdemo has top-level commands that roughly correspond to the way the
DeepAffex™ Cloud API is organized.
It uses dfx-apiv2-client-py
to communicate with the Cloud.
Device tokens, user tokens and one-time refresh tokens
Authentication on the DeepAffex™ Cloud API uses JSON Web Tokens. Each token contains information pertaining to the current access request. On the Cloud, a token is mapped against an internal policy manager that specifies what access levels it has. The token policies control access to the various parts of the API. There are three types of tokens:
A Device Token represents a single device. It provides access to endpoints that allow for device-specific features e.g., making measurements. To obtain a Device Token for the device in use, register your organization license on the DeepAffex™ Cloud. A pair of tokens (a Device Token and a One-Time Refresh Token) is returned.
dfxdemo org register <your_license_key>
A User Token provides access to most non-measurement related endpoints. To obtain a User Token, login as a user. A pair of tokens (a User Token and a One-Time Refresh Token) is returned.
dfxdemo user login <email> <password>
A One-Time Refresh Token (OTRT) is a single-use token that is used to refresh User and Device tokens. Refreshing tokens at appropriate times lets devices can "roam" properly and improves token security.
The flowchart below shows the steps needed to obtain and renew a token.

By default, dfxdemo stores tokens in a file called config.json. In a
production application, you will need to manage all tokens securely.
Note: All the commands below, use the tokens obtained above as illustrated in the demo code.
Points and Studies
The DeepAffex™ Cloud organizes around the concept of Points and Studies.
A DeepAffex Point is a biosignal of interest that can be extracted, computed
or estimated from facial blood-flow data and that is assigned a unique name on
the DeepAffex™ Cloud. (e.g., HR_BPM is the Point for pulse rate.)
A DeepAffex Study is a collection of DFX Points that are computed in one measurement. A Study is based on a Study Template which determines which Points it contains. You can list the Studies available to you, retrieve a Study's details and select one for use in measurements.
dfxdemo studies list
dfxdemo study get <study_id>
dfxdemo study select <study_id>
Making a measurement
The process of extracting facial blood-flow from a sequence of images and sending it to the DeepAffex™ Cloud for processing is called making a measurement.
dfxdemo uses OpenCV to read individual frames from a
video,
MediaPipe Face Mesh to
track facial landmark features in each frame and
libdfxpython (DFX Extraction Library's
Python bindings) to extract facial blood-flow. To make a measurement from a
video using the selected study:
dfxdemo measure make /path/to/video_file
The facial blood-flow data from a video is sent to the DeepAffex™ Cloud in fixed duration chunks (5 seconds by default) over a WebSocket. As the measurement progresses, accumulated results are returned over the same WebSocket and displayed. When the last chunk is received by the DeepAffex™ Cloud, the overall results are computed and returned.
The flowchart below shows the steps needed to make a measurement from a video.

You can also make a measurement using a webcam. This will enable the measurement constraints which guide the user to better position themselves.
Measurement results and history
Historical measurement results associated with a user and their details can also
be retrieved using dfxdemo if your legal agreement with Nuralogix™ allows
saving results:
dfxdemo measurements list
dfxdemo measure get <measurement_id>
These results are also available on the DeepAffex™ Dashboard which includes a sophisticated graphical display.
Next steps
In the next chapter, we will discuss the DeepAffex™ Cloud API in more detail.
DeepAffex™ Cloud
The DeepAffex™ Cloud is used to analyze the facial blood-flow extracted by the DeepAffex™ Extraction Library. It can also be used to manage users and DeepAffex Studies under your organization.
The DeepAffex™ Cloud API is organized into endpoint groups composed of
individual endpoints. e.g., General, Users, Profiles, Measurements etc.
are high-level groups of calls while General.Status is an individual endpoint
within the General group.
The API is canonically documented on the DeepAffex™ API Apiary.
On iOS and Android, communication with the Cloud is managed by the higher-level Anura Core SDK. On the web, it's managed by the Web Measurement Service.
Transports
The DeepAffex™ Cloud API endpoints are available on HTTP REST and WebSocket transports. The DeepAffex™ Cloud does not limit access across different transports, so you may use the transports interchangeably.
For both the REST and the WebSocket transports, API endpoints are transacted using data in the JSON format. For WebSocket, Protocol buffers were an old legacy method used to encode data.
For simplicity, we will refer to "HTTP-based access using RESTful patterns" as the REST API and the WebSocket equivalent as the WebSocket API.
The REST API is available at https://api.deepaffex.ai. The WebSocket API is available at: wss://api.deepaffex.ai.1
Please note that there are different routing options available, please refer to the chapter on regions and clusters to know more about them.
An important difference between the REST and WebSockets API is that the
Measurements.Subscribe endpoint is only available on the WebSocket API. This
endpoint is used to get real-time intermediate and final results of an active
measurement over a bidirectional WebSocket connection.
WebSockets
This transport method is highly optimized and provides a fast and efficient method of communicating with DeepAffex™ Cloud. We recommend using the WebSocket API for platforms where real-time results are required.
Connection
During connection creation, the string "json" needs to be passed as the
WebSocket protocol to the server which indicates to the server that the client's
payloads will be JSON. To maintain a connection with the DeepAffex™ Cloud, you
must implement proper ping/pong heartbeats as required by the WebSocket standard
specification.
In addition to the standard use of WebSocket connectivity mechanics, the DeepAffex™ Cloud uses a custom request/response exchange pattern outlined below.
Request structure
A WebSocket request has to be a buffer, with the following structure:
Buffer( [ string:4 ][ string:10 ][ string/buffer:variablelength ] )
The first 4 bytes are an Action ID for the request, which is defined in the Endpoint Summary Table.
The next 10 bytes are a Request ID - a string identifier unique for each request. The client is responsible for creating a unique Request ID. It could be a counter or a randomly generated alphanumeric string e.g., "JDUEHDJEKO" or "000000001". This ID is only used within the current connection and does not interfere with other concurrent connections using the same token. Request IDs are not stored, so reusing them is possible however not recommended.
The remaining bytes represent the full body of your request in JSON format. In the legacy system, it used to be a serialized Protobuf. The DeepAffex™ Protobuf definitions are still available for download on the DeepAffex™ website.
Response structure
Requests that don't follow the structure defined above aren't processed. Instead, the following response is returned:
{
  Code: "INCORRECT_REQUEST"
}
Correctly structured requests get responses with the following structure:
Buffer( [ string:10 ][ string:3 ][ string/buffer:variablelength ] )
The first 10 bytes are the Request ID matching a request to a response.
The next 3 bytes are an HTTP status identifier. Status codes are defined in the Header Response Codes Table.
The remaining bytes are the response body in JSON format. In the legacy system, it used to be a serialized Protobuf which could be deserialized using the DeepAffex™ Protobuf definitions.
The client needs to manage requests in memory and await the response asynchronously. The DeepAffex™ Cloud will always respond to a request to close it out, regardless of if there is an error or not. In addition, to the status code, the body will also contain relevant error information.
Details
An important difference in the call methods is translating query string and
parameters that would typically be sent via the REST service to the WebSocket
API. As an example, shown below are properties when making a request to the
Meta.retrieveByType endpoint:
  {
    "Foo": "bar",
    "Query": {
      "Namespace": "all",
      "Fields": "Foo,Bar"
    },
    "Params": {
      "Type": "Group",
      "ID": "7ab8bee7-808c-4123-9811-e385adb8c77d"
    }
  }
In essence Query and Params are values that are extracted from the payload
body and interpreted as values that would typically be expected by a REST
request.
Error messages are transported in turn in similar object formats as listed below. The WebSocket interface also follow this pattern.
Note: Many endpoints use arrays in the root of the payload. If you are still
using our old legacy method of Protobufs, then unfortunately Protobufs do not
support rooted arrays, hence the value needs to be wrapped in an object. The
DeepAffex™ Cloud looks for the Values property in a payload and handles the
containing array as a root array. The following is an example of a request to
Groups.addUsers:
REST request example:
    [
        "7ab8bee7-808c-4123-9811-ef85adb8c77f",
        "7ab8bee7-808c-4123-9811-ef85adb8c75f",
        "7ab8bee7-808c-4123-9811-ef85adb8c71f",
        "7ab8bee7-808c-4123-9811-ef85adb8c72f",
        "7ab8bee7-808c-4123-9811-ef85adb8c77f"
    ]
Protobuf wrapped example of the same payload:
  {
    "Values": [
        "7ab8bee7-808c-4123-9811-ef85adb8c77f",
        "7ab8bee7-808c-4123-9811-ef85adb8c75f",
        "7ab8bee7-808c-4123-9811-ef85adb8c71f",
        "7ab8bee7-808c-4123-9811-ef85adb8c72f",
        "7ab8bee7-808c-4123-9811-ef85adb8c77f"
    ]
  }
First steps
Upon connecting to the DeepAffex™ Cloud, we recommend checking the current API
version and general status. This is done by calling the General.Status endpoint
which will respond with the appropriate status details. This endpoint does not
require any authentication.
For most other endpoints though, an appropriate Authorization header must be supplied. This is discussed in the next section.
For compatibility reasons, you can also use ports 9443 and 9080 for REST and WebSocket respectively but for new applications please use the default port, 443.
Authentication
Appropriate authentication is necessary to call most of the endpoints available on the DeepAffex™ Cloud.
Tokens
Authentication on the DeepAffex™ Cloud API uses JSON Web Tokens. Each token contains information about the current access request. On the Cloud, a token is mapped against an internal policy manager that determines what access levels it has. The token policies control access to the various parts of the API. Tokens are of three types:
-
Device Token - A Device Token represents a single device. A Device Token provides access to endpoints that allow for device-specific features, for example, making measurements. To obtain a Device Token for the device in use, register your organizations License Key on the DeepAffex™ Cloud using the
Organizations.RegisterLicenseendpoint. A pair of tokens (a Device Token and a One-Time Refresh Token) is returned. -
User token - A User Token has the following two variations:
- Nonmeasurement-related User Token - This is obtained using the
Organizations.Loginendpoint. This token doesn't contain a Device ID and provides access to most non-measurement related endpoints, for example, study management. - Measurement-related User Token - This is obtained using the
Users.Loginendpoint. Before obtaining this token, it's necessary to obtain a Device Token first. This token also contains a Device ID and can be used to carry out the measurements. It is required to associate measurements with a particular user account. This token can also be used for non-measurement endpoints exactly the same way as the first type.
- Nonmeasurement-related User Token - This is obtained using the
-
One-Time Refresh Token (OTRT) - This token is only used when calling the
Auths.Renewendpoint. When you register a license or login with the user's credentials, a pair of tokens (a Device or User Token and a One-Time Refresh Token) is returned. To bind a new IP address and a new user agent to the Device Token or the User Token (or if the User Token expires) call theAuths.Renewendpoint with the OTRT. The client needs to send the matching pair of tokens to exchange it with a new pair. The old pair will not be valid after calling theAuths.Renewendpoint. This is used to ensure that devices can "roam" properly and improves token security.
Once you have obtained a token, it needs to be supplied in the header of all subsequent API calls as shown below:
Authorization: Bearer [token]
For WebSockets, if the supplied authorization details are incorrect, the connection will be refused and the socket dropped by the server. Upon a successful connection the socket will open and handshakes should be complete, signalling availability of the service.
Since November 28, 2023, DeepAffex Tokens expire 24 hours after they are
issued and you have to call the Auths.Renew
endpoint with One-Time Refresh Tokens to renew them. You can learn more about this
change in the DeepAffex™ Cloud API changes bulletin.
More details and best practices
-
Since tokens represent authentication information, please make sure to store them securely - typically in some form of secure storage.
-
Some License Keys have a limited number of allowed active Devices. If you need to use your License on a different device, make sure to unregister your current device first by calling the
Organizations.UnregisterLicenseendpoint. -
To learn more about when to use Device Tokens vs User Tokens, please read about
Anonymous Measurements. If the response toOrganizations.RegisterLicensecontains "SDK_DEVICE" as theRoleID, then you must use a User Token. -
Tokens may expire. To ensure that a token is valid, you can call the
General.VerifyTokenendpoint.- If the
ActiveLicensefield in the response is false, then your license is expired/decommissioned. Please use a different license or contact Nuralogix™. - If the API returns an HTTP error 401 or 403, then the token is expired/invalid and the client must re-register the license.
- If the
Regions and clusters
The DeepAffex Cloud API is a connected mesh of distributed AWS clusters, each of which is hosted within a specific geographic region of the globe.
Clusters
Each distinct DeepAffex cluster provides coverage across a designated region. This regional partitioning of service operates according to defined continent-based geolocation rules that use AWS's DNS Traffic Policy Lookup to manage all IP routing of the originating connection to the destination DeepAffex endpoint. The table below summarizes the rules.
Geographic location and associated routing rules
| Rule name | Cluster name | Cluster location | Used by region | Comment |
|---|---|---|---|---|
Default | na-east | North America (Northern Virginia, USA) | North America, Africa, Australia, Antarctica | The default rule applied when none of the others apply |
Europe | eu-central | Europe (Frankfurt, Germany) | Europe, Saudi Arabia | For Saudi Arabia, overrides Asia rule |
South America | sa-east | South America (Sao Paulo, Brazil) | South America | |
Asia | as-east | Asia (Tokyo, Japan) | Asia | Except Saudi Arabia |
Hong Kong | as-hk | Asia Pacific (Hong Kong) | Hong Kong | Overrides Asia rule 1 |
as-hk not visible to dynamic routing, reachable only via the cluster specific direct URL
Routing Options
Two routing options are available to NuraLogix™ integration partners who have licensed access to the DeepAffex API.
The details of both these options follow.
Option #1: Default Routing (no region locking)
With this option, you would use the global URL:
https://api.deepaffex.ai for all network calls to the DeepAffex Cloud API.
Network traffic from each edge device will be routed to the cluster determined
using the routing rules described
in the table above.
-
Data processing: Data will be processed by the cluster determined by the routing rules.
-
Results storage: If your DeepAffex ORG is configured to store results, they will be stored in the cluster-name encoded in the active Device Token. This is the cluster that was used to obtain the token, either by registering a license or by renewing a token.
Note: The purpose of the default routing rules is to manage regional requirements for data localization and processing of customer traffic with the DeepAffex Cloud. It's important to recognize that these requirements are often contradictory, imprecise and lack consistency between customers so these routing rules may not satisfy all use-cases. If this default behaviour isn't desirable, please see the Region Locking alternative below.
URLs Where Routing Rules Are Applied
| Service | Routing URL |
|---|---|
| DeepAffex API | https://api.deepaffex.ai |
| DeepAffex Dashboard | https://dashboard.deepaffex.ai |
| Anura Web Consumer | https://aw.nuralogix.ai |
| Anura Web Enterprise / Web Measurement Service | https://awe.nuralogix.ai |
Checking Which Rules Apply To You
It's possible to check in advance which region your device will be routed to by calling the following endpoint:
curl https://api.deepaffex.ai/status
You may also visit https://api.deepaffex.ai/status in a browser from the region you want to check.
The response, will contain the "Region" field:
{ ..., "Region":"na-east" }
If you want to check a different location, you may need to use a VPN.
Examples
Some examples of operating territories and the clusters they resolve to:
| Operating territory | Resolves to cluster | Rule applied |
|---|---|---|
| Australia | na-east (Virginia, USA) | Default |
| Canada | na-east (Virginia, USA) | Default |
| Colombia | na-east (Virginia, USA) | South America |
| India | as-east (Tokyo, Asia) | Asia |
| Japan | as-east (Tokyo, Asia) | Asia |
| New Zealand | na-east (Virginia, USA) | Default |
| Saudi Arabia | eu-central (Frankfurt, Germany) | Europe |
| South Africa | na-east (Virginia, USA) | Default |
| Spain | eu-central (Frankfurt, Germany) | Europe |
| UAE | as-east (Tokyo, Asia) | Asia |
Option #2: Region Locking
With this option, you use a specific DeepAffex cluster URL for all network calls to the DeepAffex Cloud. In this scenario, the integrator can entirely bypass our routing rules and instead lock access to a specific DeepAffex cluster.
-
Data processing: Data will be processed by the specific DeepAffex cluster used.
-
Results storage: If your DeepAffex ORG is configured to store measurement results, then results will be stored by the specific DeepAffex cluster used.
If region locking is a requirement for you, then please use the direct regional URLs shown below. For these URLs, data is processed (and results stored if configured) on the DeepAffex cluster corresponding to the specified URL.
Direct regional URLs
| Region | URL |
|---|---|
| North America (N. Virginia, USA) Short code: na-east | https://api.na-east.deepaffex.ai https://dashboard.na-east.deepaffex.ai https://aw.na-east.nuralogix.ai https://awe.na-east.nuralogix.ai |
| Europe (Frankfurt, Germany) Short code: eu-central | https://api.eu-central.deepaffex.ai https://dashboard.eu-central.deepaffex.ai https://aw.eu-central.nuralogix.ai https://awe.eu-central.nuralogix.ai |
| South America (Sao Paulo, Brazil) Short code: sa-east | https://api.sa-east.deepaffex.ai https://dashboard.sa-east.deepaffex.ai https://aw.sa-east.nuralogix.ai https://awe.sa-east.nuralogix.ai |
| Asia (Tokyo, Japan) Short code: as-east | https://api.as-east.deepaffex.ai https://dashboard.as-east.deepaffex.ai https://aw.as-east.nuralogix.ai https://awe.as-east.nuralogix.ai |
| Asia Pacific (Hong Kong, HK) Short code: as-hk | https://api.as-hk.deepaffex.ai https://dashboard.as-hk.deepaffex.ai https://aw.as-hk.nuralogix.ai https://awe.as-hk.nuralogix.ai |
Organizations
In the DeepAffex™ Cloud's business-to-business services model, the Organization is the partitioning "silo" that gets created and licensed by a business.
All measurements, results, raw data etc. that are created under an Organization are secure and isolated from other Organizations. Only NuraLogix™ can create Organizations.
These series of endpoints are all related to managing Organization data. We will discuss two of them in more detail here. The rest are detailed on the DeepAffex™ API Apiary.
Registering Devices
As mentioned before, a Device Token pair (a Device Token and a One-time
Refresh Token) has to be obtained before a measurement can be made from a
device. To obtain this Token pair for the device in use, call the
Organizations.Register
endpoint.
This endpoint is called with the License Key for your organization. Other
parameters in the request are DeviceTypeID, Name, Identifierand Version.
On a successful request, the DeepAffex™ Cloud responds with a Device Token, a
One-time Refresh Token, DeviceID, RoleID and UserID.
Please ensure that the Device Token is securely stored on the device as it is needed for un-registering a device.
The token (device or user) has to be used in all subsequent calls to the DeepAffex™ Cloud.
Un-registering Devices
In some cases, there are a limited number of devices allowed on a License Key.
You can however, un-register a device and gain one License use back. To
un-register a device, you can call the
Organizations.Unregister
endpoint with the Device Token.
Note that this does not delete any historical results that were made with this device.
Re-registering Devices
Device tokens may expire. To ensure that a token is valid, you can call the
General.VerifyToken
endpoint. If the ActiveLicense field in the response is false or if the API
returns one of the following errors: INVALID_TOKEN, LICENSE_EXPIRED,
INACTIVE_LICENSE or INACTIVE_DEVICE, then the client must re-register the
license using the Organizations.Register endpoint described above.
Users, Profiles and Anonymous Measurements
Users
Endpoints in this group are related to managing users associated with an Organization.
User Login
Users have to login and obtain a User Token pair before they can make measurements that will be associated with them. This is useful for getting historical results which can be used to track long term health.
You can use the Users.Login
endpoint to login using an email address and the Auths.RequestLoginCode
and Users.LoginWithPhoneCode
to login using a phone number.
User Logout
There is no explicit endpoint for user logout. However simply destroying the user token locally is enough to be considered a logout.
Other endpoints in this group are discussed in more detail on the DeepAffex™ API Apiary.
Profiles
By default every measurement is accompanied by user and device identifiers, which were used to create it. However, there are scenarios where this is not enough.
One such scenario would be a user using the same device to make a measurement on behalf of someone else. For instance, an individual making a measurement for a family member or a researcher making measurements on multiple subjects.
User Subprofiles using UserProfileID
In order to address such scenarios and further differentiate measurements within
the same user/device pair, a UserProfileID can be used. Profiles are linked to
a user.
There's no upper limit on a number of profiles for given user, and DeepAffex™
Cloud API can be used to manage a full lifecycle of those using the
Profiles
endpoints.
Anonymous Measurements
Though the DeepAffex™ Cloud API provides a complete set of methods to maintain end user accounts, some API consumers ("partners") might prefer to not use these facilities for reasons like privacy concerns or already having a database of users and not wanting to maintain an external copy of it. In such situations you can create anonymous measurements without obtaining a User Token pair, using just a Device Token instead.
Anonymous Measurements using PartnerID
However, without a link between the partner's users and their anonymous
measurements, any analysis of such measurements will not be possible. This link
can be created by adding a PartnerID to the measurements while calling the
Measurements.Create
endpoint. PartnerID is a 2 to 148 characters long string.
PartnerID can hold a unique-per-user identifier, or any other value which
could help to reconcile measurements with users later using the
Measurements.List
and
Measurements.Retrieve
endpoints.
For some billing plans (e.g., pay-per-anonymous-user) providing a PartnerID may
be mandatory.
Studies
As mentioned before, the DeepAffex™ Cloud organizes around the concept of Points and Studies.
A DeepAffex Point is a biosignal of interest that is assigned a unique name on the DeepAffex™ Cloud. A DeepAffex Study is a collection of Points that are computed in one measurement. A Study is based on a Study Template which determines which Points it contains. A Study Template (and thus any studies derived from it) has a Study Type which is a broad categorization of templates.
For example, a Study Type of HEALTH could have associated with it two Study
Templates - HEART_HEALTH and STRESS. A Study called ELDERLY_HEART_HEALTH
could then be created from the HEART_HEALTH template.
The endpoints in this group are related to Study management.
CRUD
Studies can be created, retrieved, updated and deleted using the
Studies.Create,
Studies.Retrieve,
Studies.Update
and
Studies.Delete
endpoints respectively.
Study Configuration Data
A Study has associated with configuration data which is needed to initialize
a Factory in the DeepAffex™ Extraction Library. This data can be retrieved
using the
Studies.Sdkconfig
endpoint.
To call this endpoint, you have to pass the
SDK ID
of the library, the Study ID and the hash of the current data on hand. (The
hash can be an empty string if calling for the very first time.)
If there is updated configuration data available, the Cloud will respond with HTTP status 200 and the body will contain the Base64 encoded configuration data and its hash. If hash sent was up to date, then the Cloud will respond with HTTP status 304.
Please cache the study configuration data and its hash for future use with the library for this Study.
Measurements
The process of extracting facial blood-flow from a sequence of images and sending it to the DeepAffex™ Cloud for processing is called making a measurement. The results of this process is called Measurement.
Making a measurement
Making a measurement involves three (or two) different endpoints -
Measurement.Create,
Measurement.AddData
and, if real-time results are desired,
Measurements.Subscribe.
Creating a measurement
Measurement.Create
is the first endpoint that you must call - it will prepare the DeepAffex™ Cloud
for receiving data and return a Measurement ID.
Subscribing to results
In order to receive real-time results, you will need to touch the
Measurements.Subscribe endpoint. This is WebSocket-only endpoint. You must
pass a unique Request ID to it - the results will be returned with the same
Request ID on the WebSocket as they become available on the Cloud.
Measurement Questionnaire
Measurement questionnaires are used to enhance the accuracy of the measurements. To learn more about this, please refer to Measurement Questionnaire section.
Adding data
Once you have subscribed, you can send data to the Cloud using the
Measurements.AddData
endpoint. The bytearray containing the facial blood-flow data that is sent to
the Cloud (a "chunk"), is produced by the DeepAffex™ Extraction Library. For
both the REST and the WebSocket transports, this array needs to be
Base64 encoded. In the legacy system,
WebSockets connections used the DeepAffex™ Protobufs for this encoding.
Each chunk also needs an action associated with it which tells the Cloud how to process it. The actions are summarized below:
| Action | Description |
|---|---|
FIRST::PROCESS | Add chunk as first of measurement and process it (Drop any previously added chunks) |
FIRST::IGNORE | Add chunk as first of measurement but do not process it (Drop any previously added chunks) |
CHUNK::PROCESS | Add chunk to started measurement and process it |
CHUNK::IGNORE | Add chunk to started measurement but do not process it |
LAST::PROCESS | Add chunk as last of measurement, process it and finish measurement |
LAST::IGNORE | Add chunk as last of measurement, but do not process it and finish measurement |
Each chunk also has a StartTime and EndTime in seconds. The StartTime of
a chunk cannot be less than EndTime of the previous chunk. The difference
between StartTime and EndTime cannot be more than 100 seconds nor less than
5 seconds. Usually, it's best to use the values of StartTime, EndTime etc.
that are returned by the DeepAffex™ Extraction Library.
This endpoint is subject to request throttling. You should not submit more data than can be obtained in real time. i.e. do not send more than five seconds of chunk data over the course of five seconds of real time.
Decoding real-time results
Real-time results that are returned via the Measurements.Subscribe endpoint
are in JSON format. If you are using the legacy method of Protobufs then it can
be deserialized using the DeepAffex™ Protobufs or using the (deprecated)
decodeMeasurementResult method in the
DeepAffex™ Extraction Library.
Notes in real-time results
Real-time results may also contain Notes for each Point. They provide
additional information about the computation of the signal on the Cloud. If
present for a specific DFX Point, notes will be as a value to the "Notes" key
in that point. (e.g., for ABSI they will be at
"result"/"Channels"/"ABSI"/"Notes").
"Notes" is an enum; multiple notes may be present against a single Point. They
are described in the table below:
| Note | Description |
|---|---|
NOTE_USED_PRED_DEMOG | User profile data was predicted for computations since user-entered data was missing |
NOTE_SNR_BELOW_THRESHOLD | SNR was below 0.5 db; no additional signals were computed |
NOTE_FT_LIVENSSS_FAILED | First liveness test failed |
NOTE_MODEL_LIVENSSS_FAILED | Second liveness test failed |
NOTE_MISSING_MEDICAL_INFO | Medical history questionnaire information was not sent |
NOTE_DEGRADED_ACCURACY | Signal computation suffered from degraded accuracy |
A measurement may sometimes return an error. To know more about different error codes, please refer to the error codes table.
Results on DeepAffex™ Cloud
A history of the measurements results made by a device, user or profile will be available on the DeepAffex™ Cloud if your legal agreement with Nuralogix™ allows saving results. (Please see the next section for more information if this is not the case.)
A historical list of measurements can be retrieved by using one of the following endpoints:
-
Measurements.List- Behavior of this endpoint depends upon the type of token used in the header.-
Device Token - Will return a list of measurements made by the same Device Token as used in the header of this call.
-
User Token - Will return a list of measurements made by the user whose credentials were used to generate the User Token used in the header of this call.
-
-
Organizations.ListMeasurements- Using this endpoint, you can retrieve a list of measurements made across the organization, but it requires a token generated by a user with Admin, Lead, or Researcher roles.
The lists can be filtered by Date, EndDate, UserProfileID,
UserProfileName, PartnerID, StudyID, StatusID or any combination
thereof. The retrieved lists are paginated with a limited number of measurements
in the response. There is an Offset parameter which can be used to specify the
start of the list, and can be adjusted to get all the required measurements.
A measurement can have one of the following statuses:
| Status | Description |
|---|---|
| COMPLETE | This measurement has been successfully processed and all the expected results have been computed. |
| PARTIAL | This measurement has been fully processed and one (or possibly more) of the expected results could not be accurately computed. |
| IN_PROGRESS | This measurement has been created and the DeepAffex™ Cloud is waiting for payloads from the client. |
| PENDING | The DeepAffex™ Cloud has received all the payloads and the results are being computed. |
| INACTIVE | This measurement has been cancelled because a new measurement has been created with the same DeviceID. |
| ERROR | An error occurred in the DeepAffex™ Cloud while processing this measurement and none of the expected results could be computed. |
Detailed measurement results can then be retrieved by using one of the following endpoints:
-
Measurements.Retrieve- Behavior of this endpoint depends upon the type of token used in the header.-
Device Token - Will return the results for the measurements made by the same Device Token as used in the header of this call.
-
User Token - Will return the results for the measurements made by the user whose credentials were used to generate the User Token used in the header of this call.
-
-
Organizations.RetrieveMeasurement- Using this endpoint, you can retrieve any measurement across the organization, but it requires a token generated by a user with Admin, Lead, or Researcher roles.
Notes, if present, will also be part of the detailed results for each point.
Results not saved on DeepAffex™ Cloud
If your measurement results are not being saved on the DeepAffex™ Cloud, then:
-
The
Measurements.RetrieveandOrganizations.RetrieveMeasurementendpoints will return theMeasurementIDand the status only. -
On the DeepAffex™ Dashboard, a list of the measurements will be visible but the individual measurements will only show
MeasurementID, creation date, Study name and status. -
Your app must use the WebSocket-only
Measurements.Subscribeendpoint during a measurement and save the results on the device or on your own backend.
Errors
A measurement may have one of the following errors received from the DeepAffex™ Cloud:
| Error code | Measurement status | Description |
|---|---|---|
WORKER_ERROR | ERROR | The DeepAffex Cloud encountered an unrecoverable internal error during the computation of results and could not continue. |
LIVENESS_ERROR | PARTIAL | The Signal to Noise Ratio (SNR) of the measurement was too low to meet the minimum threshold. The results will contain only SNR = -100dB. |
ANALYSIS_ERROR | PARTIAL | The DeepAffex™ Cloud encountered an error while computing a Point. The JSON results will have Point IDs as keys for Points with errors with values indicating failure reason. |
The Errors field in the JSON will have the following format:
"Errors": {
  "Code": "<Error code>",
  "Errors": {
    "<signal_id>": {
      "msgs": [
        "<Error description>"
      ]
    }
  }
}
Next steps
In the next chapter, we will discuss the DeepAffex™ Extraction Library in more detail.
DeepAffex™ Extraction Library
The DeepAffex™ Extraction Library is a low-level library used to extract facial blood-flow information from a sequence of face-tracked images using a technology called Transdermal Optical Imaging™. It is available on three desktop platforms (Windows, macOS and Linux) and can be downloaded from the DeepAffex™ website. It has bindings to several popular programming languages made possible by its C API which facilitates linking with C Foreign Function Interfaces.
The library is canonically documented in the C/C++ documentation.
On iOS and Android, blood-flow extraction is managed by the higher-level Anura Core SDK. On the web, it's managed by the the Web Measurement Service.
Installation
C / C++
The C / C++ package consists of:
libdfx- a precompiled C library distributed as header files and binarieslibdfxcpp- a C++ wrapper forlibdfx, distributed as C++ source files and header files
We provide 64-bit binaries for Windows, macOS and Linux. The C++ wrapper layer that sits on top of the C API is a convenient access layer for C++ applications. It requires access to an OpenCV implementation. (The core C library has no external dependencies).
Installing the C++ package involves simply copying the headers and libraries locally and configuring your toolchain to point to them.
The README.html in the zip file, contains details on how to use CMake to build the C++ wrappers and also on how to compile an example program. You may choose to forgo CMake and e.g., use Visual Studio directly if you wish.
C / C++ documentation is available online.
.NET
The .NET DeepAffex Extraction Library is distributed as a NuGet package
targetting .NET Framework 4.6.1. It wraps the 64-bit DFX Extraction C dll -
dfx.dll.
Please refer to the NuGet or Visual Studio Package Manager documentation on how to install is as part of your project.
Python
The Python DeepAffex™ Extraction Library is distributed as Python Wheels for Windows, macOS and Linux, wrapping the respective 64-bit DFX Extraction C dynamic link libraries.
Installation is simple via a pip install command.
Basic Usage
Here we discuss basic usage of the DeepAffex™ Library for blood-flow extraction. We use Python here for clarity but the API is the same in all the languages.
DFX Factory
A DFX Factory is the primary entrypoint into the library. A Factory object
is constructed by calling a parameterless constructor.
factory = dfxsdk.Factory()
The next step is to use the SDK ID to obtain study configuration data from a
POST call to the Cloud API's
Studies.Sdkconfig
endpoint and to use it to initialize the Factory. (This assumes that you have
registered, logged in, obtained a token and selected a study as discussed in
the authentication chapter.)
We pass the SDK ID, Study ID and the hash of the current data on hand. The
first time we call this endpoint, the hash would be an empty string. If there is
updated study configuration data available, we will get at 200 response and the
body will contain the base64 encoded study configuration data and its hash. If
our hash we sent is up to date, then we will get a 304 response. Please cache
the study configuration data and its hash for future use.
sdk_id = factory.getSdkId()
study_cfg_data = # Cloud API call with sdk_id, studyid and current_hash
if not factory.initializeStudy(study_cfg_bytes):
    print(f"DFX factory creation failed: {factory.getLastErrorMessage()}")
If the initialization had no errors, our next step is to create a DFX
Collector.
DFX Collector
A Collector collects Frame(s) containing Face(s) and produces chunks of data
containing blood flow information (ChunkData.) To create a collector, we call
the createCollector method of an initialized Factory object.
collector = factory.createCollector()
The collector uses frame timestamp information to determine when a chunk of data is ready to be sent to the DeepAffex™ Cloud for processing. Thus, before we can start using it, we have to set some important properties - the anticipated framerate, the duration of each chunk of data and the duration of the measurement (set indirectly by setting the number of chunks to be sent.)
collector.setTargetFPS(fps)
collector.setChunkDurationSeconds(chunk_duration_s)
collector.setNumberChunks(number_chunks)  # measurement duration = chunk_duration_s * number_chunks
Next, we create a measurement on the DeepAffex™ Cloud using a POST call on the
Measurements.Create
endpoint.
At this stage, we are ready to start collecting blood flow data. However, a few points are to be noted.
- The minimum chunk duration is 5 seconds. Intermediate results will be available at this interval.
- The chunk duration may not evenly divide the total duration of a measurement
e.g., in the case of a video of predetermined length. In that case, we set the
number of chunks to be one more than the quotient. For the last chunk, when we
have received the last frame, we use the
forceCompletemethod of the collector. - In a live camera measurement, we could delay the start of blood flow data collection, until the person's face is in the frame and certain conditions like lighting etc have been met. This is the DFX Constraints system and is discussed in more detail in the next section.
Assuming we have an image source producing frames and a face tracker that can
track each frame and produce facial landmark information, we proceed by calling
startCollection on the collector object and adding frames to it.
collector.startCollection()
Adding frames
To add frames to the collector:
-
we first wrap our native image format into a DFX
VideoFrameobject (which tells the collector things like the timestamp of the frame and the channel order of the frame.)dfx_video_frame = dfxsdk.VideoFrame(image, frame_number, # Relative frame number frame_timestamp_ns, # Relative frame timestamp in nanoseconds dfxsdk.ChannelOrder.CHANNEL_ORDER_BGR) -
Then, we create a DFX
Frameobject by passing ourVideoFrameto the collector.dfx_frame = collector.createFrame(dfx_video_frame) -
Then, we add the DFX
Faces containing face tracking information to theFrame.for dfx_face in dfx_faces: dfx_frame.addFace(face) -
Finally, we create regions (from where the facial bloodflow information will be extracted) and we extract the information. We also check and see if a chunk of data is ready and whether the measurement has ended.
collector.defineRegions(dfx_frame) result = collector.extractChannels(dfx_frame) if result == dfxsdk.CollectorState.CHUNKREADY or \ result == dfxsdk.CollectorState.COMPLETED: chunk_data = collector.getChunkData() if chunk_data is not None: chunk = chunk_data.getChunkPayload() # Send the chunk to the DeepAffex™ Cloud if result == dfxsdk.CollectorState.COMPLETED: # Exit our image collection loopNote:
getChunkDatamay return aNone(or anullptrin C++). This will happen if the library wasn't able to extract enough bloodflow information from the frames that were passed in.
Decoding results
Real-time results that are returned via the Measurements.Subscribe endpoint
are in JSON format.
For older applications, the Collector also has a deprecated
decodeMeasurementResult function that can decode the Protobuf-encoded binary
results that are received on the WebSocket-only
Measurements.Subscribe
endpoint.
decoded_result = decodeMeasurementResult(payload)
This method will be removed in future versions of the library and you should rely on JSON results instead.
Some details about DFX Face's follow in the next section
Adapting Face Trackers
The DFX Extraction Library does not provide any built-in facial landmark tracking. Face detection and facial landmark tracking is available as a commodity with implementations like Dlib, Visage etc.
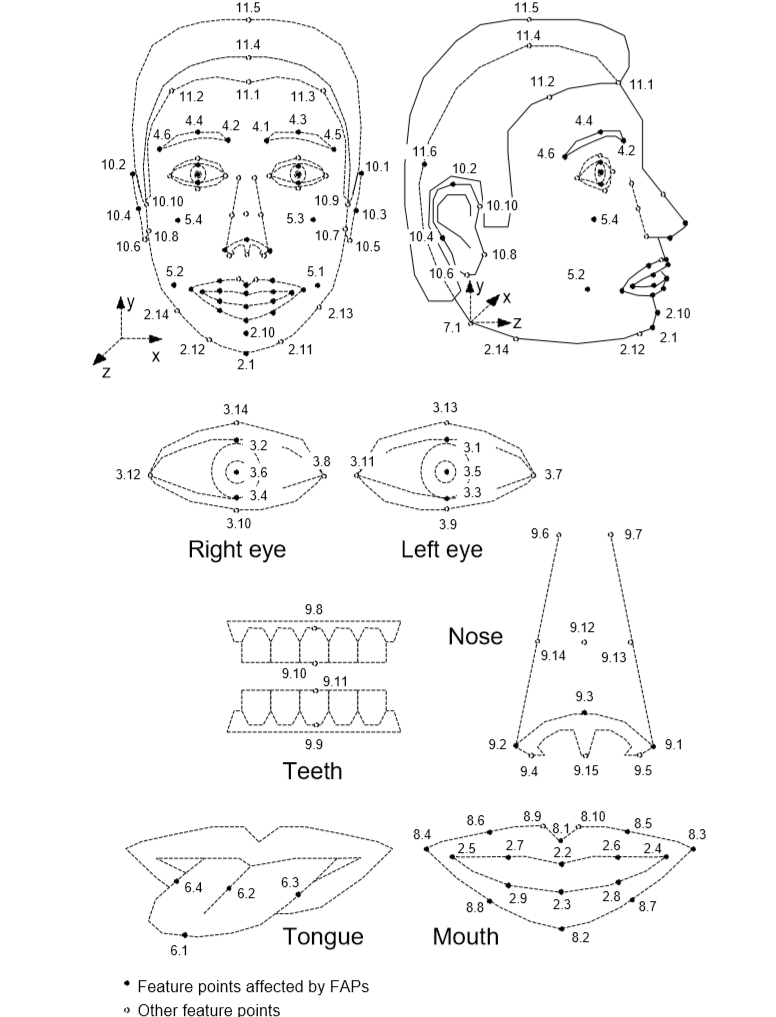
MPEG-4 Facial Data Points
Whatever the output of the face tracking engine, it will need to be mapped
into standard
MPEG-4 Facial Data Points
before being inserted into a DFX Frame as a DFX Face structure.
Please see the _dlib2mpeg4 structure in dlib_tracker.py in the dfxdemo as
an example of such a mapping for the Dlib face tracker. NuraLogix™ will be
happy to assist you in this process and we already have similar mappings for
several common face tracking engines.
Required Landmarks
The DFX Collector has a method called getRequiredPosePointIDs which will
return a list of MPEG-4 Facial Data Point names that need to be added to the
Face structure for the blood-flow extraction to work correctly. This list
will change base on the study configuration data used to initialize the DFX
Factory.
However, there are currently 15 core facial landmarks used by the majority of DFX Studies. These landmarks and other details are discussed thoroughly in the next chapter.
DFX Face
A DFX Face structure consists of:
id- unique to one person in a frame. The person's name, a GUID or even a counter will sufficefaceRect- the bounding rectangle of the face in the frameposeValid- true if the posePoints are validdetected- true if the face was detected in this frame, false if the face-tracking information is cached from an older frame and was used to estimate landmark points on this frame.posePoints- a map of MPEG-4 point names and DFXPosePointsattributes- a map of additional face attributes likeyaw,pitchetc.
A DFX PosePoint structure consists of:
x- the X location on the framey- the Y location on the framez- the Z location on the frame (reserved for future use)valid- true if this point was valid in this frameestimated- false if this point was returned by the face tracker, true if it was estimated by interpolating from points that were returned by the face trackerquality- the tracking quality (or probability) of this point (between 0 and 1)
Face-tracking strategies
If the face tracker that you have selected cannot keep pace with the frame rate
of the image source, then you can run the face tracker on a best-effort basis on
a background task and use its most recently produced results (within reason.)
Please be sure to set the detected and estimated fields correctly when using
cached data.
Currently, the DFX solution can better tolerate some inaccuracies in PosePoint
locations better than dropped frames. (This may change in the future and a
different face tracker strategy may be more appropriate.)
Required Facial Landmarks
Each DeepAffex Study potentially requires a unique set of facial landmarks.
However, there are currently
15 core facial landmarks used by the majority of
studies. These points provide details to the DFX Collector from which it is
able to identify the regions of interest for blood-flow extraction.
In addition, there are 44 visual facial landmarks which are used for animation and rendering of which do not affect the measurement quality.
Core Measurement Points
The 15 core facial data points are identified in this image by the red dot at the location and with the corresponding white label. The black box is the detected face rectangle provided to the Extraction Library along with the face points.
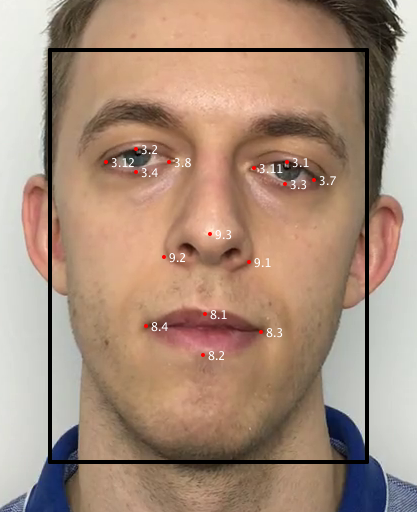
In addition to providing the black face bounding box, the 15 required point names are:
3.1, 3.2, 3.3, 3.4, 3.7, 3.8, 3.11, 3.12, 8.1, 8.2, 8.3, 8.4, 9.1, 9.2, 9.3
Visual Animation Points
There are 44 animation points which are used to construct the visuals which end users typical see along the contour of the face. These points do not need to be tracked (or mapped) as accurately as the core measurement points as they are only for aesthetic purposes. It is actually difficult for most face engines to accurately track the outer profile of a face and so these points are anticipated to have much more inaccuracy in general. You can see in the positioning of the group 13 series below how they have drifted from the edge of the face in the following diagram.
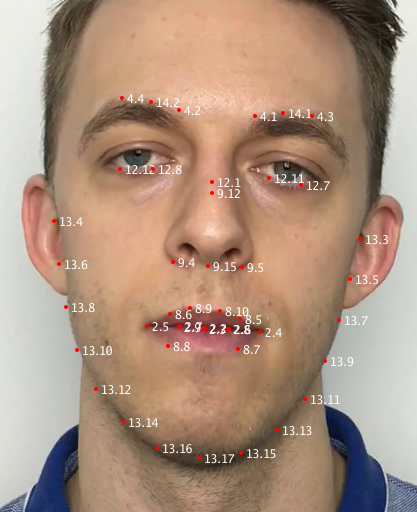
The 44 points used for visual animation include:
2.2, 2.3, 2.4, 2.5, 2.6, 2.7, 2.8, 2.9, 4.1, 4.2, 4.3, 4.4, 8.10, 8.5, 8.6, 8.7, 8.8, 8.9, 9.12, 9.15, 9.4, 9.5, 12.1, 12.11, 12.12, 12.7, 12.8, 13.10, 13.11, 13.12, 13.13, 13.14, 13.15, 13.16, 13.17, 13.3, 13.4, 13.5, 13.6, 13.7, 13.8, 13.9, 14.1, 14.2
Raw Data
In order to help facilitate mapping a face tracker to the MPEG-4 points that the library leverages, the raw data for the annotated image is:
The first line in the CSV file is a header describing the data.
The next two lines are for the top left corner of the bounding box (box.tl),
and the bottom right corner of the bounding box (box.br), respectively.
The rest of the data lines are for 174 landmarks points provided by the tracker
we used to produce this data.
Constraints
The DeepAffex Cloud will occasionally fail to return a result successfully. This usually occurs when the Signal-to-Noise Ratio (SNR) of the extracted blood-flow signal isn't high enough or when there are other issues with it.
While the user cannot do much about this for blood-flow extracted from videos, if a measurement is being made live using a camera, your application can provide actionable feedback to the user based on the Constraints system in the Extraction Library which may increase the chances of a successful result. You can also cancel a failing measurement early without waiting for a round trip over the internet.
Constraints demo using dfxdemo
dfxdemo, introduced earlier, has the ability to
make measurements using your computer's webcam and provide actionable feedback
using the Constraints system while you do so. Assuming you have completed all
the prerequisite steps needed to make measurements (i.e. registered your
license, logged in as a user and selected a study,) you can run the following
command:
dfxdemo measure make_camera
Note: If your computer has multiple webcams and you want to select a different
one, you can use the --camera <index> argument. You can pass --help to get a
full list of options.
Once the demo starts, you may see multiple feedback messages in red, asking you,
for example, to look straight at the camera or to hold still. Once all the
constraints are met, you can press s to start the measurement. You may also
see warnings during the measurement and if you violate constraints too much
during the measurement, it may fail.
The flowchart below shows the steps needed to make a measurement from a webcam with constraints enabled.

Checking constraints
Programmatically, you need to call checkConstraints on every Frame -
typically, before starting a collection.
dfx_frame = collector.createFrame(dfx_video_frame)
 for dfx_face in dfx_faces:
     dfx_frame.addFace(face)
result, details = collector.checkConstraints(dfx_frame)
The result return value is the aggregate result of the constraint check and
can be either GOOD, WARN or ERROR.
-
GOODmeans that the constraints are all met and collection can proceed. If it hasn't started yet you could choose to automatically start it or allow the user to start it using an input. (Recall that a measurement is started by callingstartCollection) -
WARNmeans that constraints are currently violated but the user has still has a chance to change conditions and change things back toGOODand perhaps still have a successful measurement. Feedback should be provided to the user. -
ERRORmeans that the collection has failed because of too many constraint violations. Obviously,ERRORcan only be returned after the collection has started. On anERROR, the application is expected to callcancelCollectionto terminate the ongoing measurement andresetCollectionto reset the internal collector state.
On a result of WARN and ERROR the details return value contains a map of
reason strings and result values. The reason strings correspond to each
possible constraint that is violated with a WARN OR ERROR.
The possible reason strings and their meanings are listed below:
| Reason String | Meaning | Possible user feedback |
|---|---|---|
| FaceNone | No faces detected in the frame | Move face into frame |
| FaceOffTarget | User's face is not in the constraints target region | Move face into target region |
| FaceDirection | User is not looking at camera | Look straight at the camera |
| FaceFar | User's face is too far from camera | Move closer to the camera |
| FaceMovement | User is moving too much | Hold still |
| ImageBright | Image is too bright | Make the image darker |
| ImageDark | Image is too dark | Make the image brighter |
| ImageBackLit | User's face is backlit | Remove illumination from behind the face |
| LowFps | Frame rate is too low | Improve frame rate |
Clearly, feedback to the user can and should be customized for your specific
application. The Image and LowFps reasons in particular can be dealt with
using application specific camera settings and controls. In addition to the
above, you may get ImageEmpty (an empty image was passed) and CameraMovement
(capture device was moving during capture) which will not be discussed in this
guide.
Configuring constraints
The constraints that will be checked by the DFX Collector are configurable by
the developer. You can query the currently set constraints by calling
collector.getConstraintsConfig("json") and modify the values by calling
collector.setConstraintsConfig("json", json_string) - the return value and
the modified values are expected to be JSON strings which will contain a simple
JSON dictionary. Typically, you would get the existing constraints, modify what
you need to and set them again.
constraints_cfg_str = collector.getConstraintsConfig("json")
# Parse the json, modify the values as needed
modified_constraints_cfg_str = parse_and_modify(constraints_cfg_str)
collector.setConstraintsConfig("json", modified_constraints_cfg_str)
The following constraints can be adjusted:
Minimum frame rate
The capture frame rate in frames/second has to exceed minimumFps (default:
27). This check can be disabled using checkMinFps.
Face position and presence
The face has to be present within a target rectangle within the frame. (The
rectangle is specified as a percent of the frame size using boxCenterX_pct,
boxCenterY_pct, boxWidth_pct and boxHeight_pct) (default: 50, 50, 50, 99).
These defaults are optimized for the landscape orientation. This check can be
disabled using checkCentered.
Face distance from camera
The face has to be close enough to the camera. Minimum inter-pupillary distance
in pixels (minInterPupilDist_px) is used a proxy for distance (default: 60.0).
This check can be disable using checkDistance. (This check assumes that you
haven't disabled the face rotation constraint described below.)
Image brightness and backlighting
The rectangle containing the face has to be brighter than threshDark
(default: 48) and darker than threshBright. (default: 225). This check can be
disabled using checkLighting.
If the region around the face, created by growing the face rectangle by
backLightSearchMult (default: 2.0) and cropping at the bottom of the face
rectangle, has more than backLightMaxPixels_pct percentage (default: 30%) of
its pixels brighter than backLightThresh (default: 240) then the backlight
constraint is violated. This check can be disabled using checkBackLight.
Face rotation
The user has to look at the camera. The maximum allowed left-right face
rotation is maxFaceRotLR_deg degrees (default: 12.5) and max allowed up-down
face rotation is maxFaceRotUD_deg degrees. (default: 25). This check can be
disabled using checkFaceDirection.
Face movement
The nose position is tracked in time (for the last movementWindow_ms
milliseconds) (default: 2000) and if it exceeds maxMovement_mm millimeters
(default: 10), then a warning is issued. This check can be disabled using
checkMovement.
Eyebrow movement
The perpendicular distance from the eyebrow midpoint to the line joining the
two lateral canthuses is calculated in mm for both eyebrows and tracked. If the
range of the larger tracked value exceeds maxEyebrowMovement_mm millimeters
(default: 3), then a warning is issued. This check can be disabled using
checkEyebrowMovement
NOTE: The face movement and eyebrow movement constraints are only checked if a measurement is active.
We recommend using your judgement to modify and/or disable constraints to get the best results for your particular use case. Testing with a wide variety of users and in a wide range of environments is very helpful!
DeepAffex™ Dashboard
The DeepAffex™ Dashboard is a web-based management tool primarily intended for developers and system administrators. This allows authorized users to monitor an organization’s private account on the DeepAffex™ cloud.
The Dashboard applies Role-Based-Access authorization criteria to provide secure management for an Organization’s collection of measurement results, study configurations, licenses, user accounts, participant information, cockpit, usage, and other relevant aspects.
Accessing the Dashboard
The DeepAffex™ Dashboard is available on the DeepAffex™ website. Please note that by default you will be automatically routed to the server nearest to your geographical location. If you wish to connect to a specific region, please refer to the Direct regional URLs table.
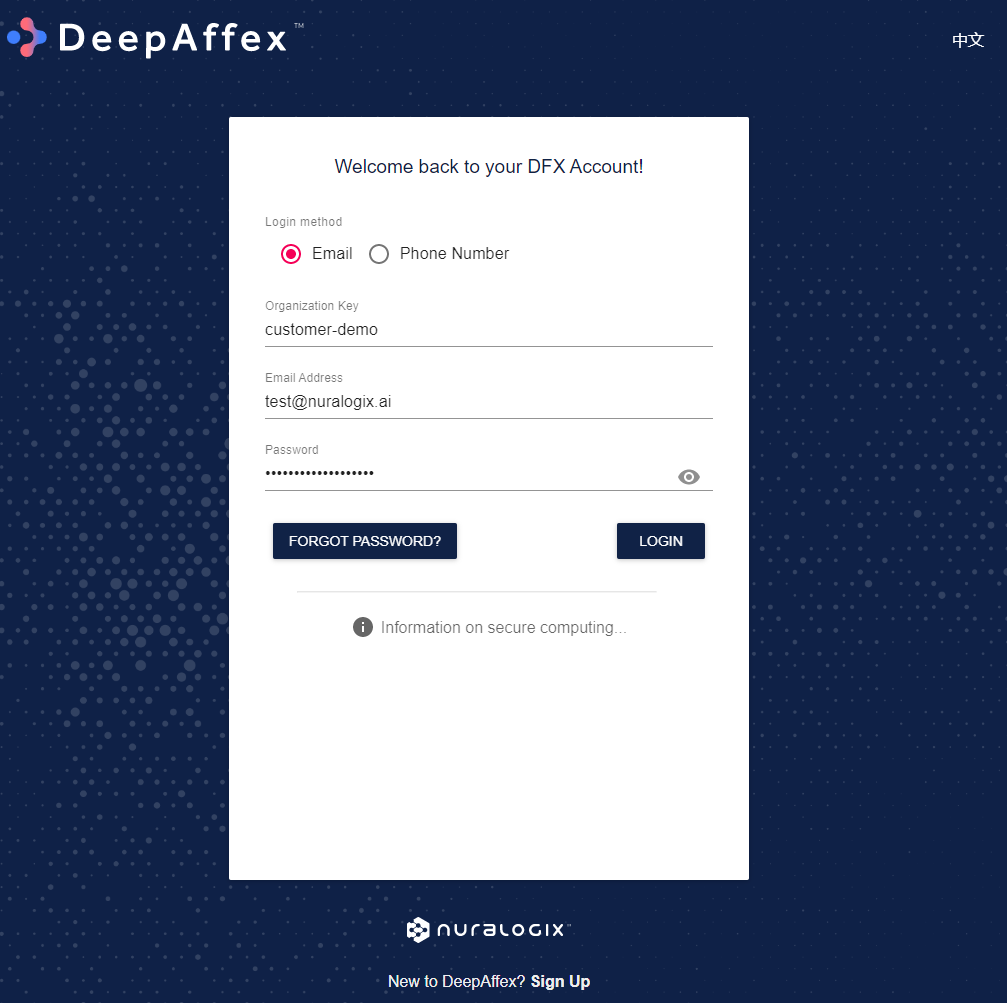
In most cases, you will start using DeepAffex™ Dashboard with an invitation email that is generated on account creation. Please click on the Activate my account button in the email to verify your account and proceed with the password setup process. When done, you can log in to DeepAffex™ Dashboard with your Organization Key, email address, and password.

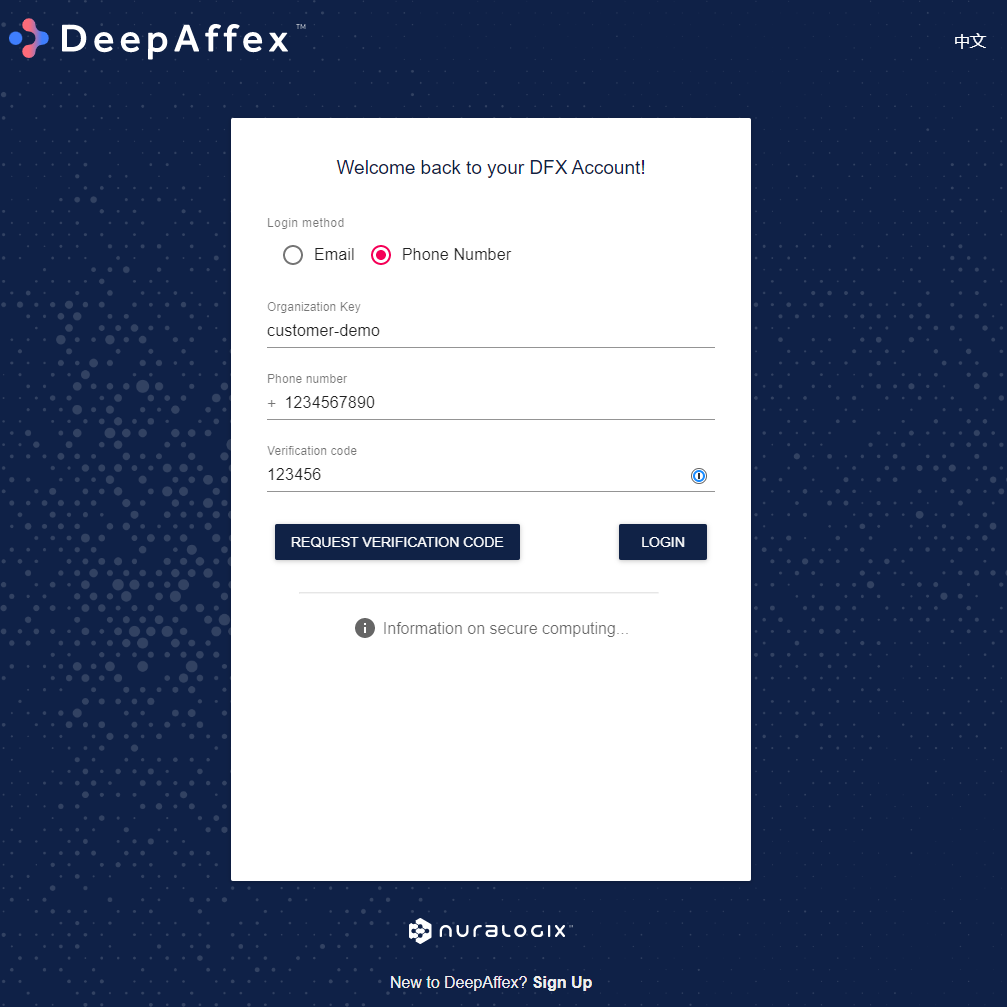
If your account was created using a Phone Number, there is no activation process. You can go to the login page directly, choose Phone Number as the login method, type the Organization Key and the Phone number, click on the REQUEST VERIFICATION CODE button, enter the code received in the SMS message, and then log in.
Role Based Access
The Dashboard applies Role-Based-Access authorization criteria to provide secure management for an Organization’s collection of measurement results, Study configurations, licenses, user accounts, participant information, cockpit, usage, and other relevant aspects.
A full list of permissions by user role is shown in the table below.
| Org Admin | DFX Analyst | DFX Researcher | DFX Lead | Anura Application User | DFX Operator | |
|---|---|---|---|---|---|---|
| Study Templates | ✔ | - | - | - | - | - |
| Studies | ✔ | ✔ | ✔ | ✔ | ✔ | ✔ |
| Licenses | ✔ | - | - | - | - | - |
| Measurements (All) | ✔ | - | ✔ | ✔ | - | - |
| Measurements (Own) | ✔ | - | ✔ | ✔ | ✔ | ✔ |
| Participants | ✔ | - | ✔ | ✔ | ✔ | ✔ |
| Users | ✔ | - | - | ✔ | - | - |
| Export Results | ✔ | - | - | ✔ | - | - |
| Cockpit and Usage | ✔ | ✔ | - | - | - | - |
| Edit My Information | ✔ | ✔ | ✔ | ✔ | ✔ | ✔ |
Explanation of each User Role:
-
Org Admin: A user with this role is an Organization Administrator who can view and manage all the available features on DeepAffex™ Dashboard. It is the ONLY role that can perform DELETE operations.
-
DFX Analyst: This role is usually created for analyzing the aggregate data and usage for your organization.
-
DFX Researcher: This role is usually created for any studies conducted by the researchers in your organization.
-
DFX Lead: This role is usually created for people who are managing the project/study. A user with this role can perform CREATE operations.
-
Anura Application User/DFX Operator: These two roles have the same level of access. Users with this role can only view their own measurements and of related participants (sub-profiles). It is usually created for people who are conducting measurements for studies and/or development. A DFX Operator may also be created for taking centralized/kiosk measurements.
A partial walkthrough using an actual operational DFX account follows.
Navigation
After successfully logging in, all features and capabilities covered by the Dashboard are shown on a navigation bar that is always accessible on the left.
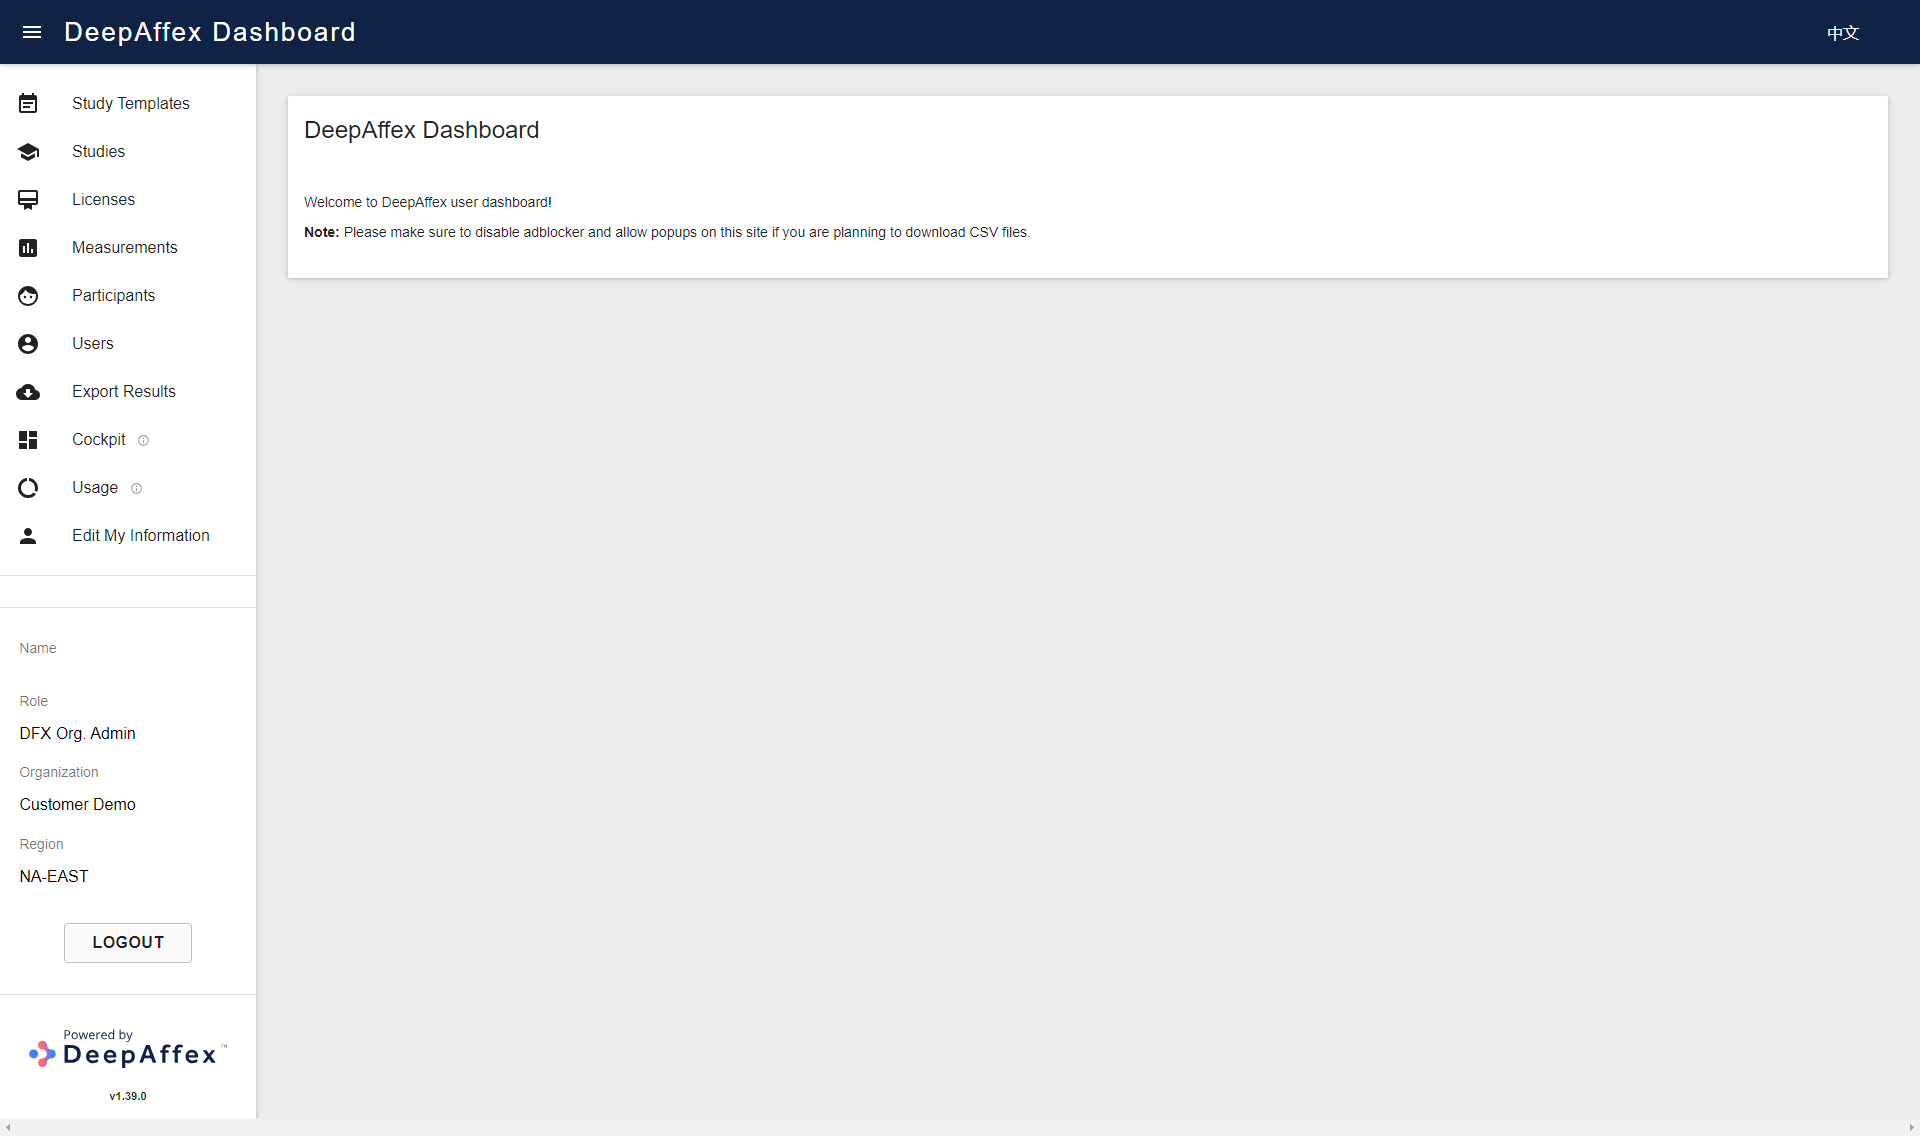
(Click here to open a larger version of this picture in a new window)
Underneath all the navigation buttons, the navigation bar will display your Name, Role and Organization as well as the version of the Dashboard and DeepAffex Cloud Region in use.
Study Templates
Only an Org Admin can view the Study Templates that have been issued to your Organization. If you need to add a new Study Template, please contact NuraLogix™.
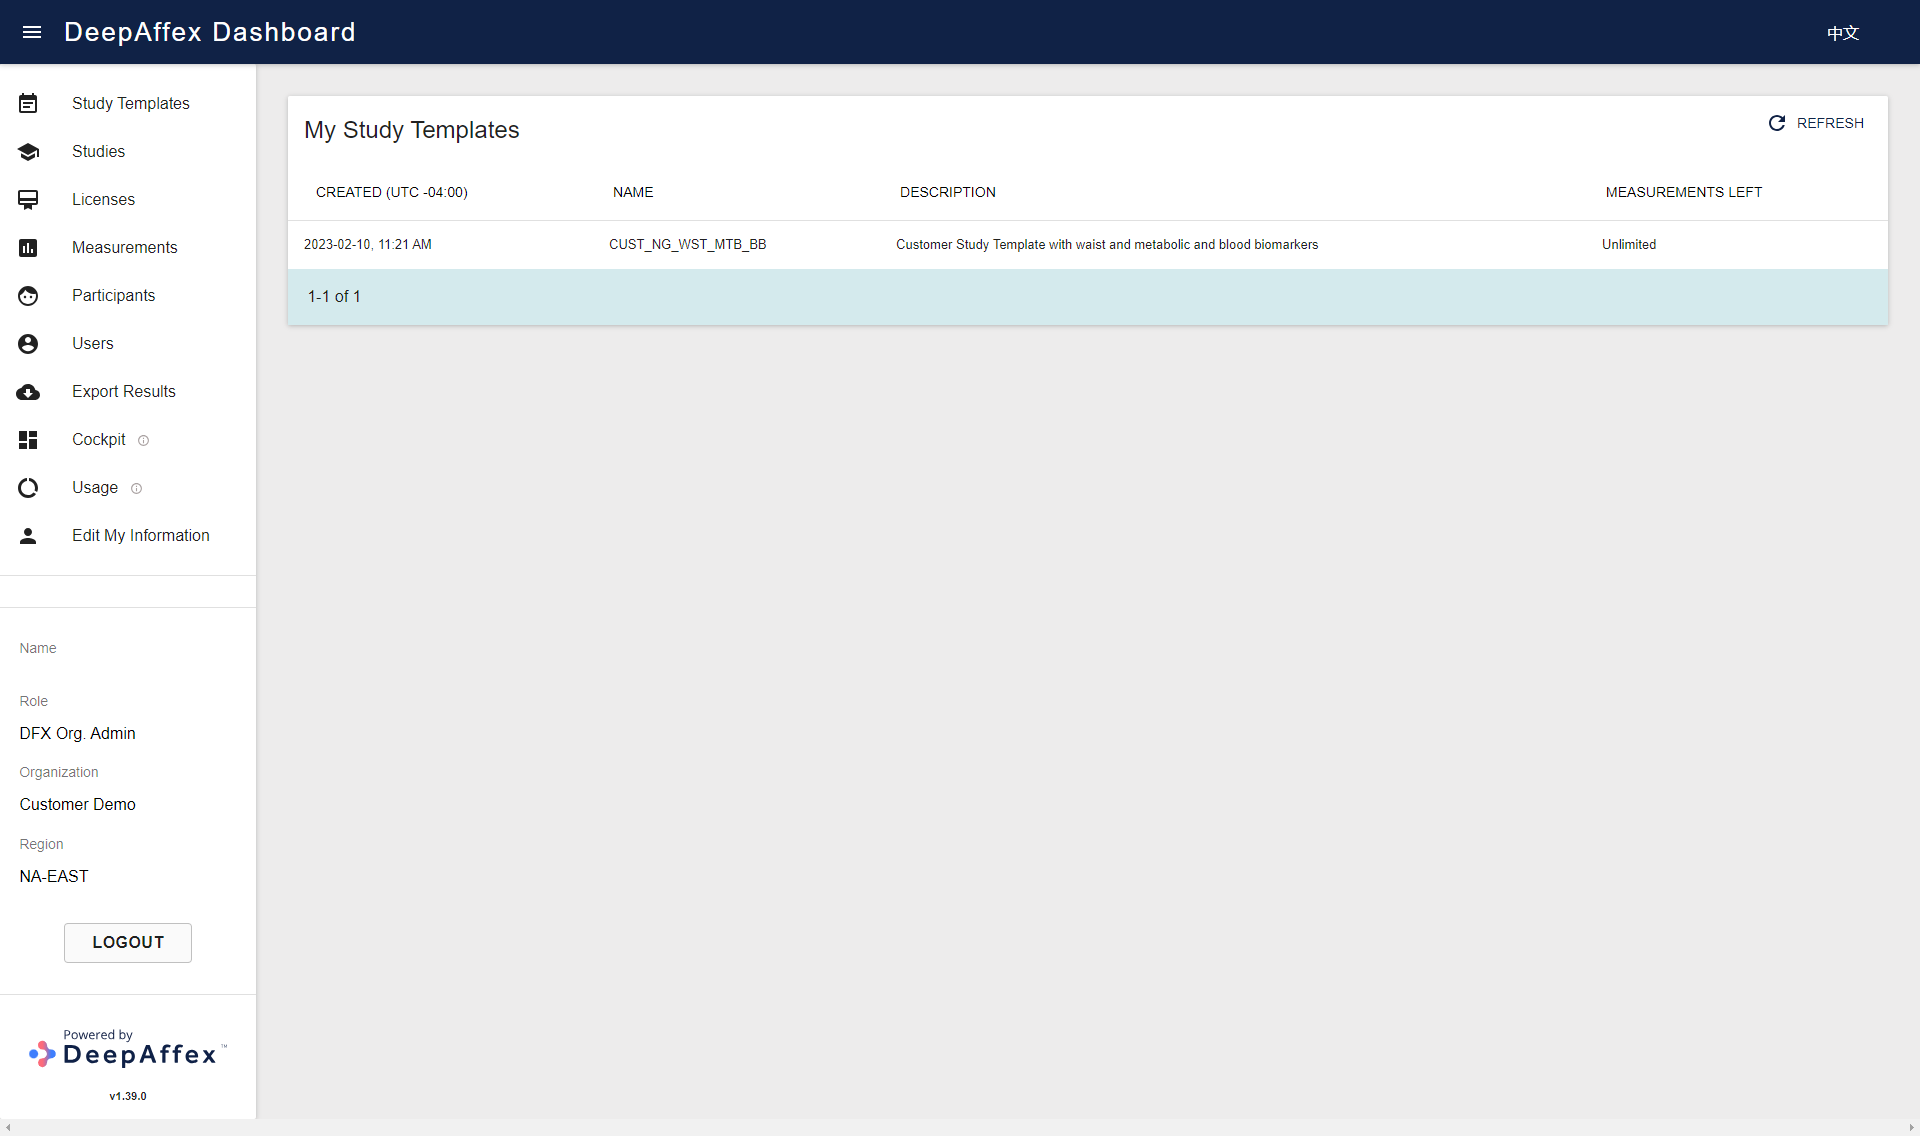
(Click here to open a larger version of this picture in a new window)
Explanation
- MEASUREMENTS LEFT:
- It is the number of measurements left that you can make using the studies created from a particular study template. Usually, this value is Unlimited.
- If the assigned study template is a Hard Limit type and the count falls to zero, you won't be able to take any more measurements using the studies created from that study template.
- If the assigned study template is a Soft Limit type and the count falls to zero, you can still make measurements, but the count will become negative.
- If any of the above two situations happen, please contact NuraLogix™.
Studies
This section provides an overview of all the Studies in your Organization. You
can filter your Studies by Name and Date. You can also view the number of
Participants and Measurements that have been done for each of the Studies.
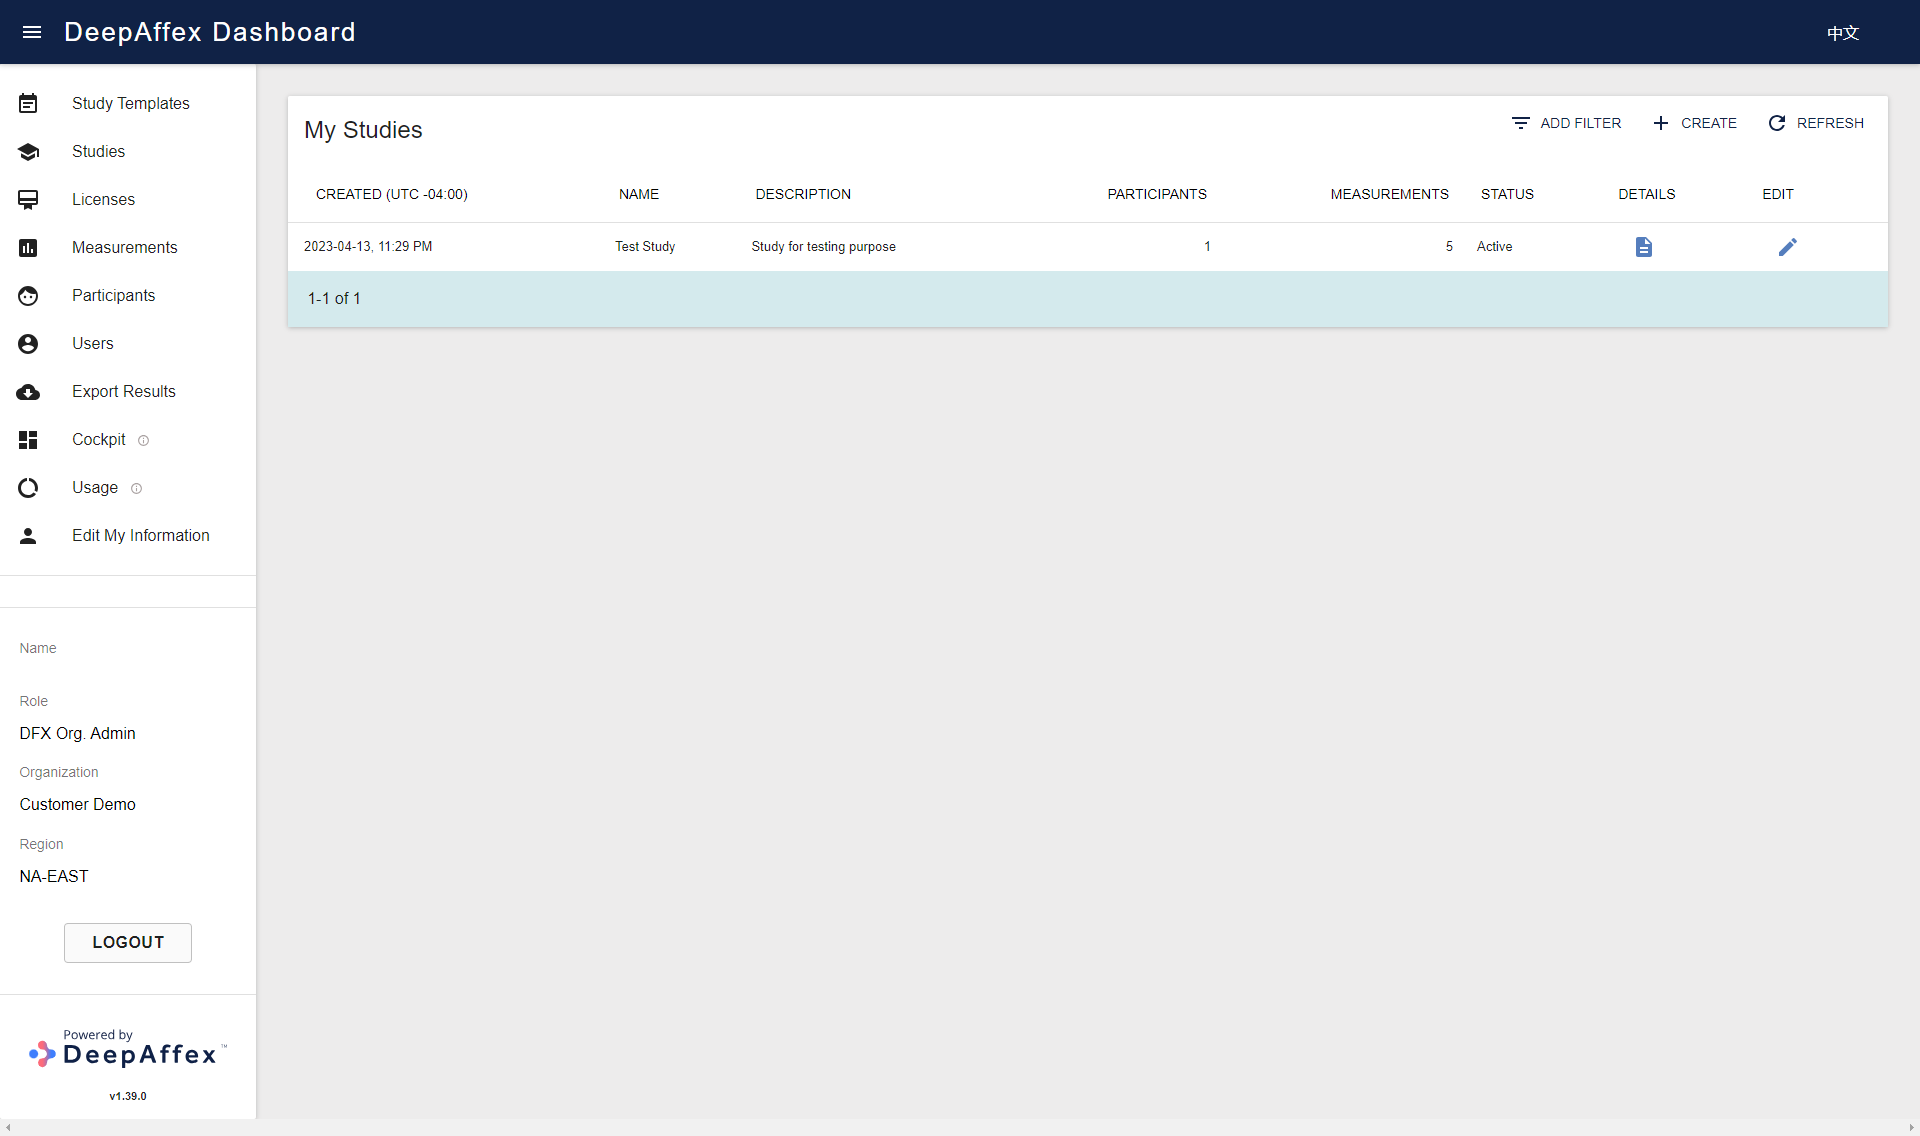
(Click here to open a larger version of this picture in a new window)
If your role is DFX Lead or Org Admin, you will be able to create and edit Studies by clicking CREATE and EDIT buttons respectively.
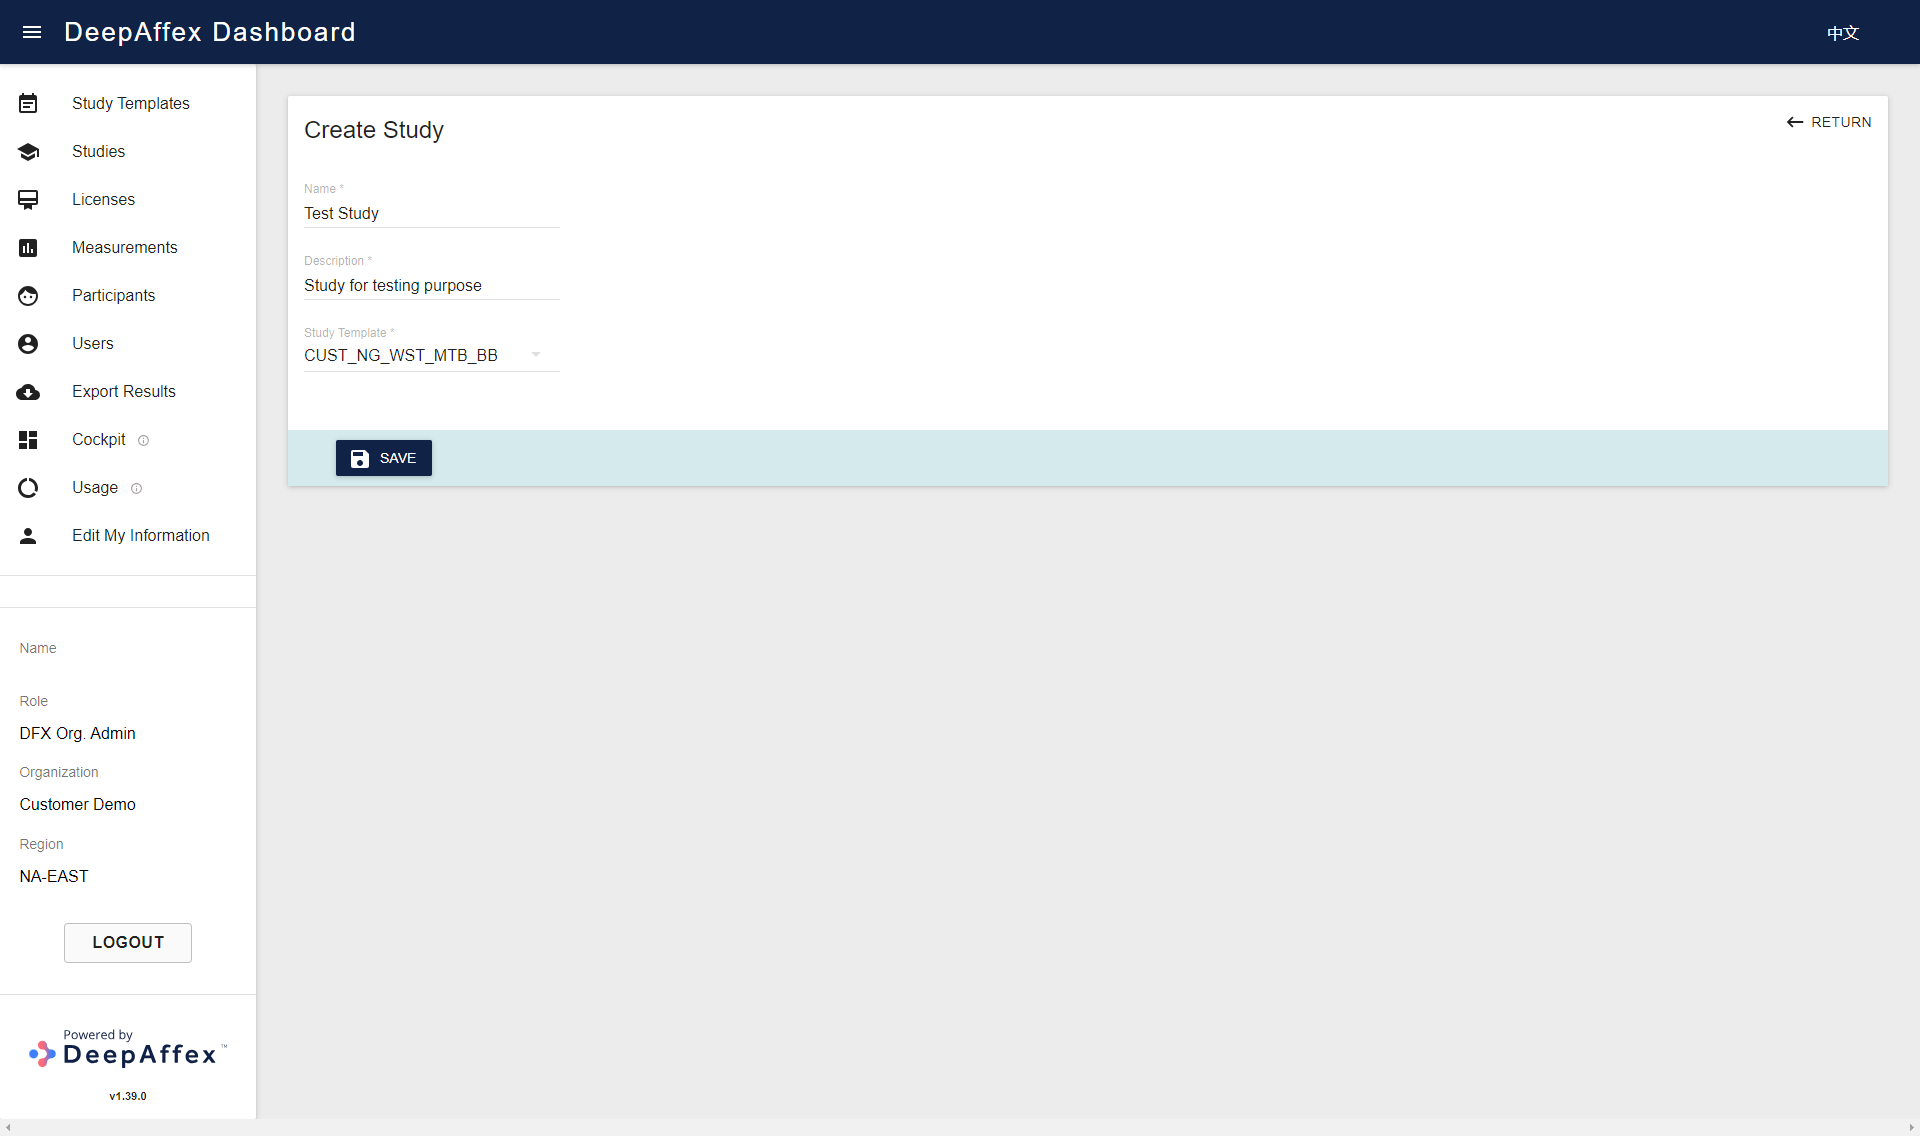
(Click here to open a larger version of this picture in a new window)
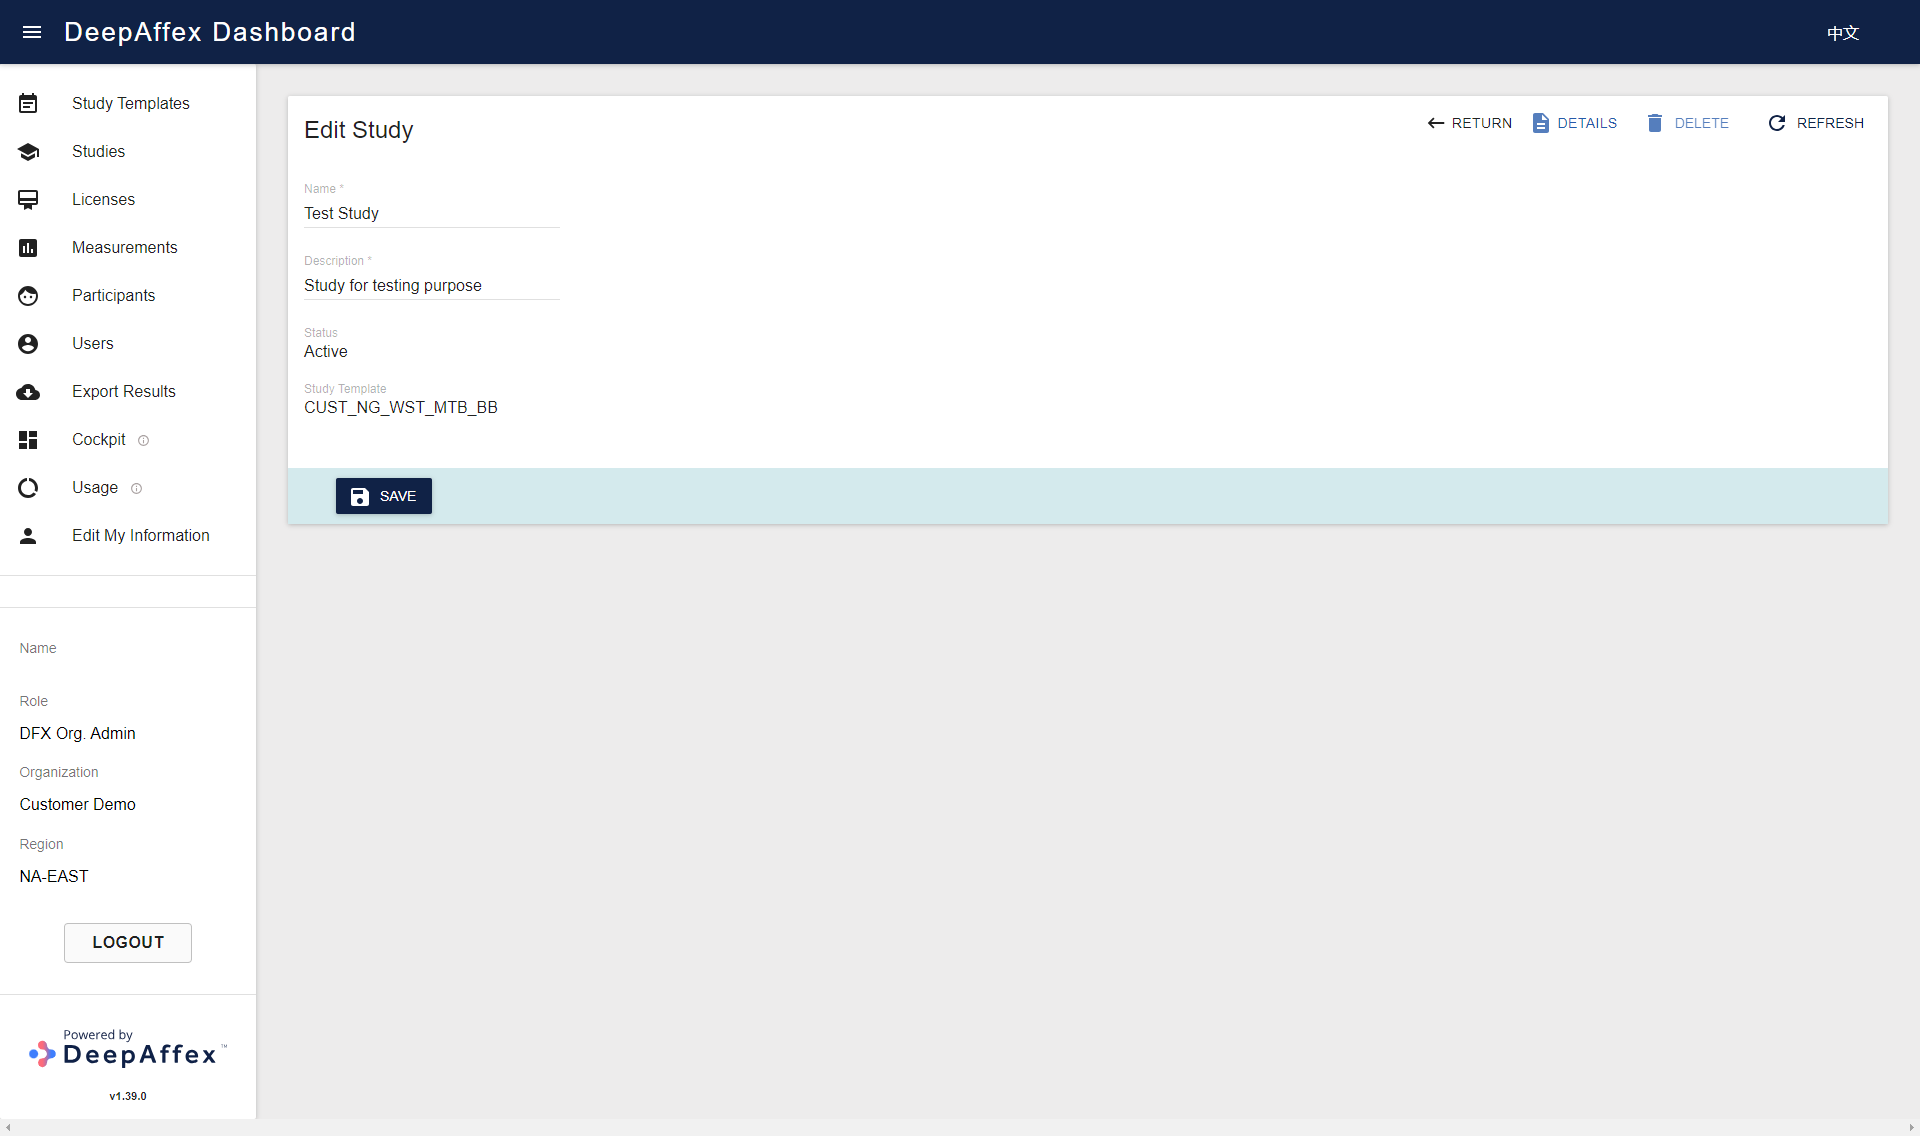
(Click here to open a larger version of this picture in a new window)
You can click on the DETAILS button to bring up the Study Details page. If your role is Org Admin, you can also delete the Studies by clicking the DELETE button.
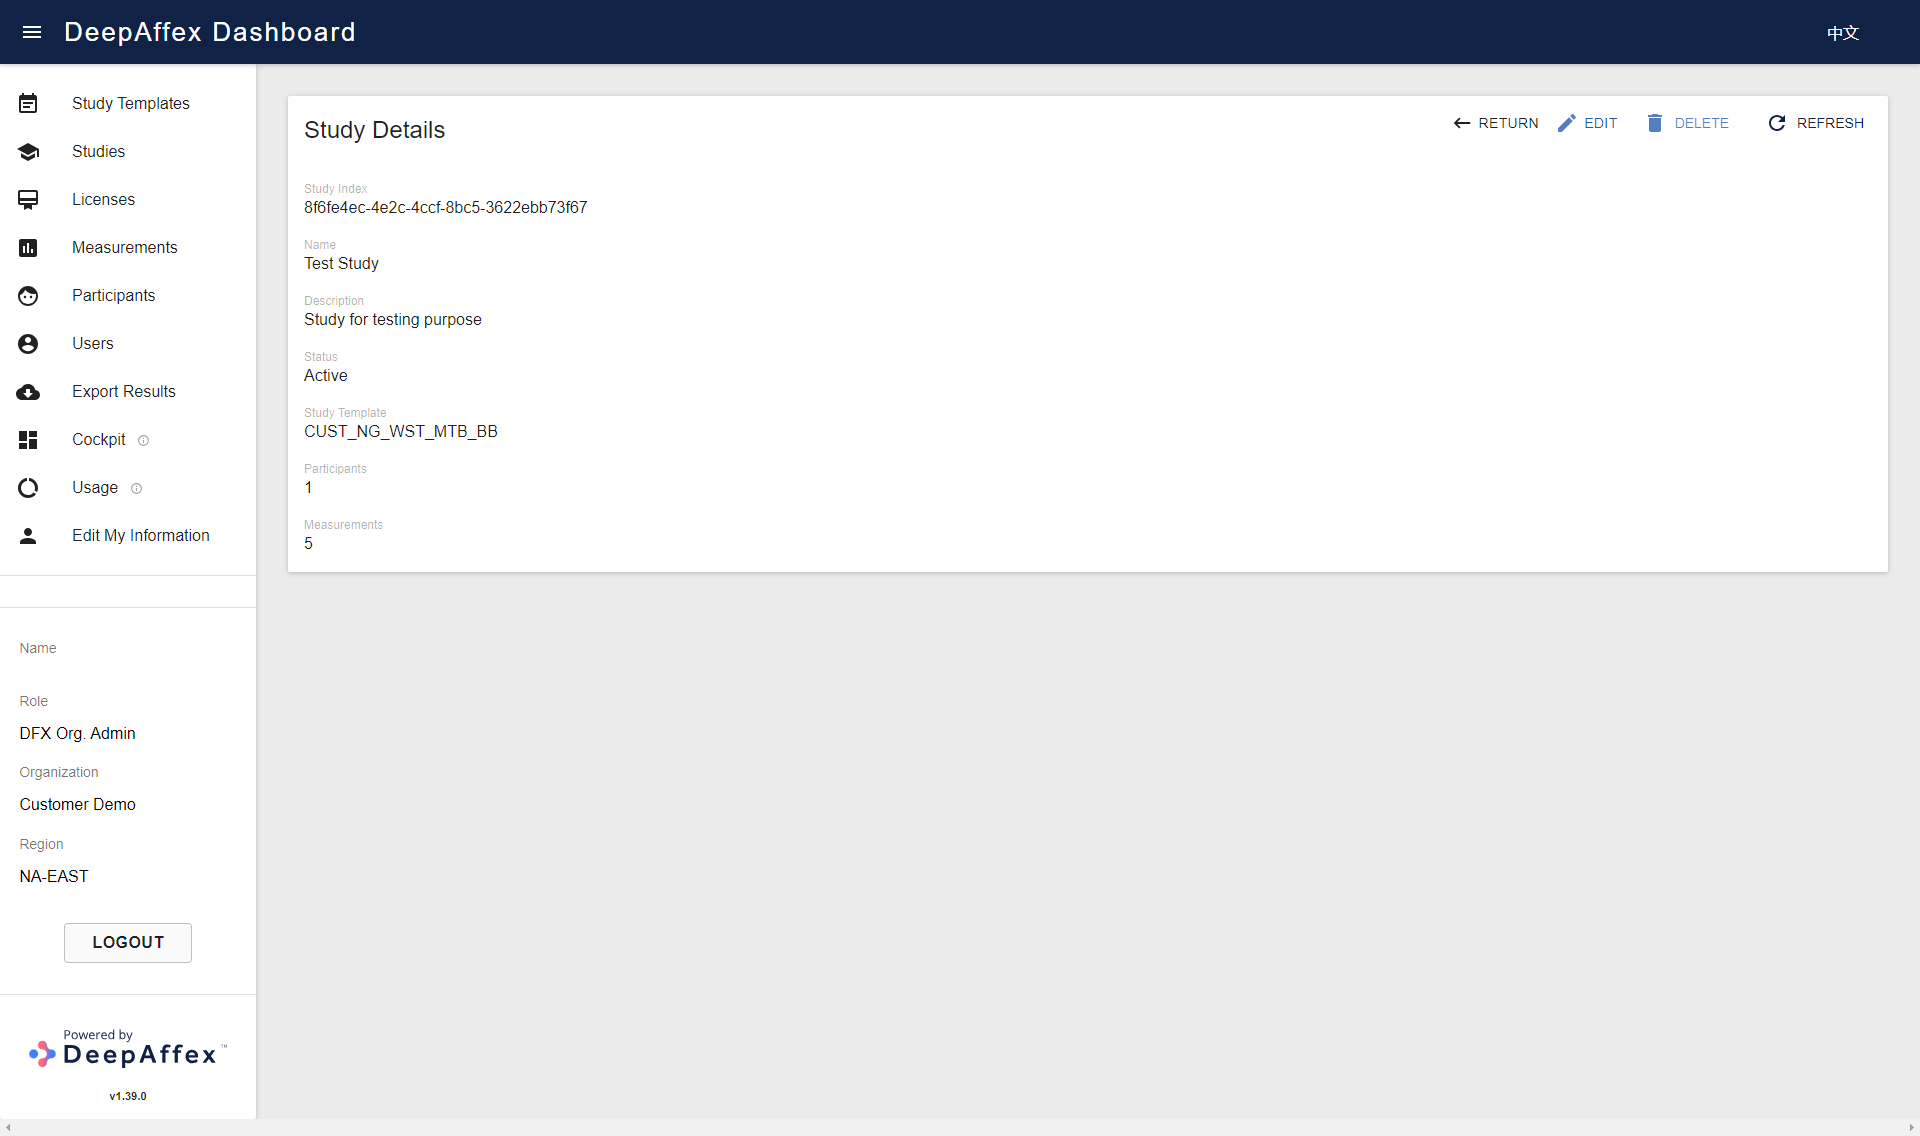
(Click here to open a larger version of this picture in a new window)
Explanation
-
PARTICIPANTS: The number of participants (sub-profiles) that have measurements under the selected Study.
-
MEASUREMENTS: The number of measurements taken under the selected Study.
-
STATUS: By default, status of a study is
Active. It will change toDeletedif the selected Study has been deleted, and this Study can't be used for measurements anymore. -
Study Index: The Study ID used when making a measurement. (Shown on the Study Details page.)
Licenses
Only an Org Admin can view Licenses that have been issued to your Organization.
You can filter your Licenses by License Type, Status and Date.
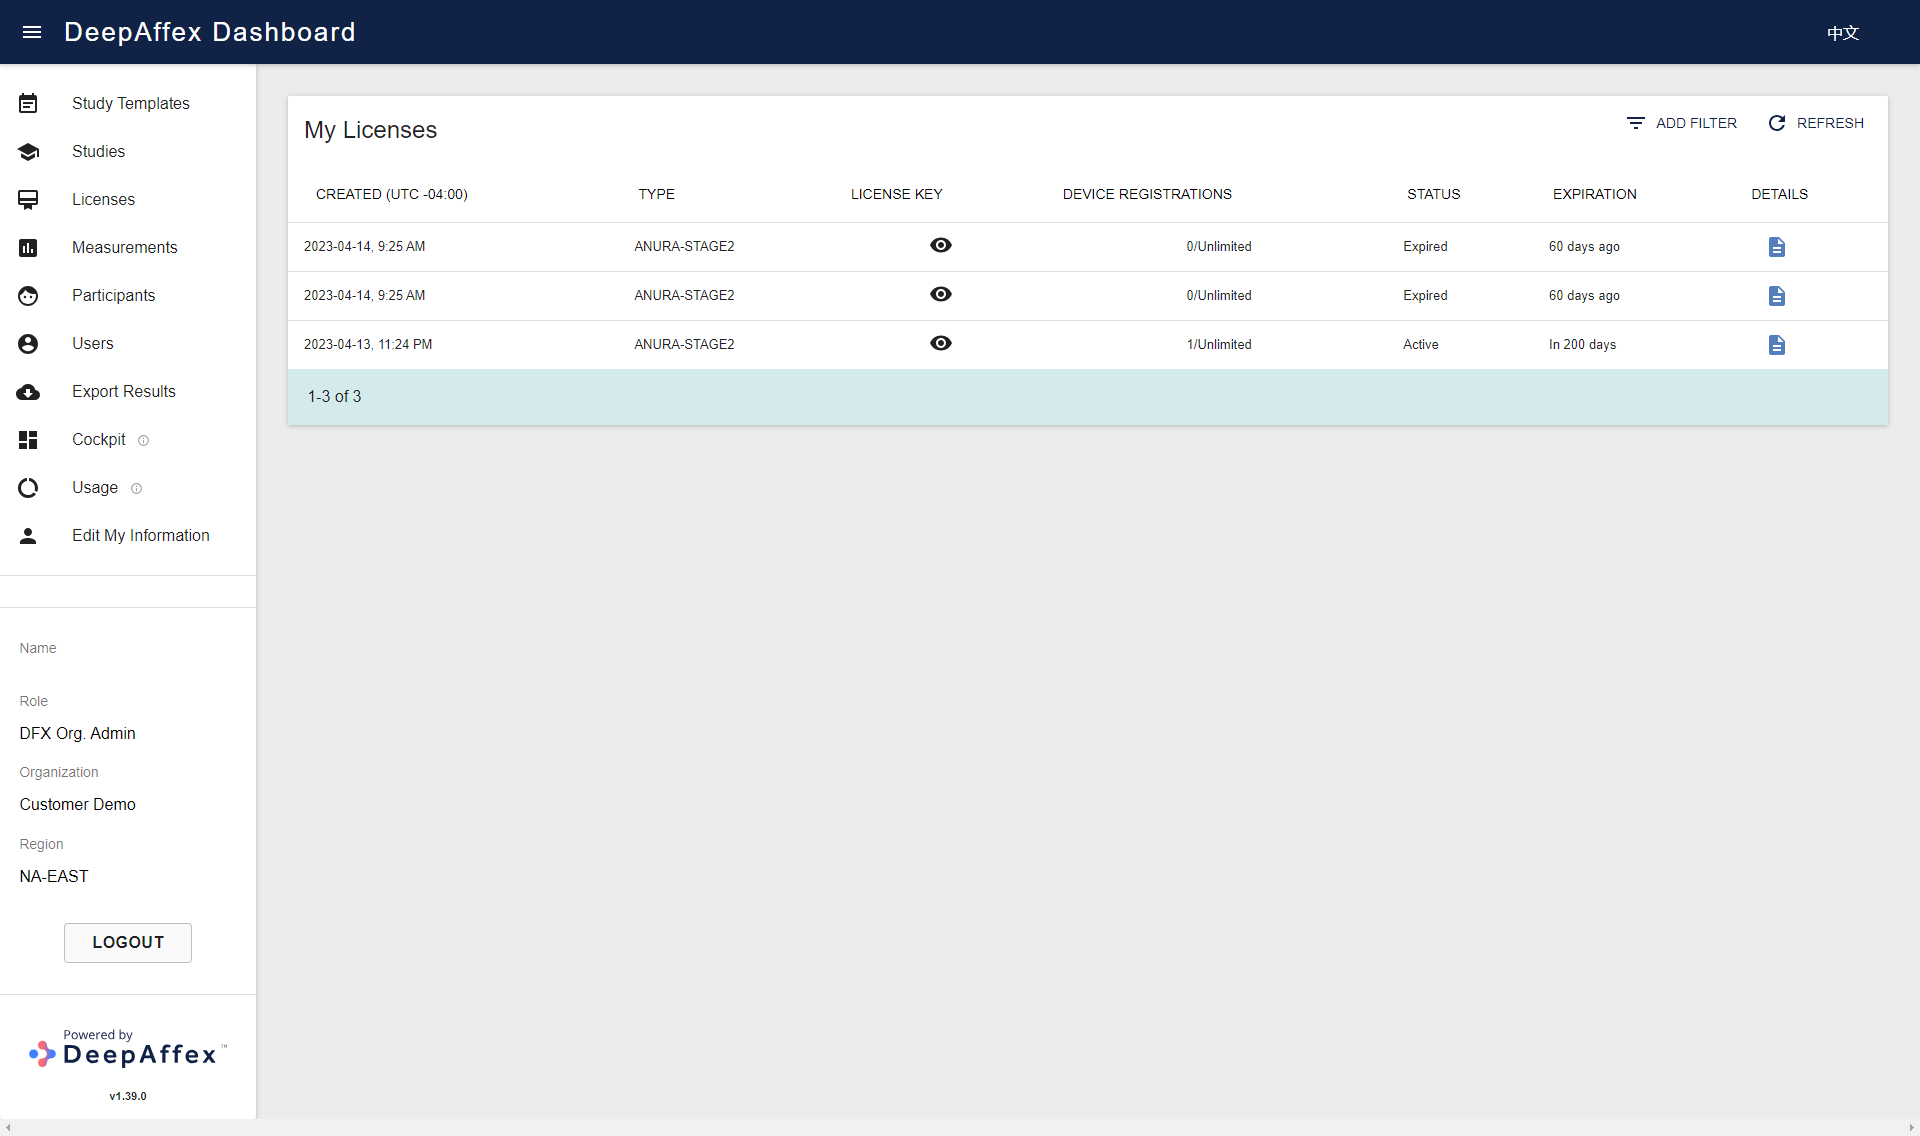
(Click here to open a larger version of this picture in a new window)
You can click on the DETAILS button to bring up the License Details page including a list of the devices registered with that license.
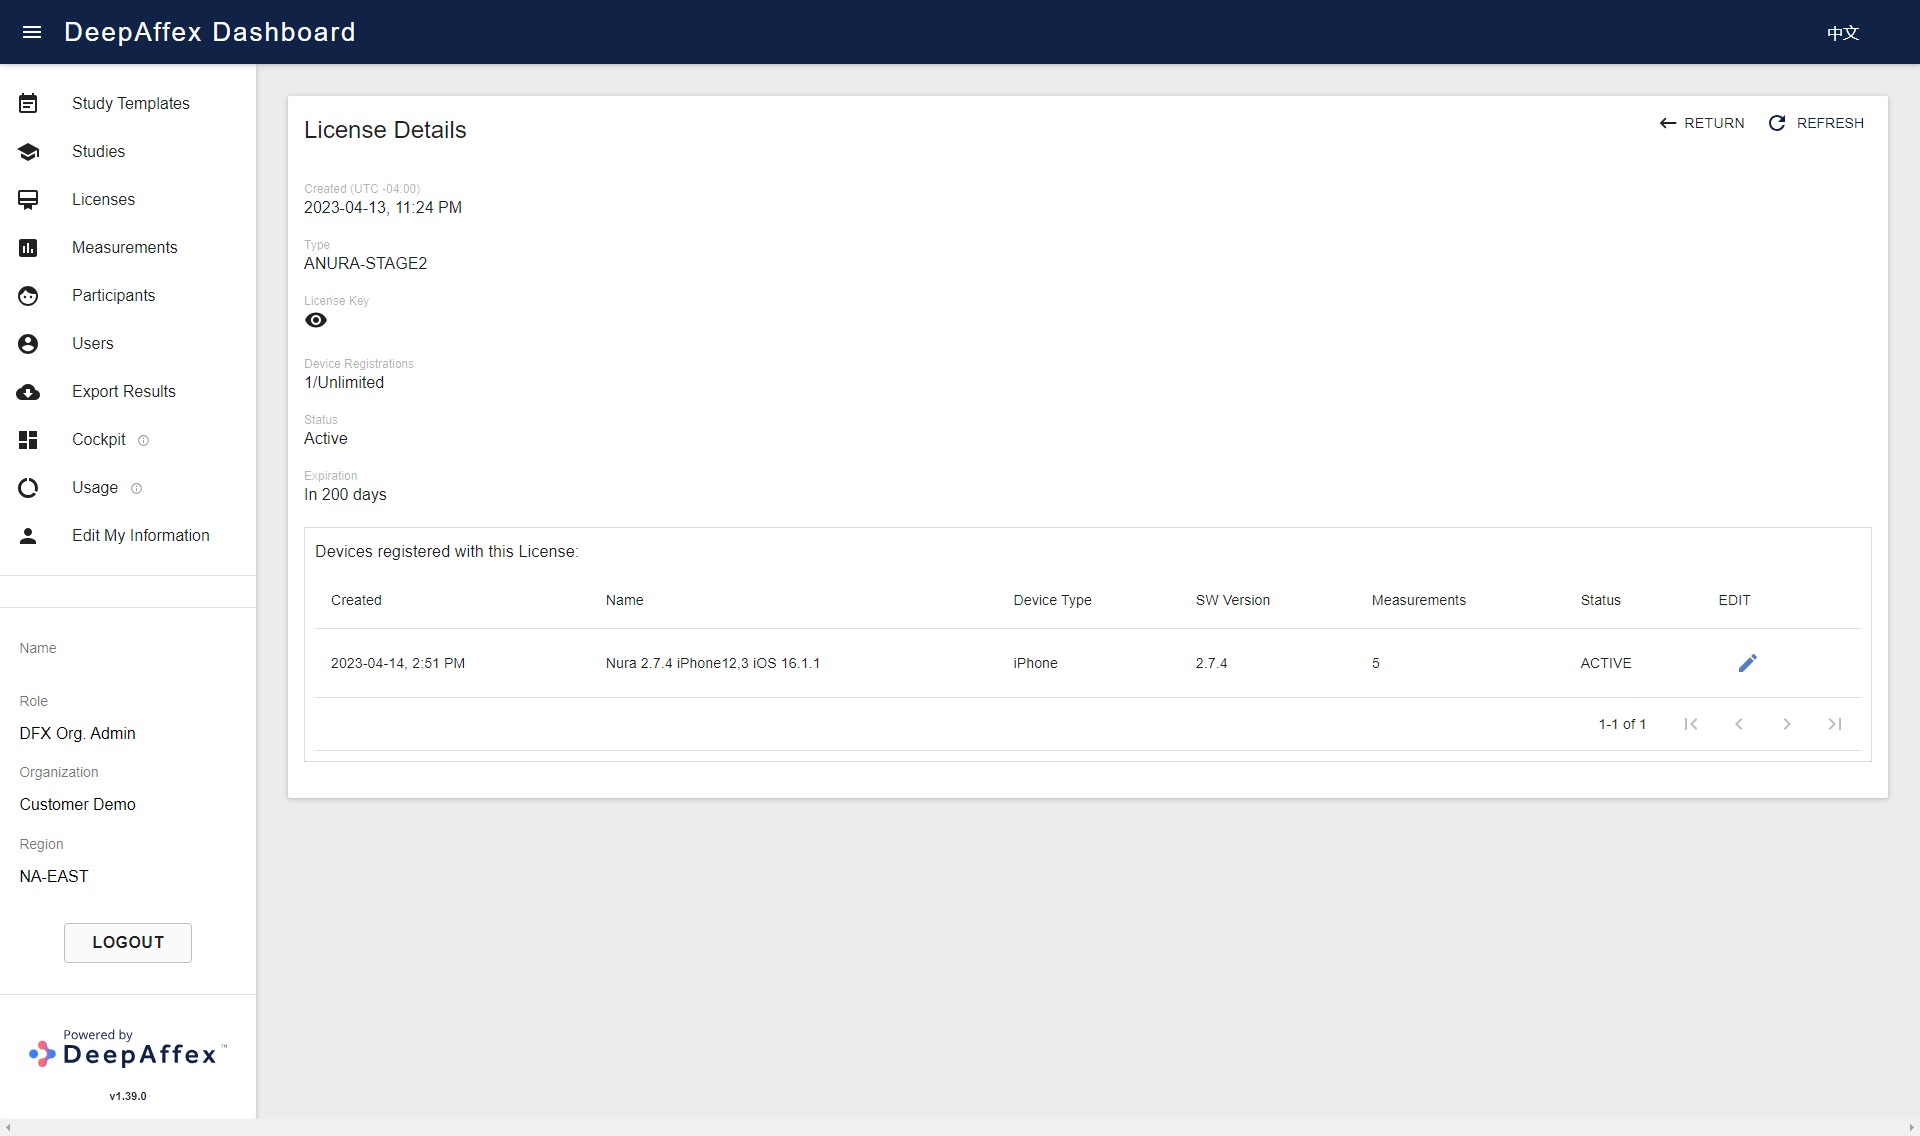
(Click here to open a larger version of this picture in a new window)
You can also click on the EDIT button of a certain device to bring up the Edit Device page, where you can decommission or reactivate the device by toggling the option in the Status field.
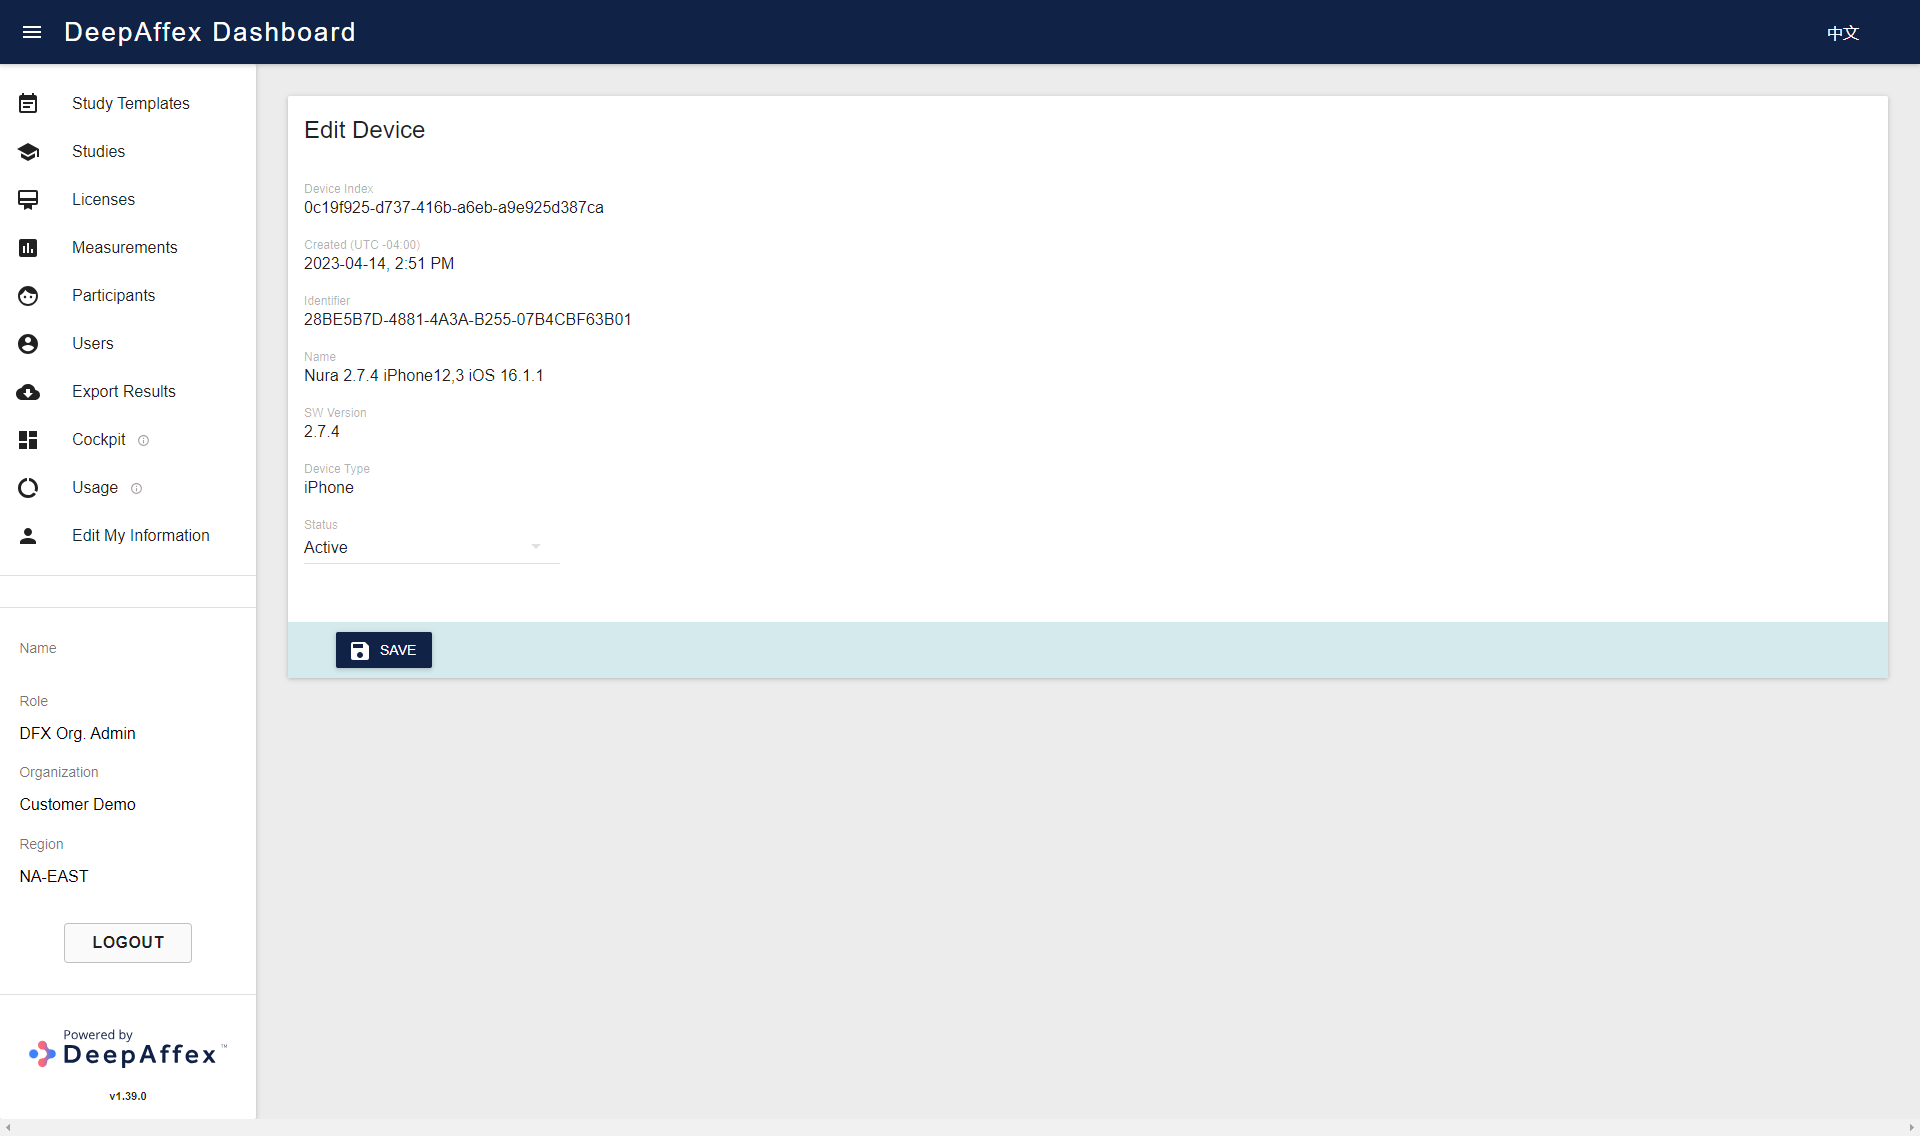
(Click here to open a larger version of this picture in a new window)
You will not be able to register a new device or take a new measurement with the license if any of the following are true:
-
Your license has reached the device registration maximum limit which is displayed in My Licenses > DEVICE REGISTRATIONS
-
Your license does not have any measurements left which are displayed in Study Templates > MEASUREMENTS LEFT
-
Your license status is Expired or Decommissioned
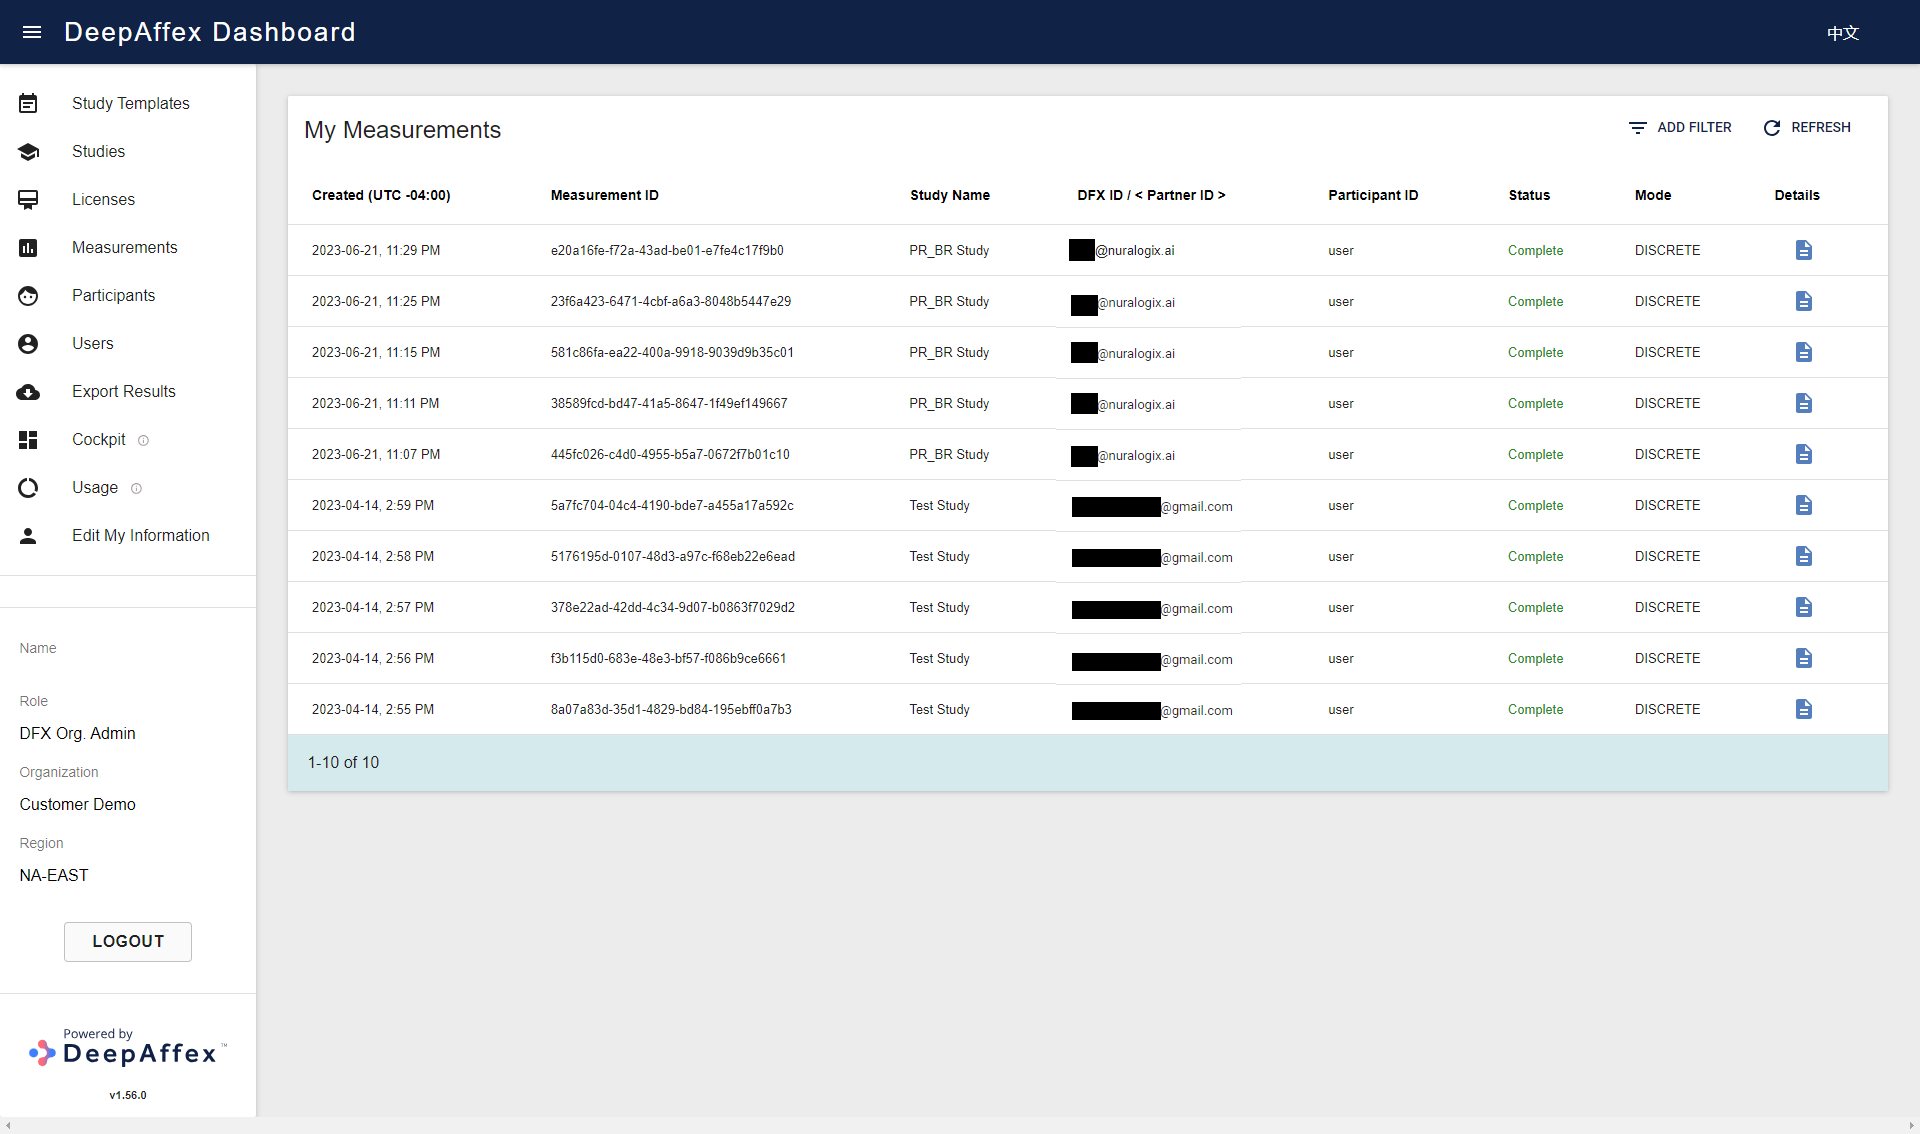
Measurements
In this section, you can review measurements accumulated under your
Organization. You can filter Measurements by Study Name, Status, Mode,
DFX ID, Partner ID, Participant ID and Date.
This page is region-fenced, i.e. Org Admins, DFX Leads and DFX Researchers can only view the measurements in their region.
(Click here to open a larger version of this picture in a new window)
You can click on the DETAILS button to bring up the Measurement Details page. It contains more information such as Measurement Index (Measurement ID) and the measurement results. You can browse the results by selecting different points under the Point dropdown. The results can also be downloaded as CSV files by clicking the DOWNLOAD MEASUREMENT (CSV) button (for bulk export, please see the Export Results section). The CSV file name includes the Measurement ID, and the file itself contains Date (creation date), Username (DFX ID), Participant ID, and all the results. Some of the results are per frame and shown as a series of values instead of a single final value.
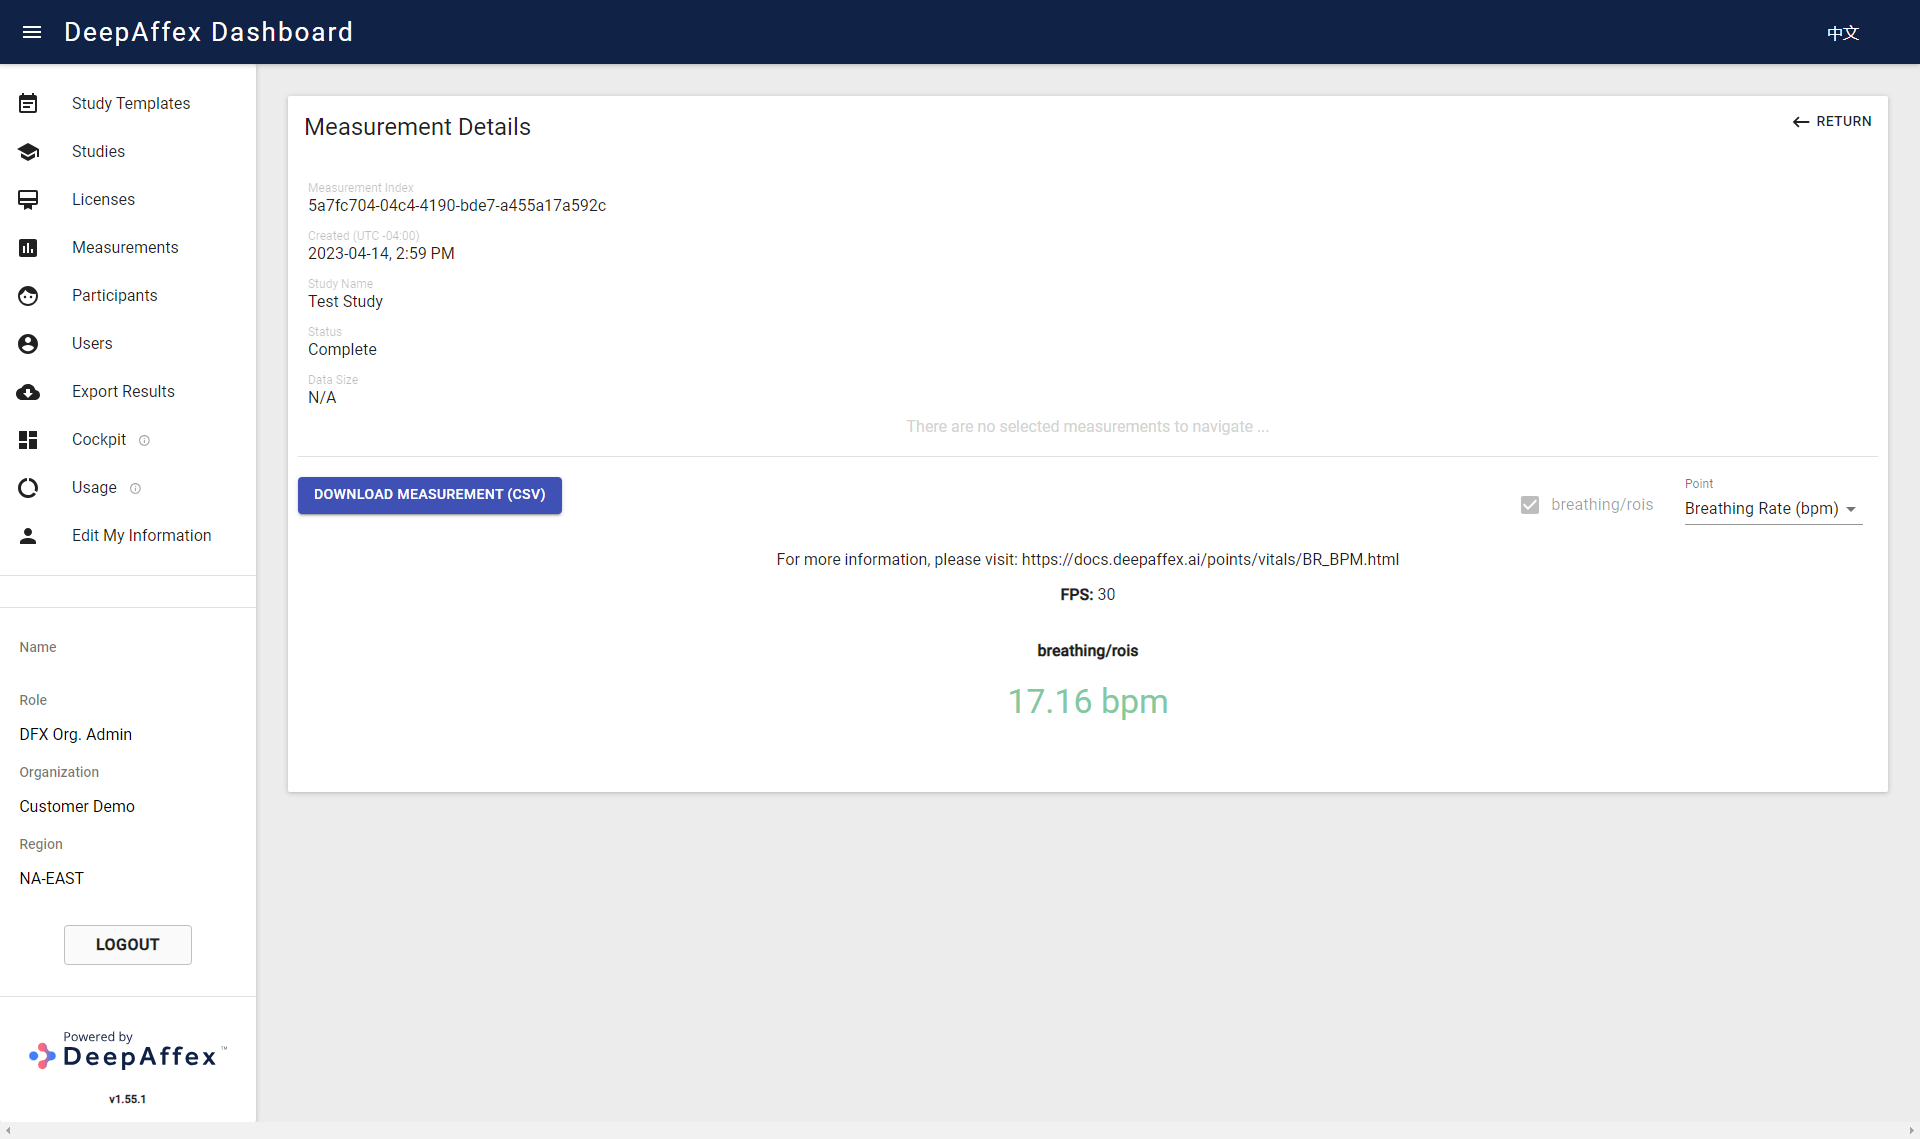
(Click here to open a larger version of this picture in a new window)
Explanation
-
DFX ID: It is used for the measurements taken using a user token. It is displayed as either an Email Address or a Mobile number.
-
PARTNER ID: It is used as a tag for Anonymous measurements and is useful in situations when some API consumers ("partners") prefer not to send their end-user accounts info to DeepAffex™ Cloud.
-
PARTICIPANT ID: To know more about participants, please refer to the Profiles section. If measurements are created anonymously, they will show as Anonymous.
-
STATUS: To know more about statuses, please refer to the Status table.
Participants
Participants of a user account (DFX ID) can be understood as different profiles that belong to that account. You can measure your family and friends and yourself with the same account but under different profiles/participants. To know more about participants, please refer to the Profiles section.
In this section, you can access the attributes, measurement counts, etc. for any
Participants (Profiles) whose Measurements reside under your Organization. You
can also filter Participants by DFX ID, Participant ID and Date.
This page is region-fenced, i.e. Org Admins, DFX Leads and DFX Researchers can only view the participants in their region.
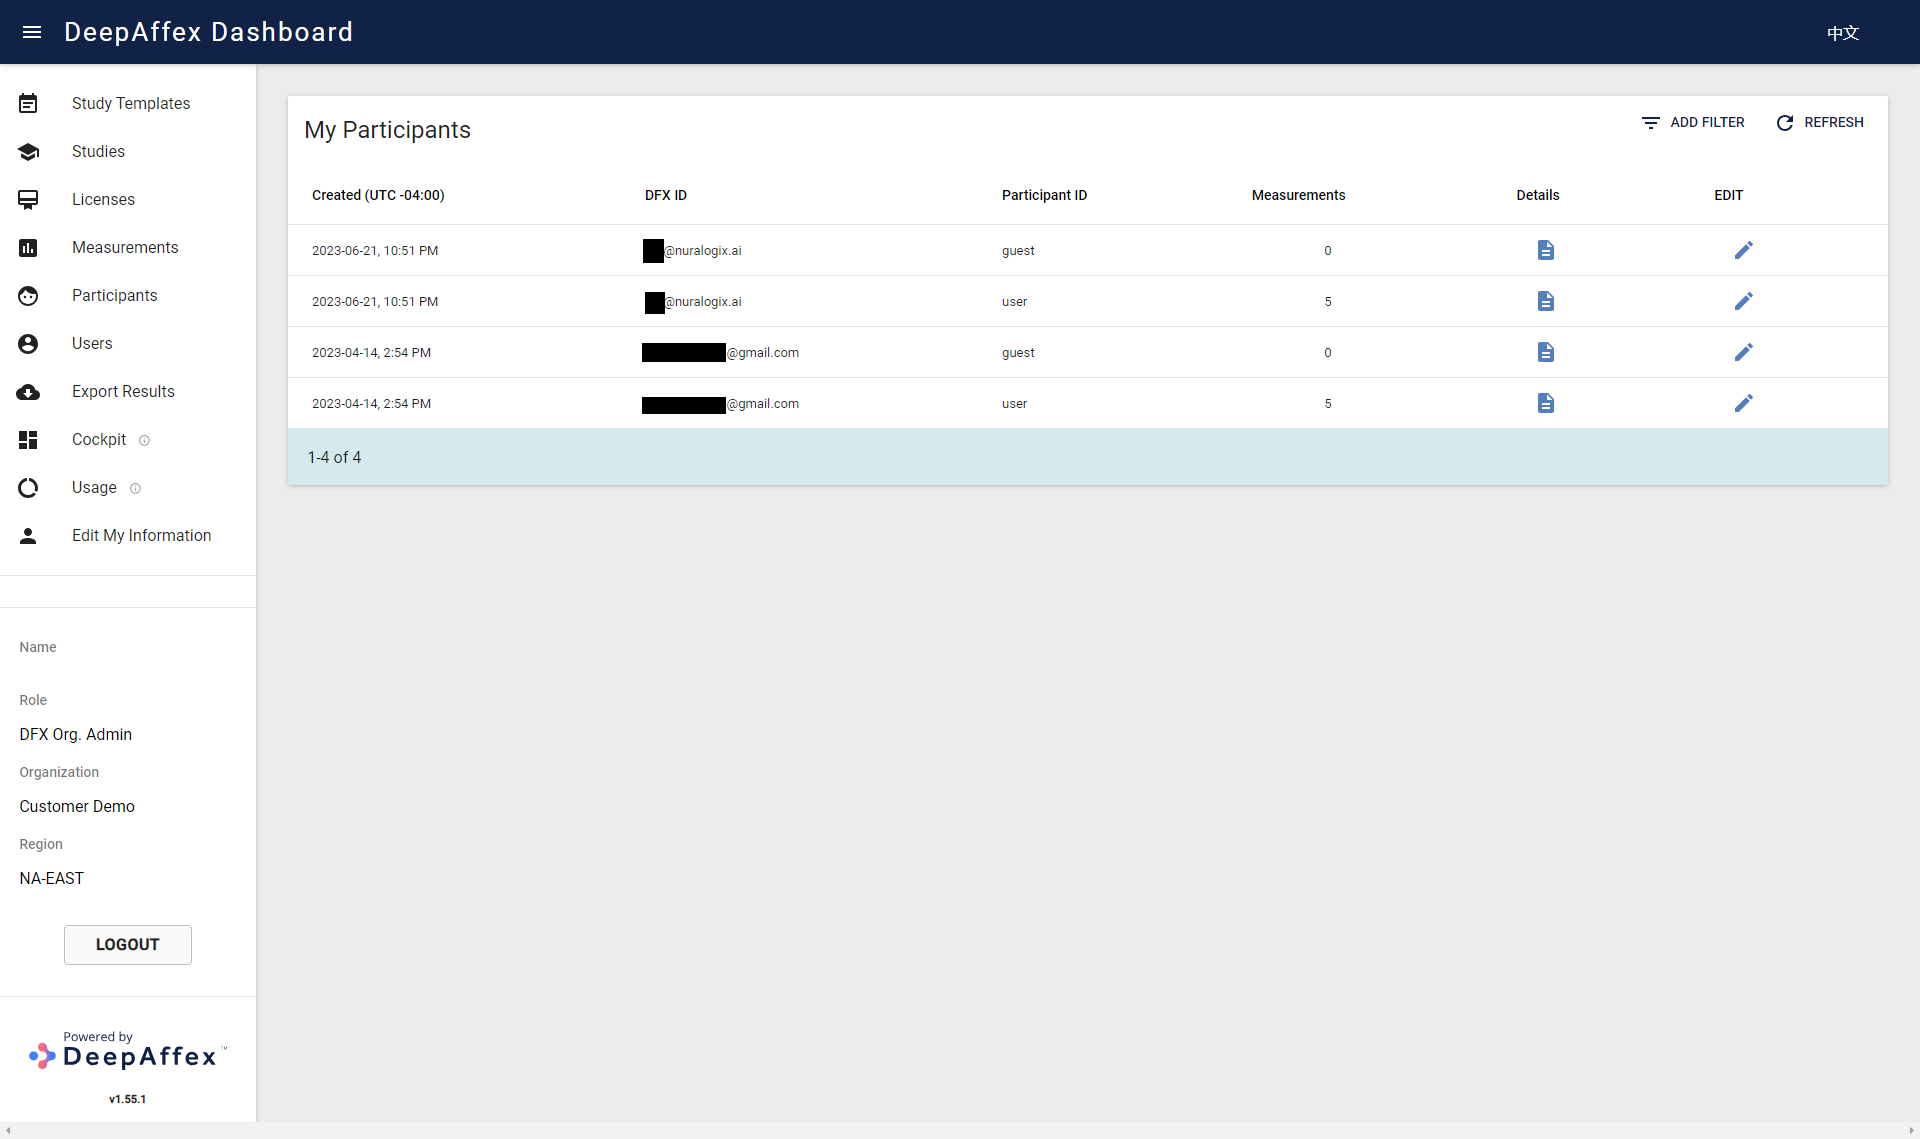
(Click here to open a larger version of this picture in a new window)
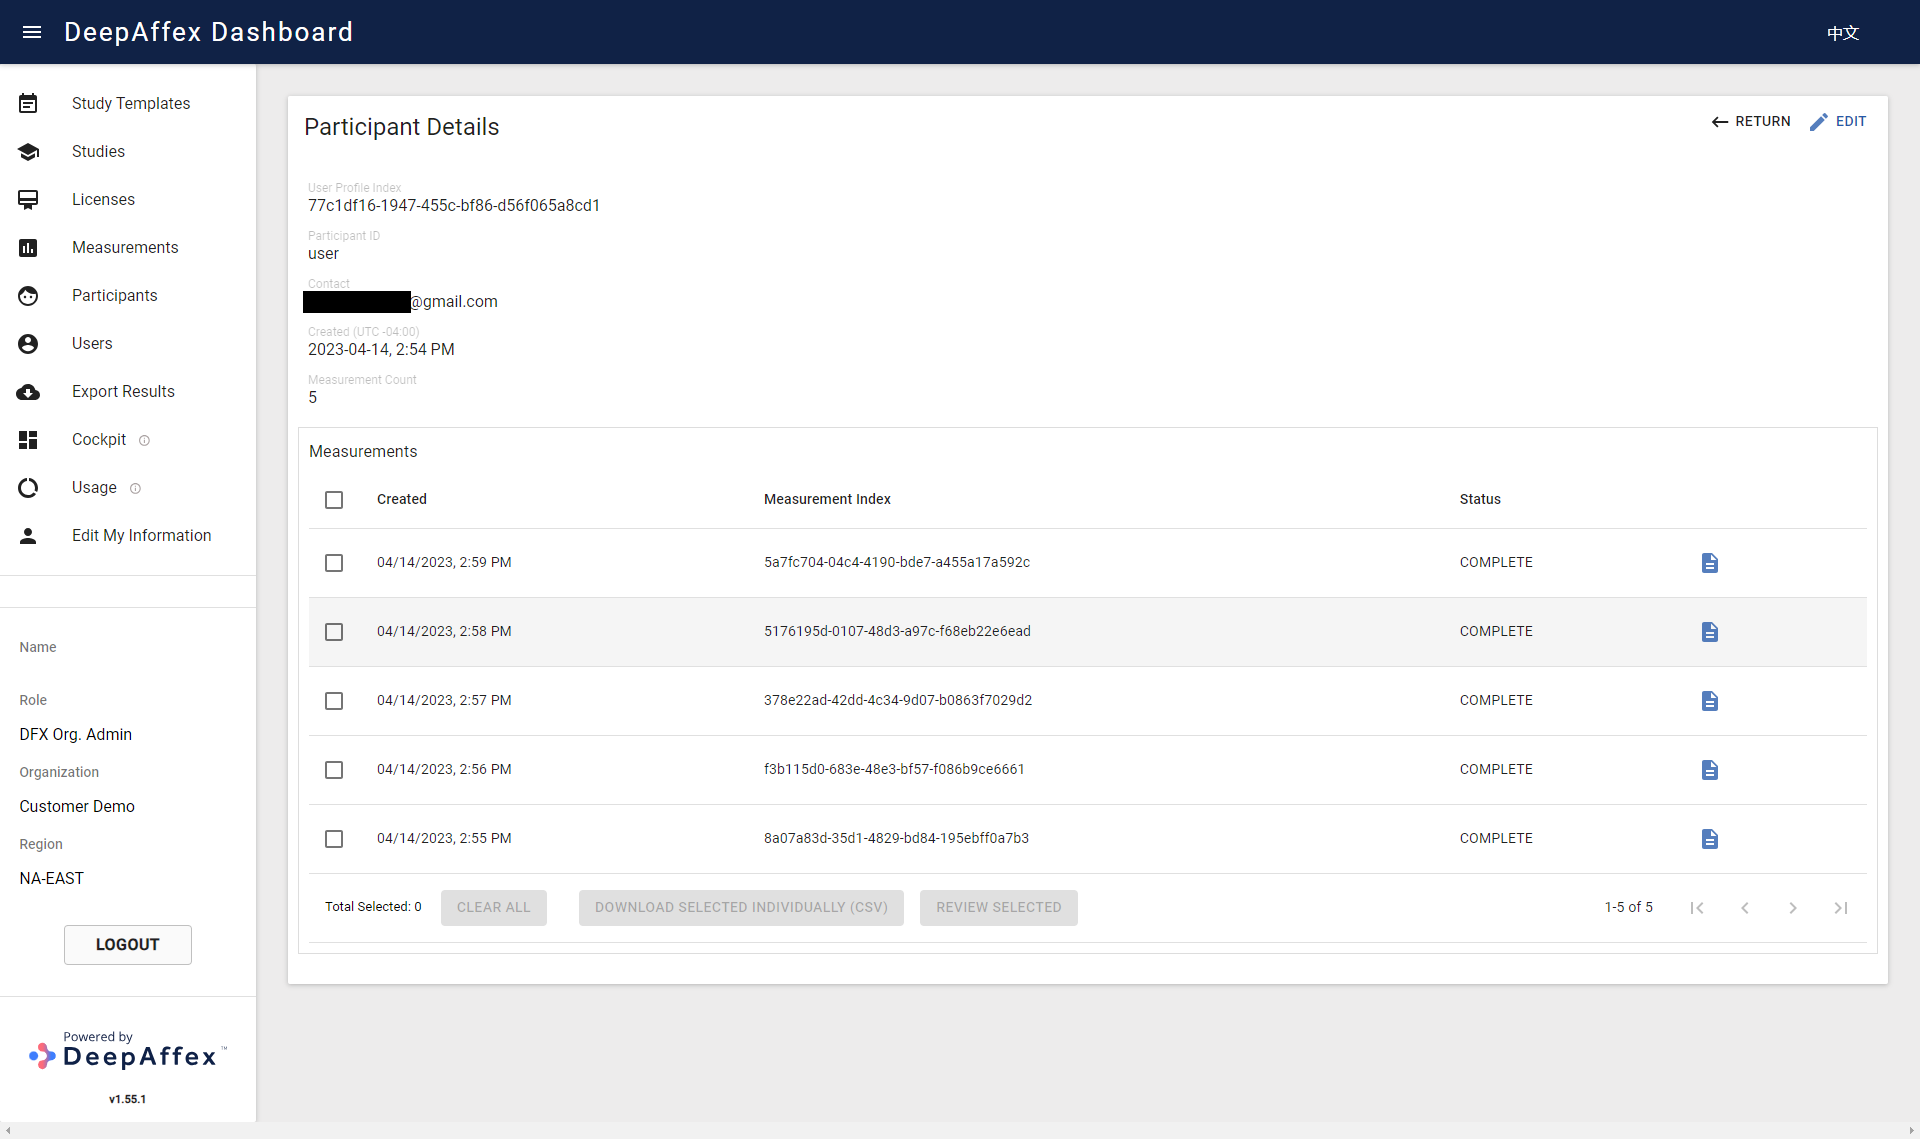
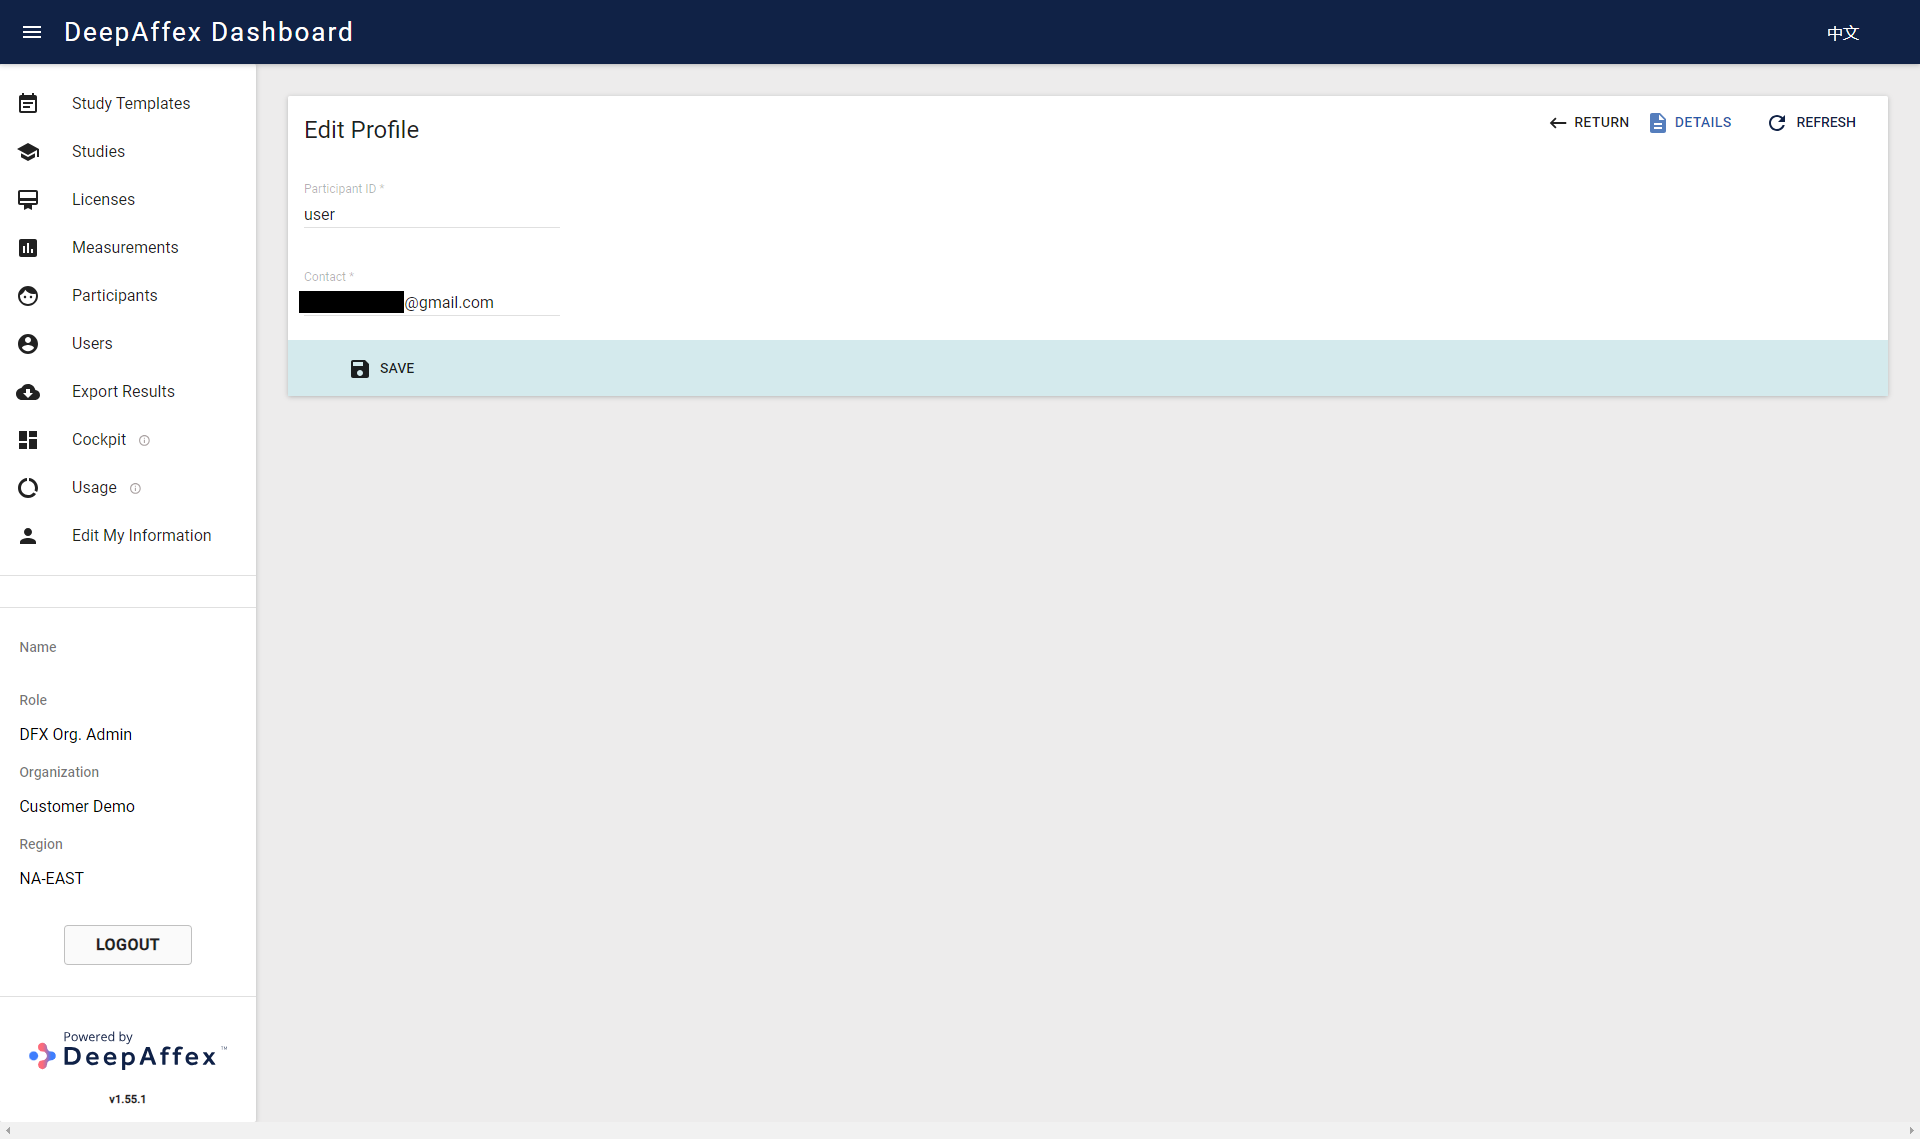
You can view and edit Participants' profile details by clicking the DETAILS and EDIT buttons.
The Participant Details page contains extra information such as User Profile
Index (Profile ID) and measurements taken under this participant. You can select
measurements with COMPLETE status and bulk download the results as CSV files
(one measurement per CSV file, please see the
Export Results section for other bulk export). The CSV
file has the same format as the one downloaded from the Measurement Details
page, please refer to the
Measurements section. By clicking the
DETAILS button, you can also view the results of the selected measurement.
(Click here to open a larger version of this picture in a new window)
(Click here to open a larger version of this picture in a new window)
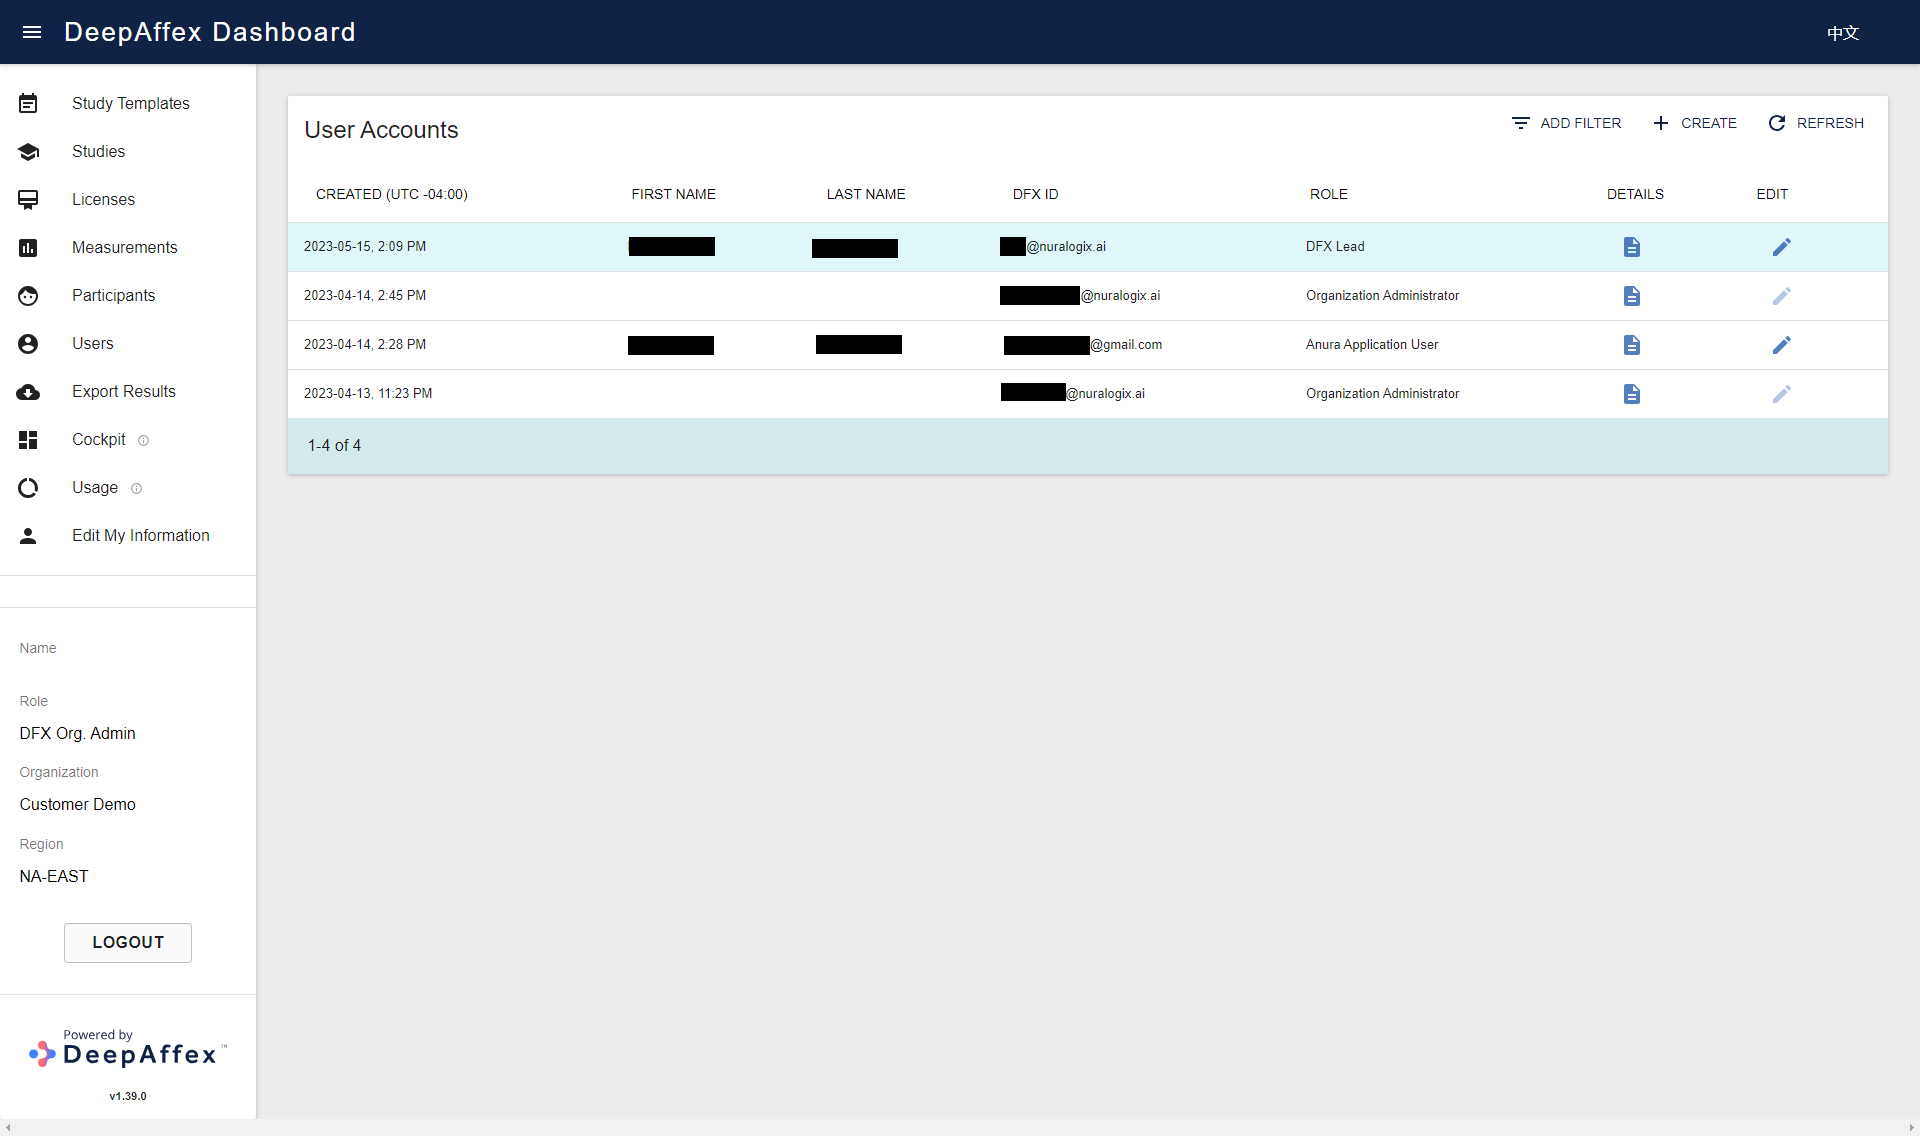
Users
This section provides an overview of all Users who are registered under your
Organization. You can filter Users by DFX ID, Role and Date.
This page is region-fenced, i.e. Org Admins and DFX Leads can only view the users in their region.
Different roles have different permissions on DeepAffex™ Dashboard, please refer to the Role Based Access section.
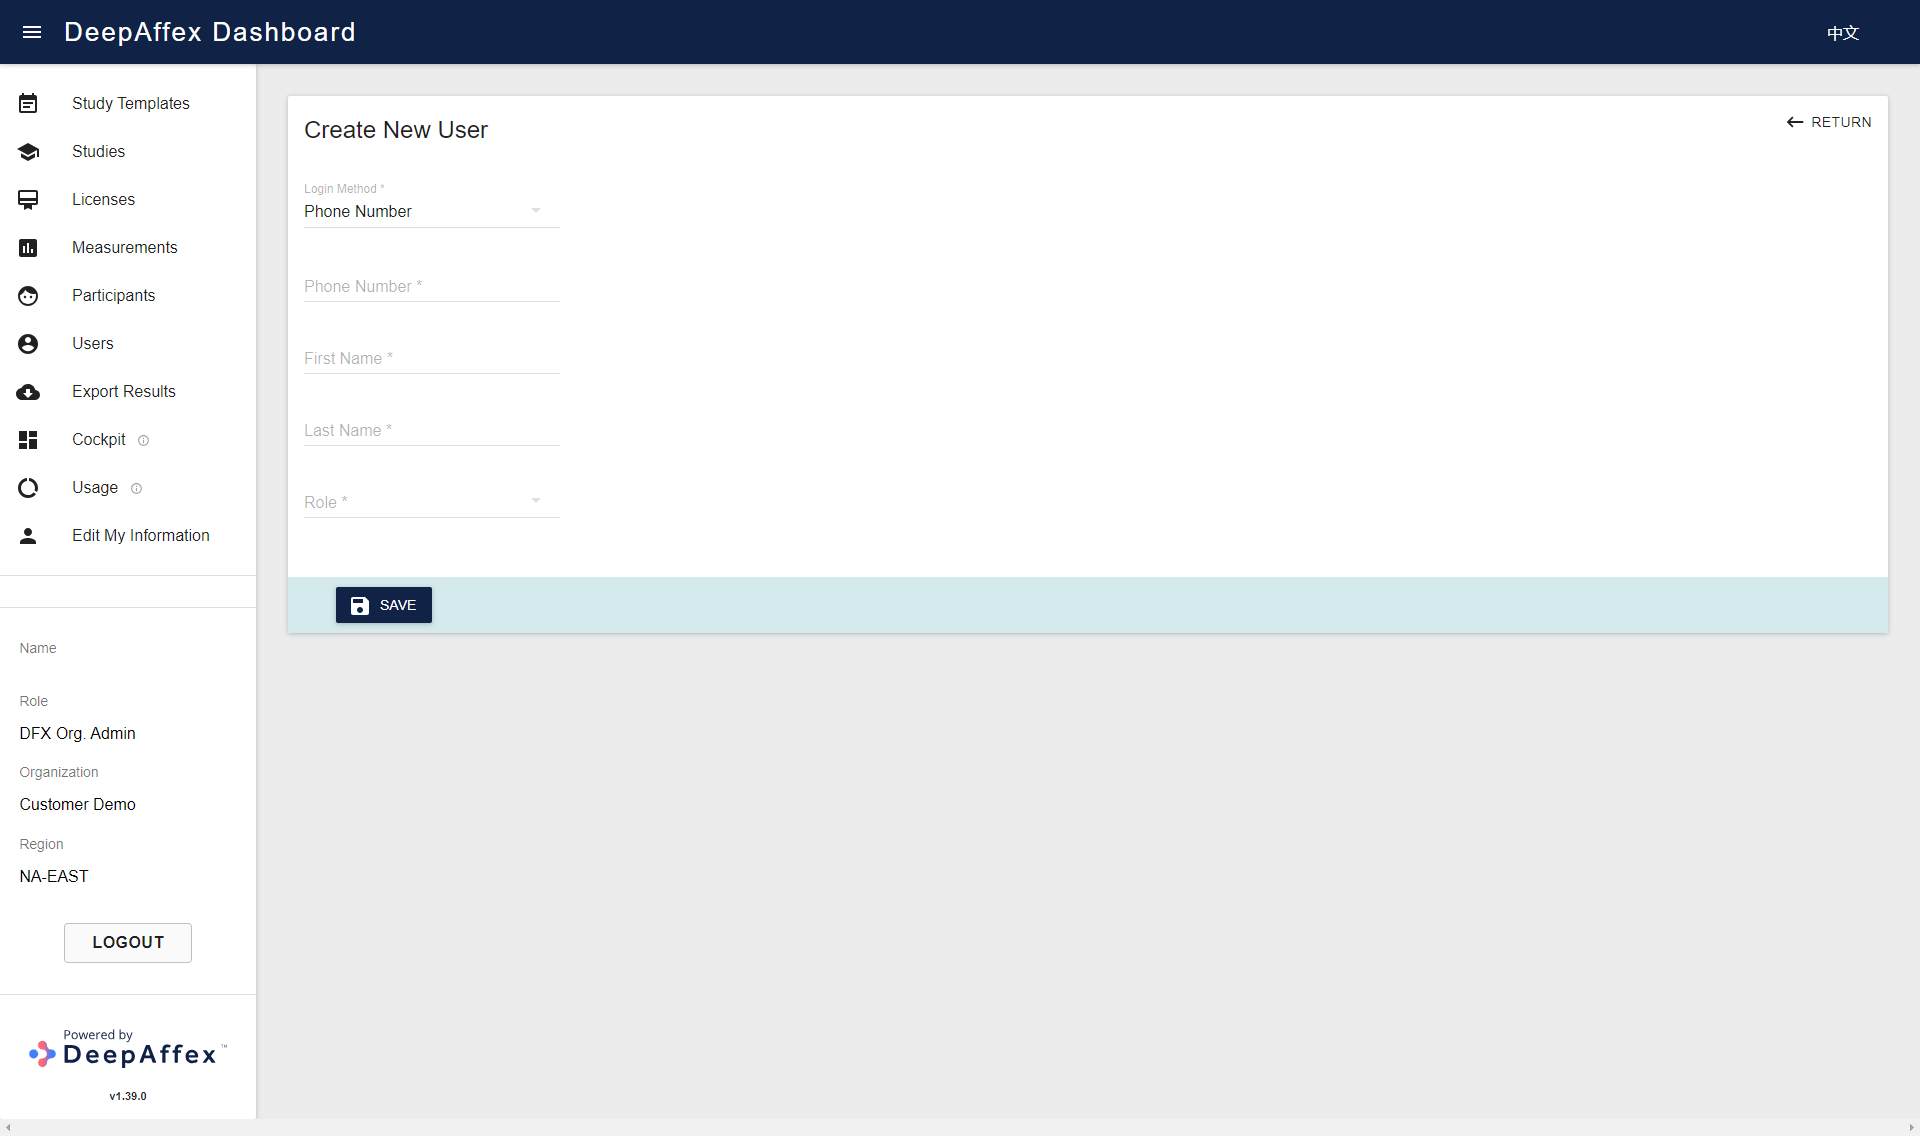
You will be able to create, view and edit Users by clicking CREATE, DETAILS and EDIT buttons.
(Click here to open a larger version of this picture in a new window)
Users can be created using two login methods: Email and Phone Number. If you choose to create a new user using a Phone Number, please note that you must include the country code at the beginning of the number (e.g., +1 for USA or Canada). Once a new user has been created, a verification code will be sent to the phone number via text message and used to log in. If the code has expired, the user can always click on the REQUEST VERIFICATION CODE button to request a new one.

(Click here to open a larger version of this picture in a new window)
(Click here to open a larger version of this picture in a new window)
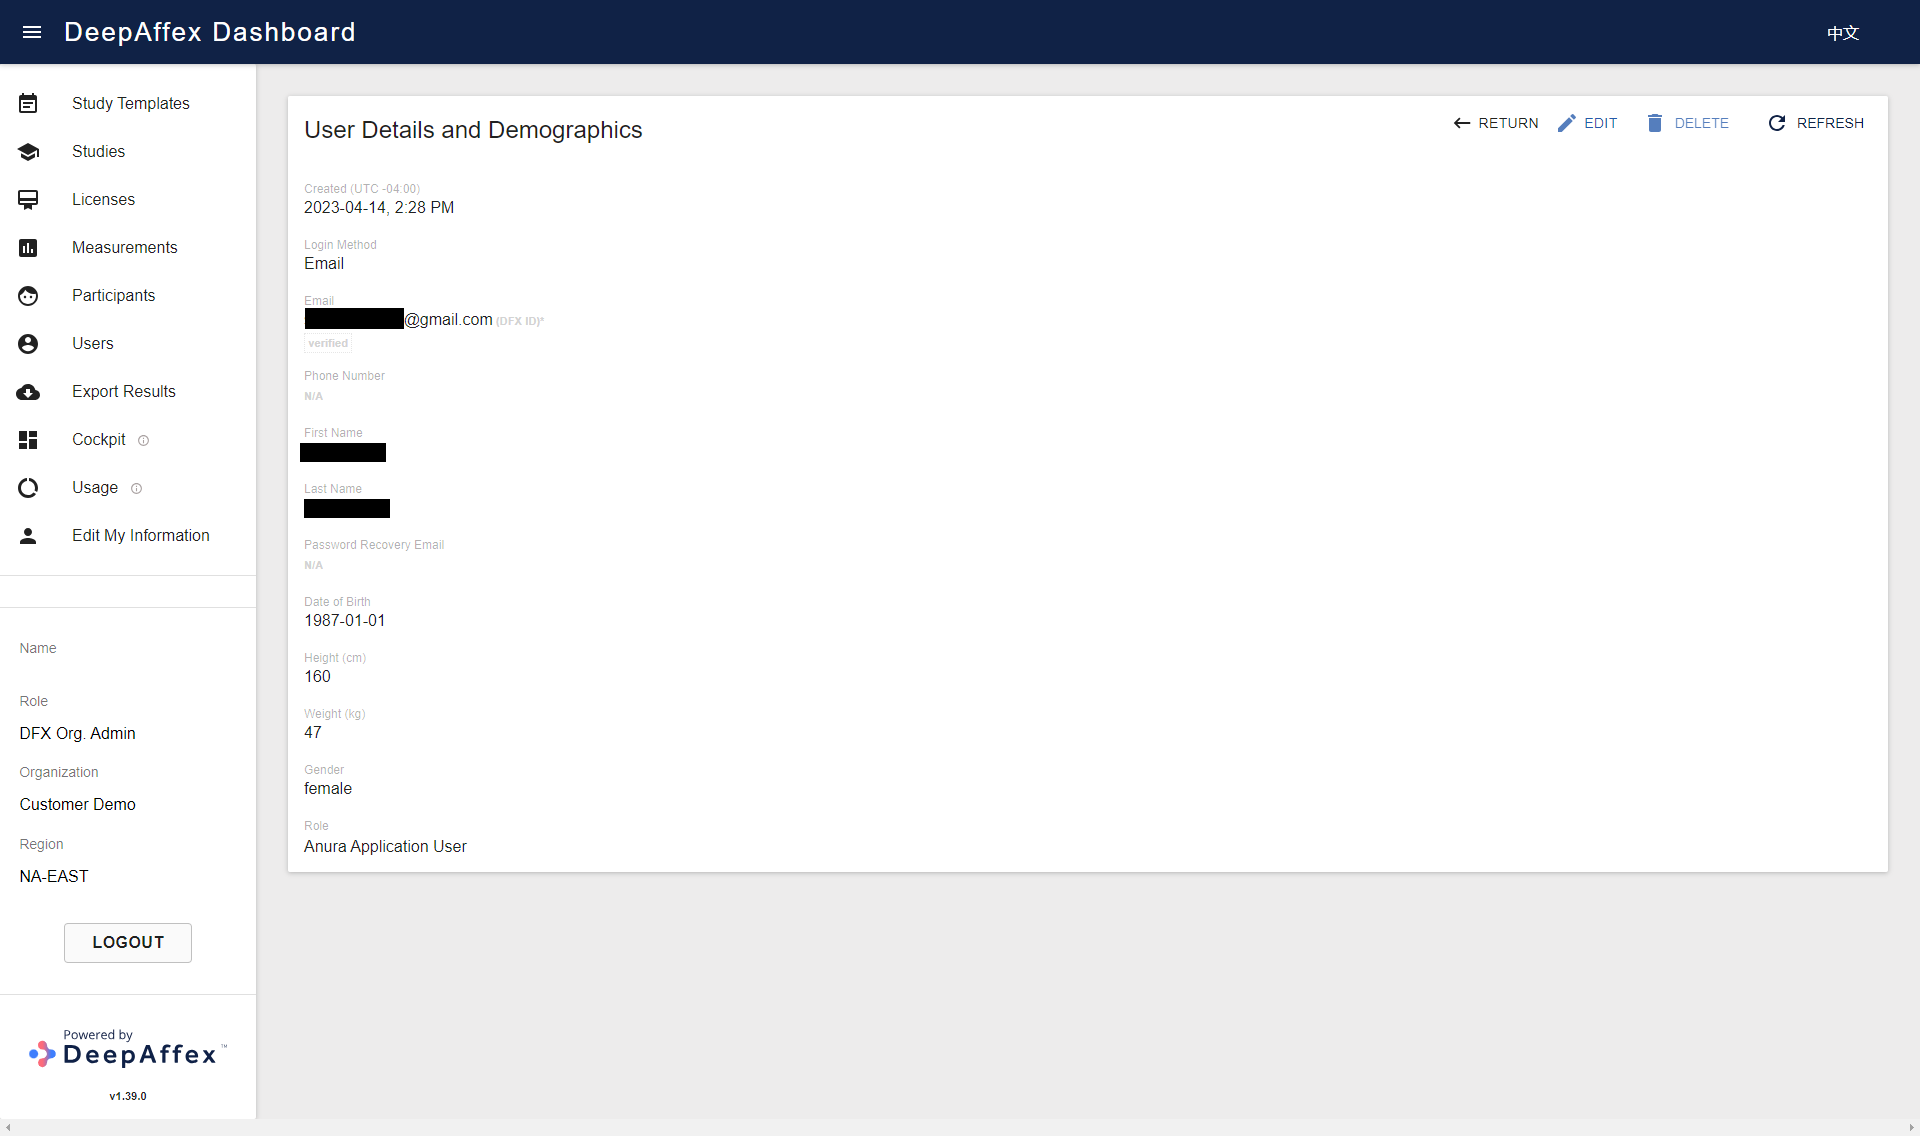
Org Admin can also delete the Users by clicking the DELETE button on the Users Details page. After the user is deleted, the associated Personal Identifiable Information (PII) will be anonymized, the user Status will become Deleted, and cannot be used for user login or taking measurements anymore.
(Click here to open a larger version of this picture in a new window)
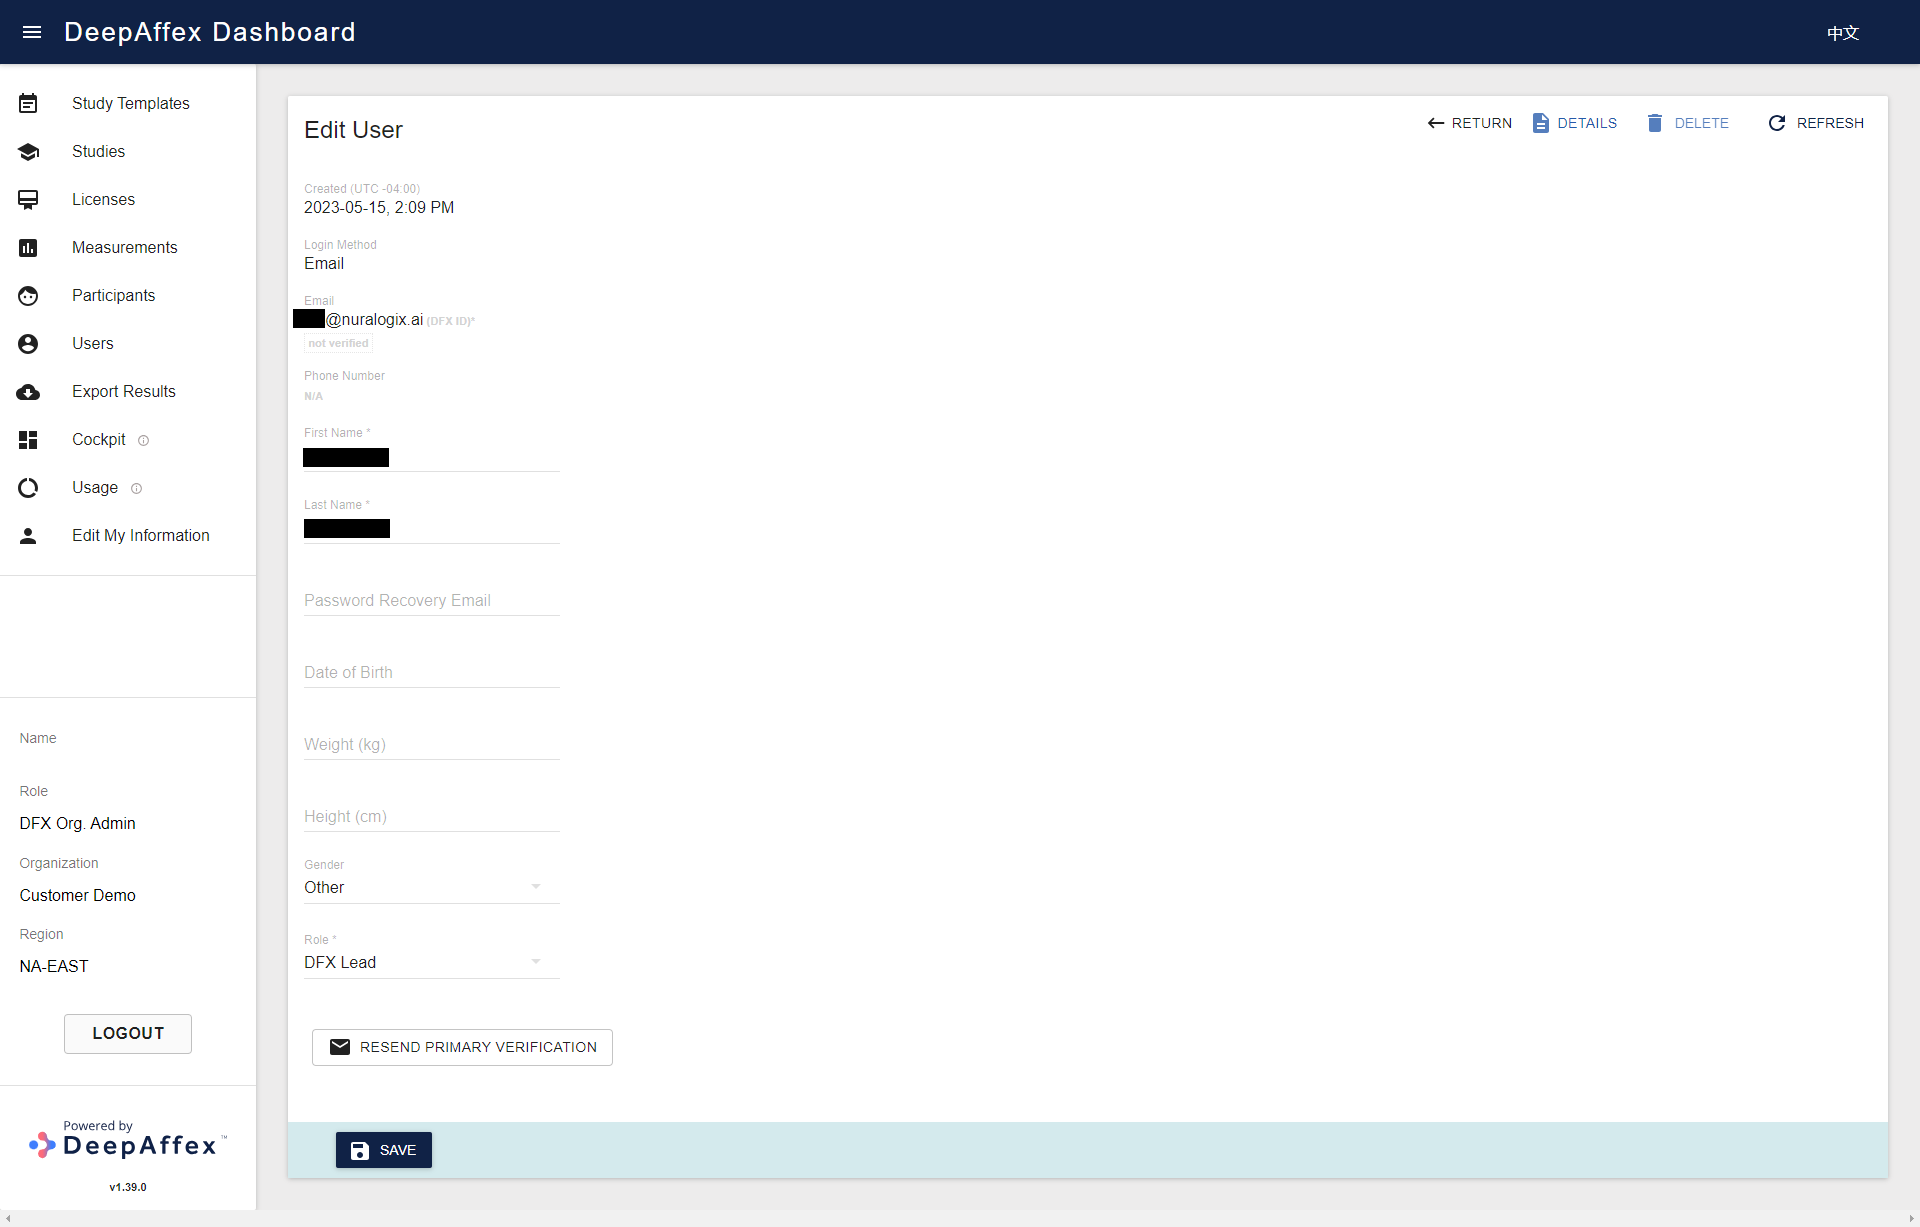
If you choose to create a new user using Email, a not verified status is automatically displayed below the Email field upon creation, and it will be automatically updated to verified once the account has been successfully verified. In case the invitation email expires or cannot be found, the invitation can be sent again by clicking the RESEND PRIMARY VERIFICATION button at the bottom of the Edit User page. Additionally, the User's profile information and Role can be edited on the same page.
(Click here to open a larger version of this picture in a new window)
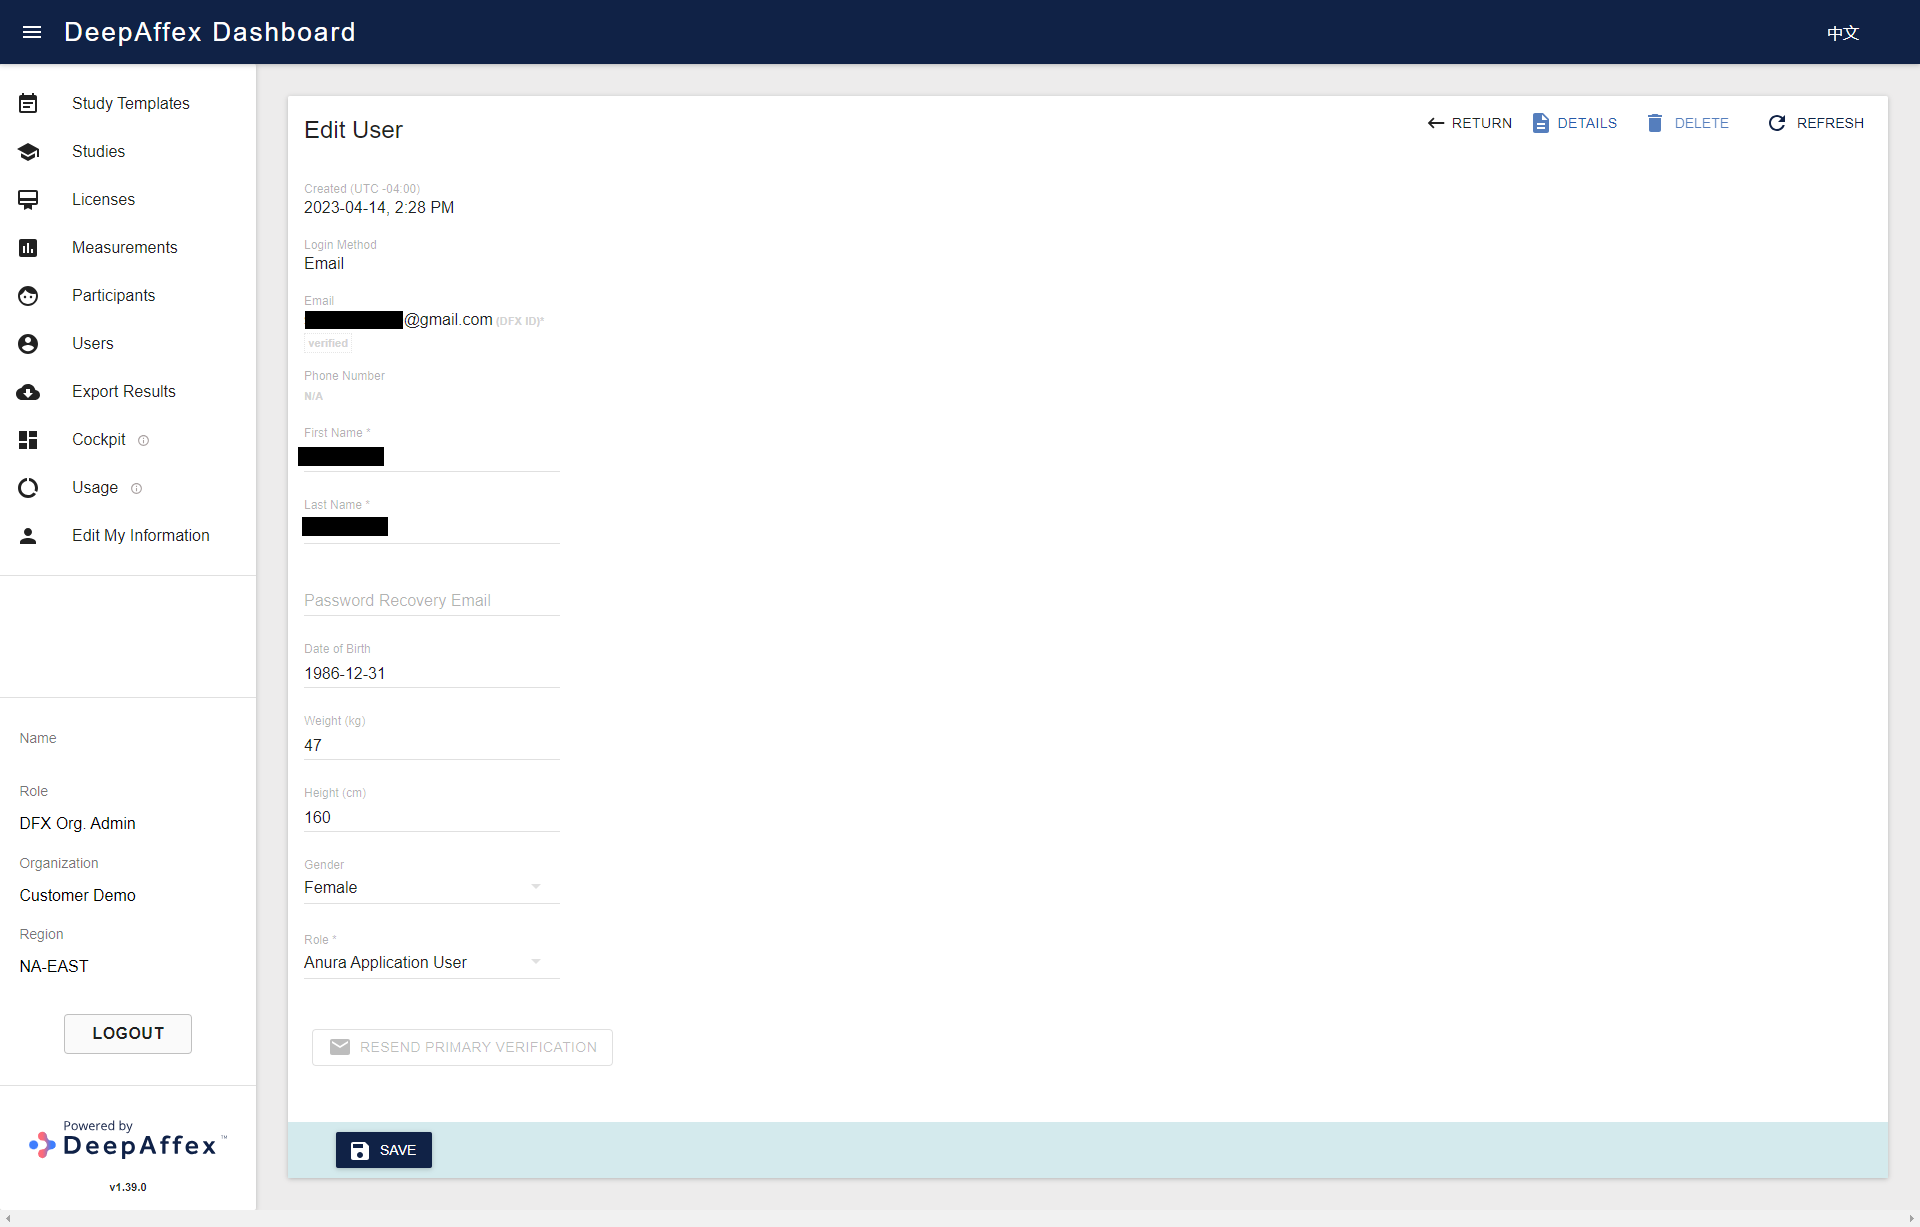
(Click here to open a larger version of this picture in a new window)
A User with an Org Admin role cannot be created or deleted, nor can their role be edited, through the Dashboard. If you need to perform any of these actions, please contact NuraLogix™.
Results Export
From this section you can export measurement results - either in the
HDF5 or
CSV format based on the
export option of Study, User or Organization. To find a specific Study or User,
you can either type in the study name or user's email, or use the dropdown menu to search through
the available options.
This page is region-fenced, i.e., Org Admins and DFX Leads can only export the measurement results in their own regions.
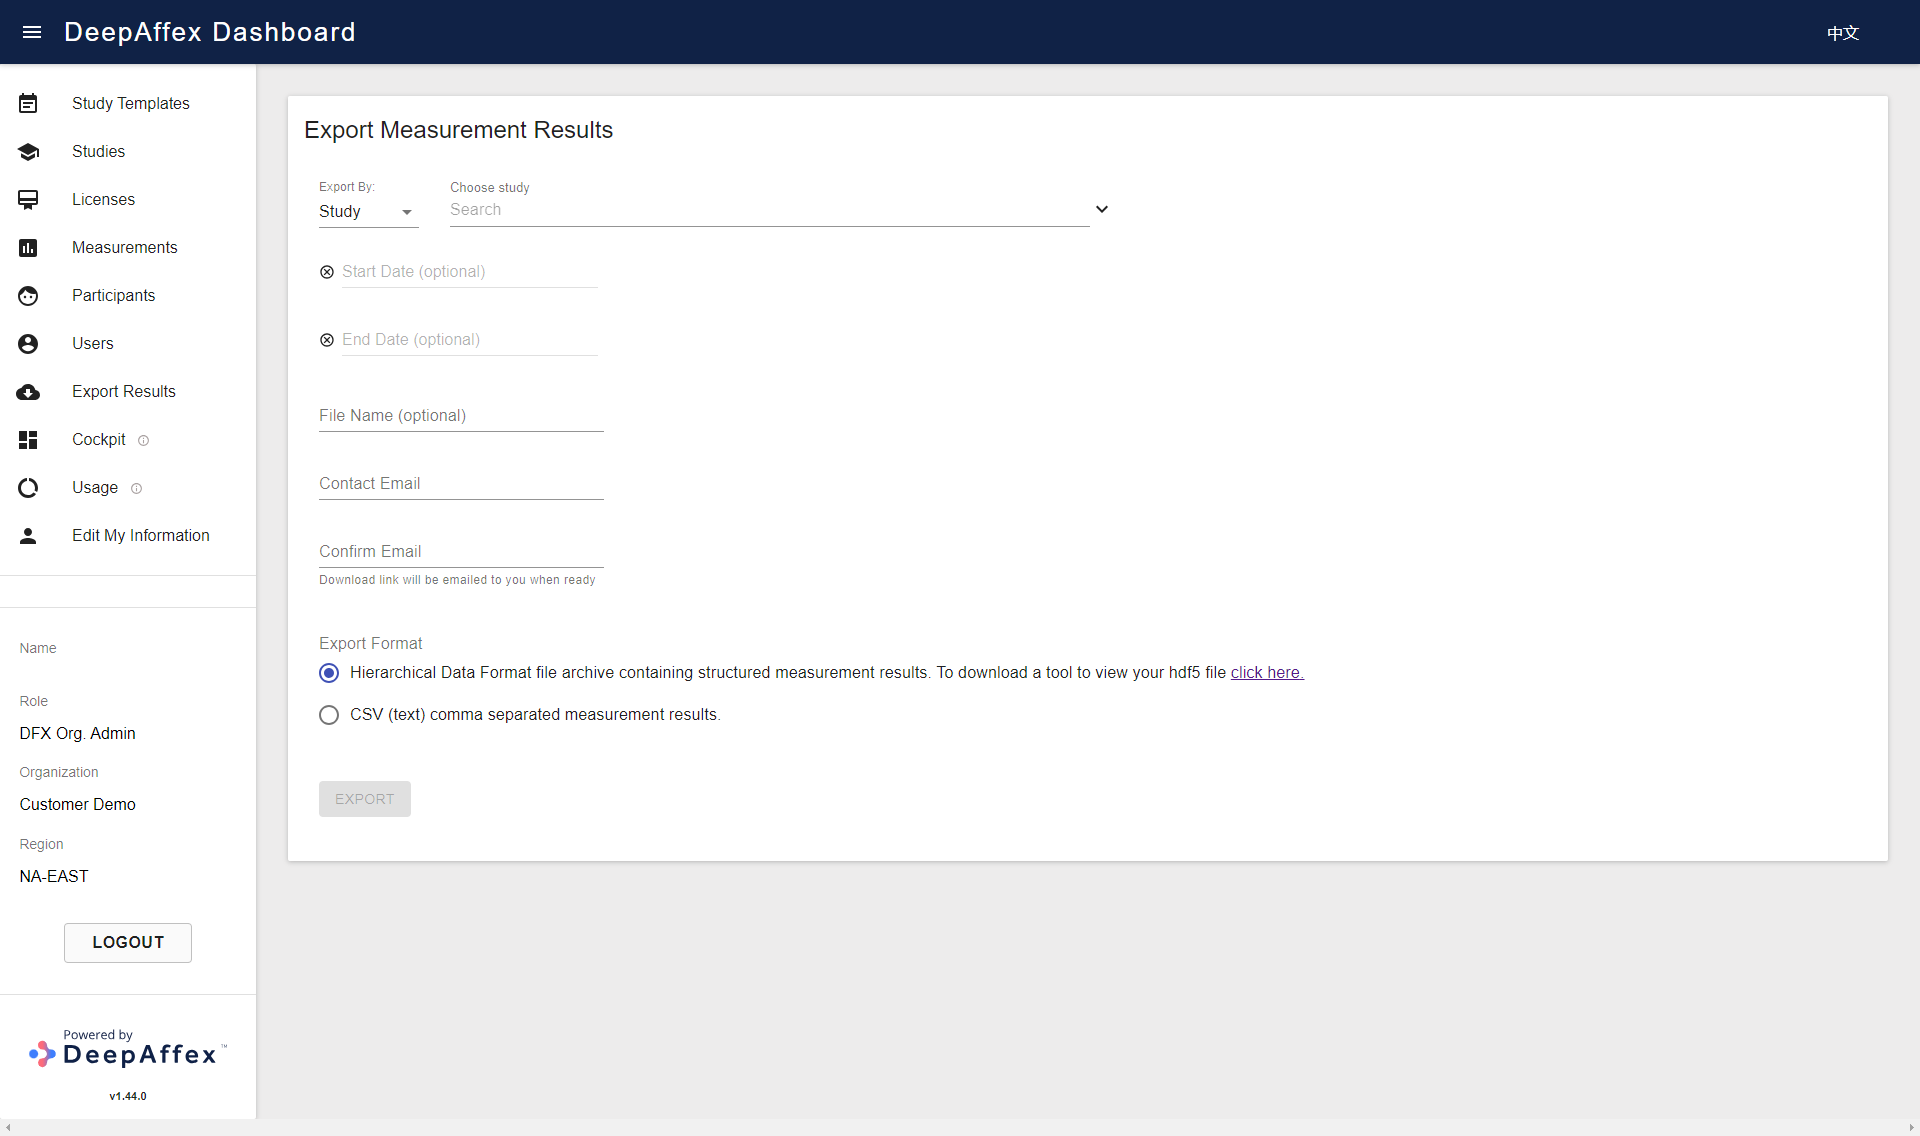
(Click here to open a larger version of this picture in a new window)
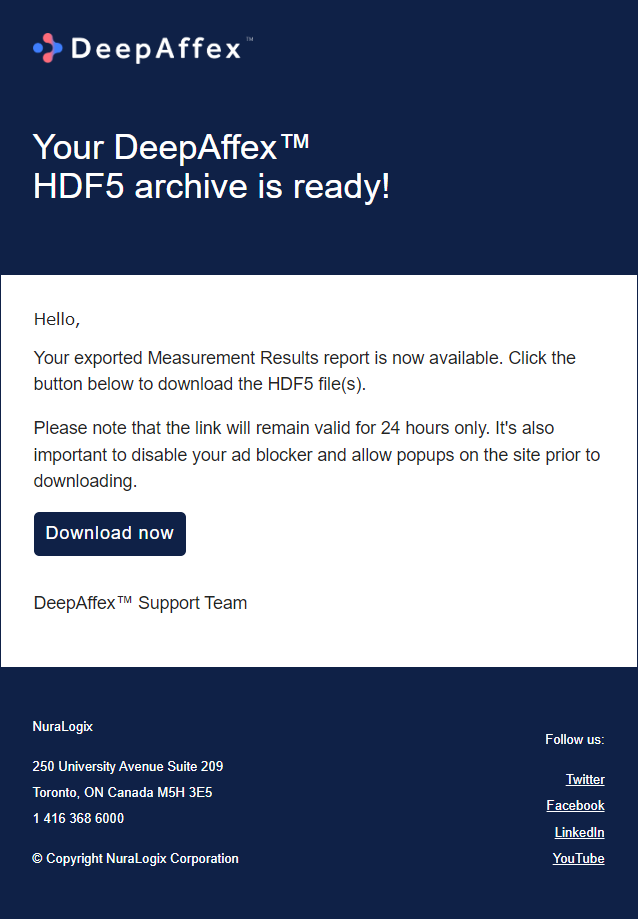
The measurements can be further filtered according to the selected date range. Wait for the confirmation message (shown in red in the following screenshot) to display before filling in the File Name (optional, it will be appended to the exported file name) and Contact Email. Once the exported file is ready, an email containing the download link will be sent to the contact email you provided when submitting the request. The link will remain valid for 24 hours.
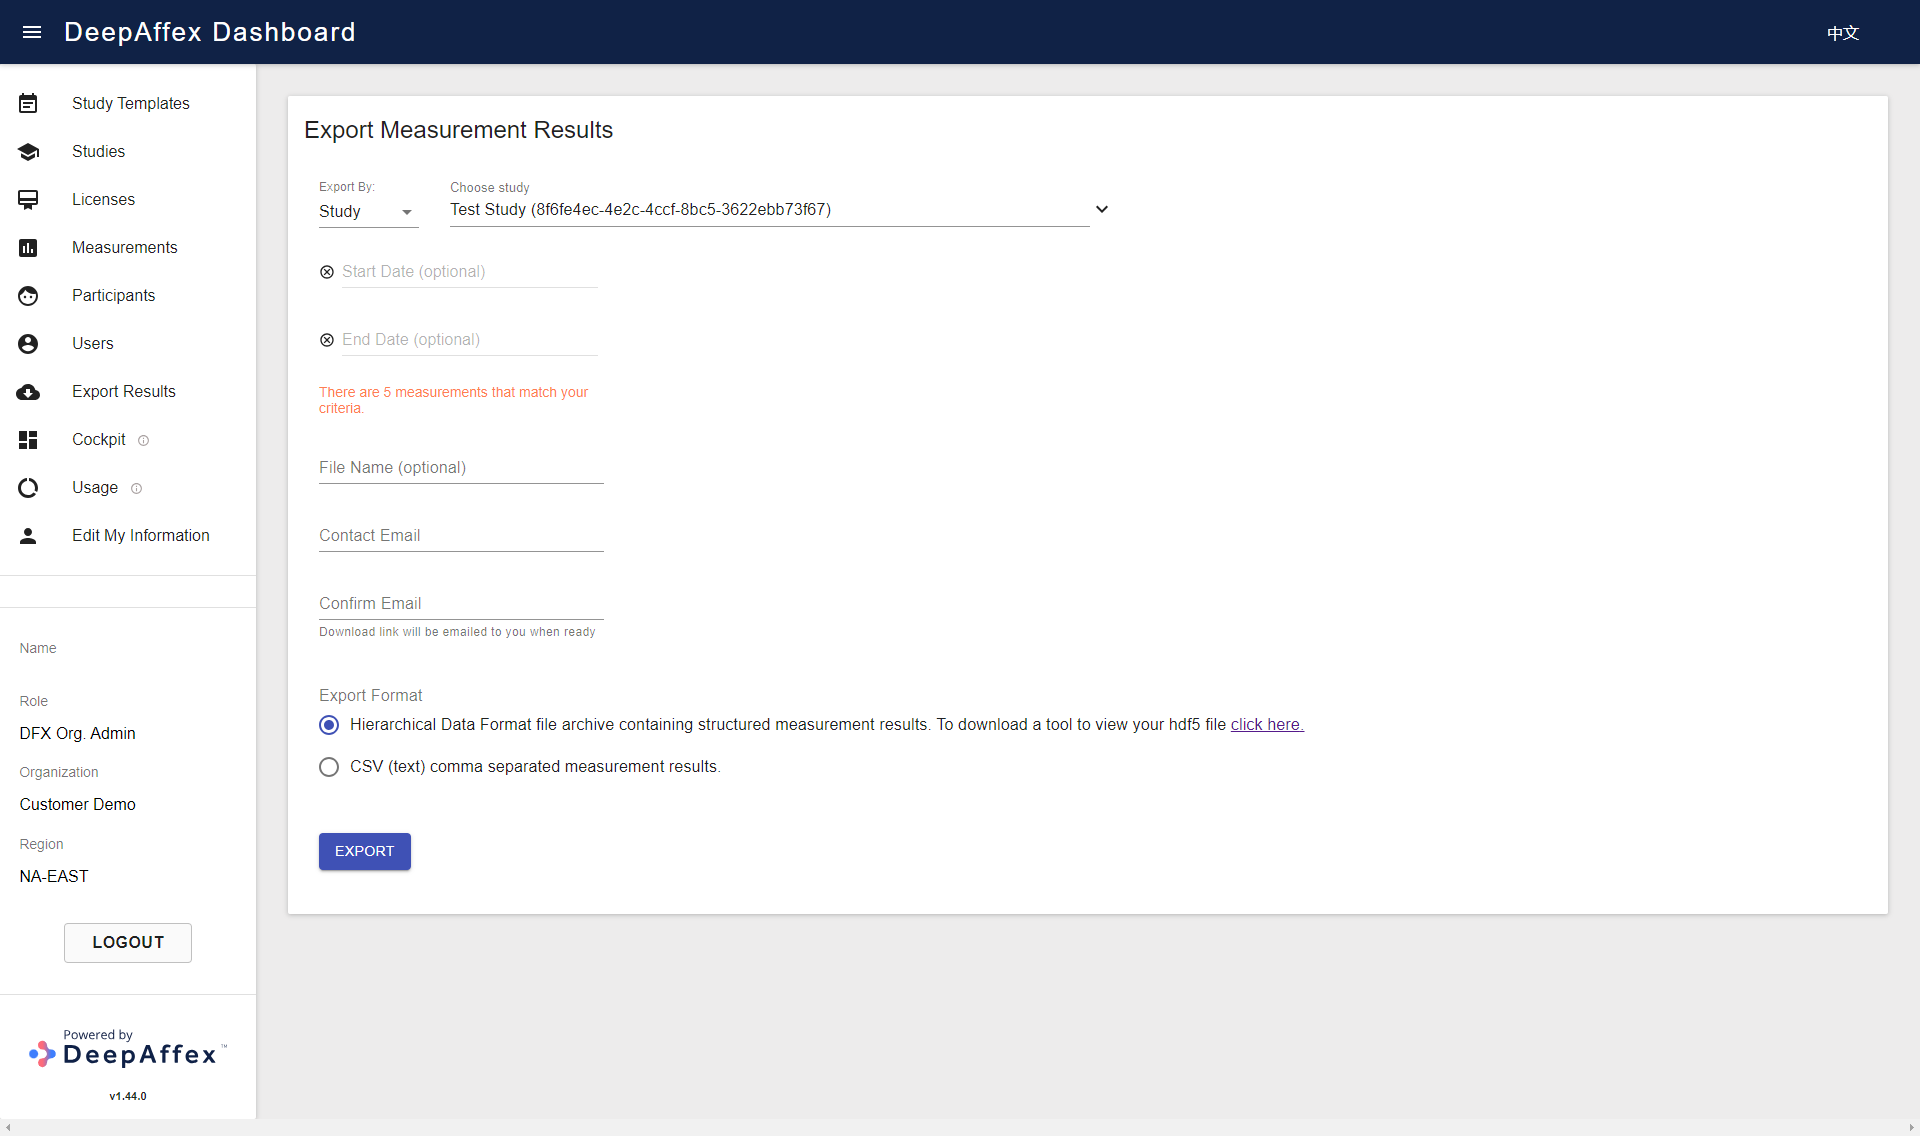
(Click here to open a larger version of this picture in a new window)
Explanation
-
CSV File: it contains the final results of all the points specified in the corresponding study.
-
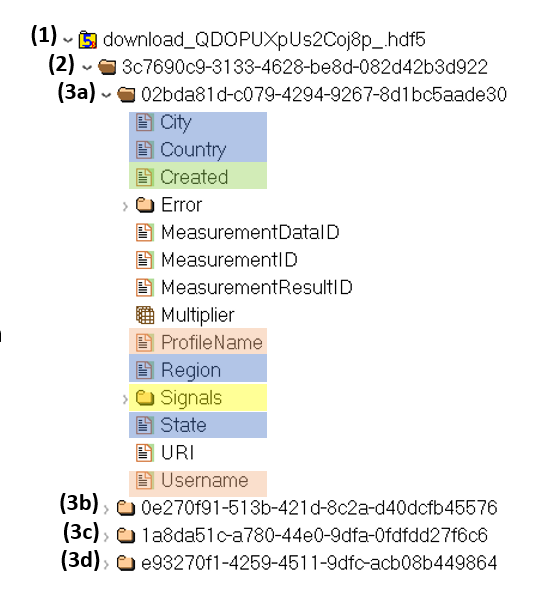
HDF5 File:
-
The file structure is shown in the figure below, where "(2)" is the Study Index which you can find from the Dashboard > Studies > Details page, and "(3)" is the individual Measurement Index which you can find from the Dashboard > Measurements >Details page.
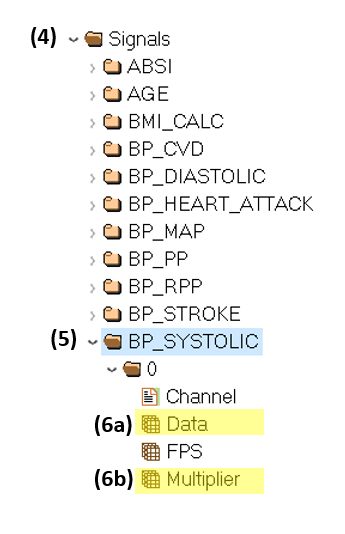
-
Expand (4) or the Signals folder to view the list of points, and expand (5) or one of the point folders to access the results, where (6a) contains the result after the multiplier is applied, (6b) contains the value of the multiplier. Therefore, to obtain the final result of the point, the value of (6a) must be divided by the value of (6b). For example, if BP_SYSTOLIC Data is 997064, and Multiplier is 10000, the final result of BP_SYSTOLIC will be 997064/10000 = 99.7064.
-
If there are more than 5000 measurements to be exported, you will need to split the export into chunks by filtering Start and End Date.
Cockpit
This section provides an overview of aggregate data for your organization in a
predefined report format. You can filter the aggregation scope by Study and
Date Range of measurement creation time. By default, it shows data for last
week.
This page is region-fenced, i.e. Org Admins and DFX Analysts can only view the aggregate data in their region.
The graphs indicate the distribution of the point results categorized by:
-
DFX Point Name (Heart Rate, Breathing, etc.)
-
Color coding specified in the interpretation table for each of the applicable DFX Point, it can be found in our DFX Points Reference
-
Percentage of each gender
-
Percentage of each age group
The graph also displays the average results based on the filtered aggregate data per DFX Point.
Authenticated vs Anonymous users section displays the number and percentage breakdown (as a pie chart) of the registered DFX users and anonymous users.

(Click here to open a larger version of this picture in a new window)
The aggregated results displayed on the Cockpit page are intended for informational purposes only and may provide insights by exploring underlying patterns and/or trends within the measurement data.
Usage
The USAGE feature is temporarily unavailable while we update our data-pipeline infrastructure. Please subscribe to the Dashboard changelog for further updates about this.
This section provides an overview of usage for your organization. You can filter
the results by Study and Date Range of measurement creation time. By
default, it shows data for last week.
This page is region-fenced, i.e. Org Admins and DFX Analysts can only view the usage in their region.
It is broken down into the following categories:
-
Measurements
-
By Status - To learn more about measurement statuses, please refer to the Status table in the Results on DeepAffex Cloud section.
-
By Study - List Studies by name
-
By Location - Break down further into Country, State and City
-
By Measurement Duration - Measurement length
-
Count - Number of measurements
-
Trend - Percentage change in the Count for the Selected date range as compared to the Prior date range
-
-
Active Users (i.e., the users who are performing measurements)
-
By User Type - Anonymous user and Registered DFX user
-
By Study - List Studies by name
-
By Location - Break down further into Country, State and City
-
Count - Number of active users
-
Trend - Percentage change in the Count for the Selected date range as compared to the Prior date range
-
-
Results - List the DFX Points by ID
-
Exports - Number of export results requested
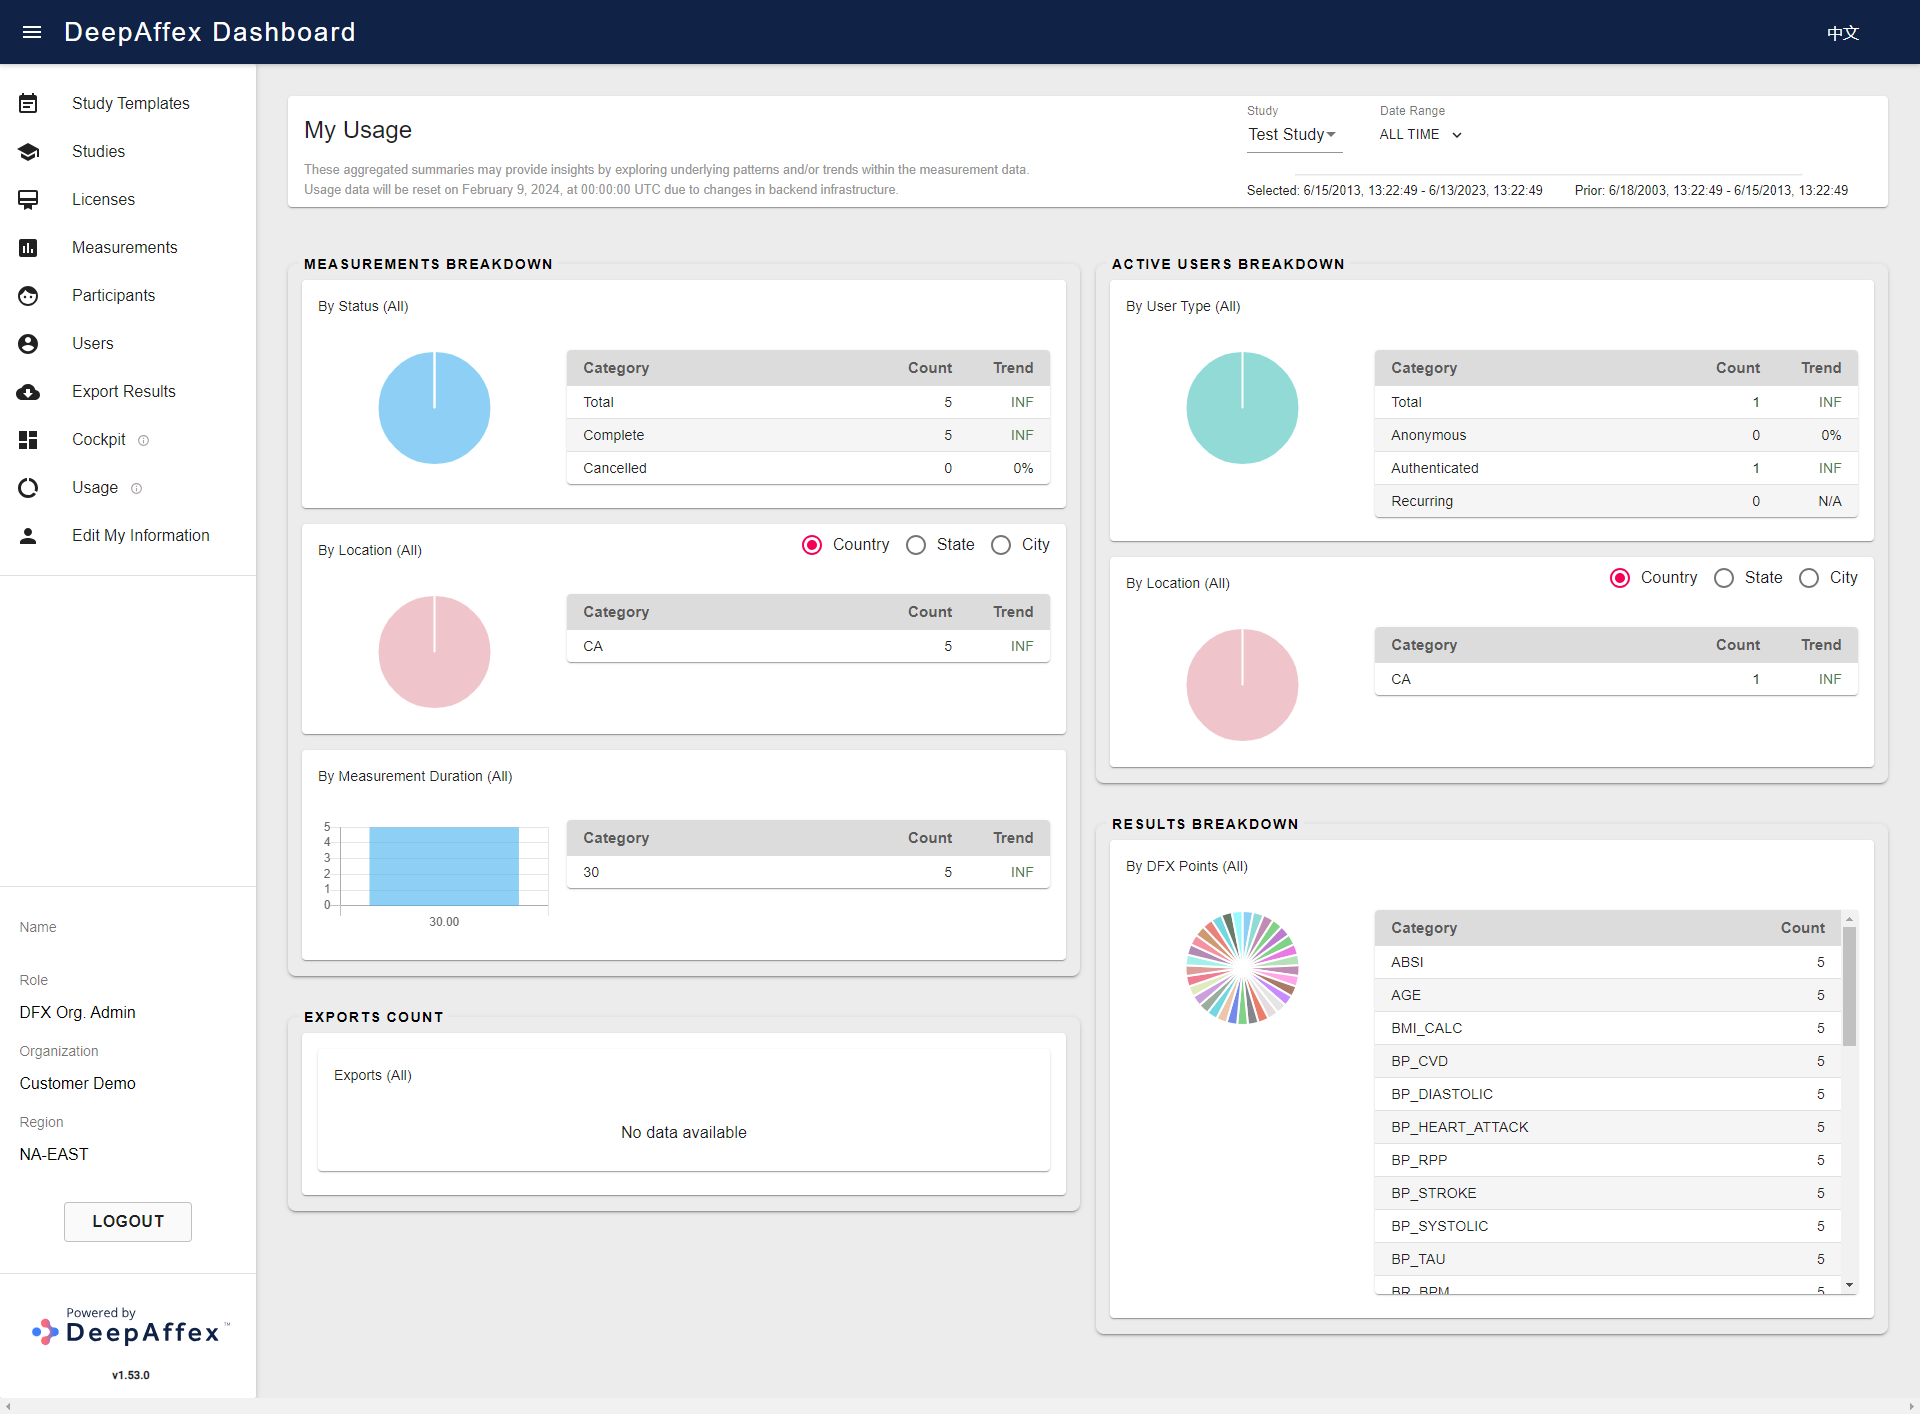
(Click here to open a larger version of this picture in a new window)
The aggregated results displayed on the Usage page are intended for informational purposes only and may provide insights by exploring underlying patterns and/or trends within the measurement data.
Edit My Information
In this section, you can edit your personal profile information and add a Password Recovery Email for additional security.
We highly encourage you to provide a separate Recovery Email (different from your sign-up email) that will be used in case of a password reset. If added to the Password Recovery Email field, a not verified status is automatically displayed below the field, and a verification email will be sent to the Recovery Email. The status will be automatically updated to verified once the Recovery Email has been successfully verified. In case the verification email expires or cannot be found, the verification email can be sent again by clicking the RESEND RECOVERY VERIFICATION button next to the status.
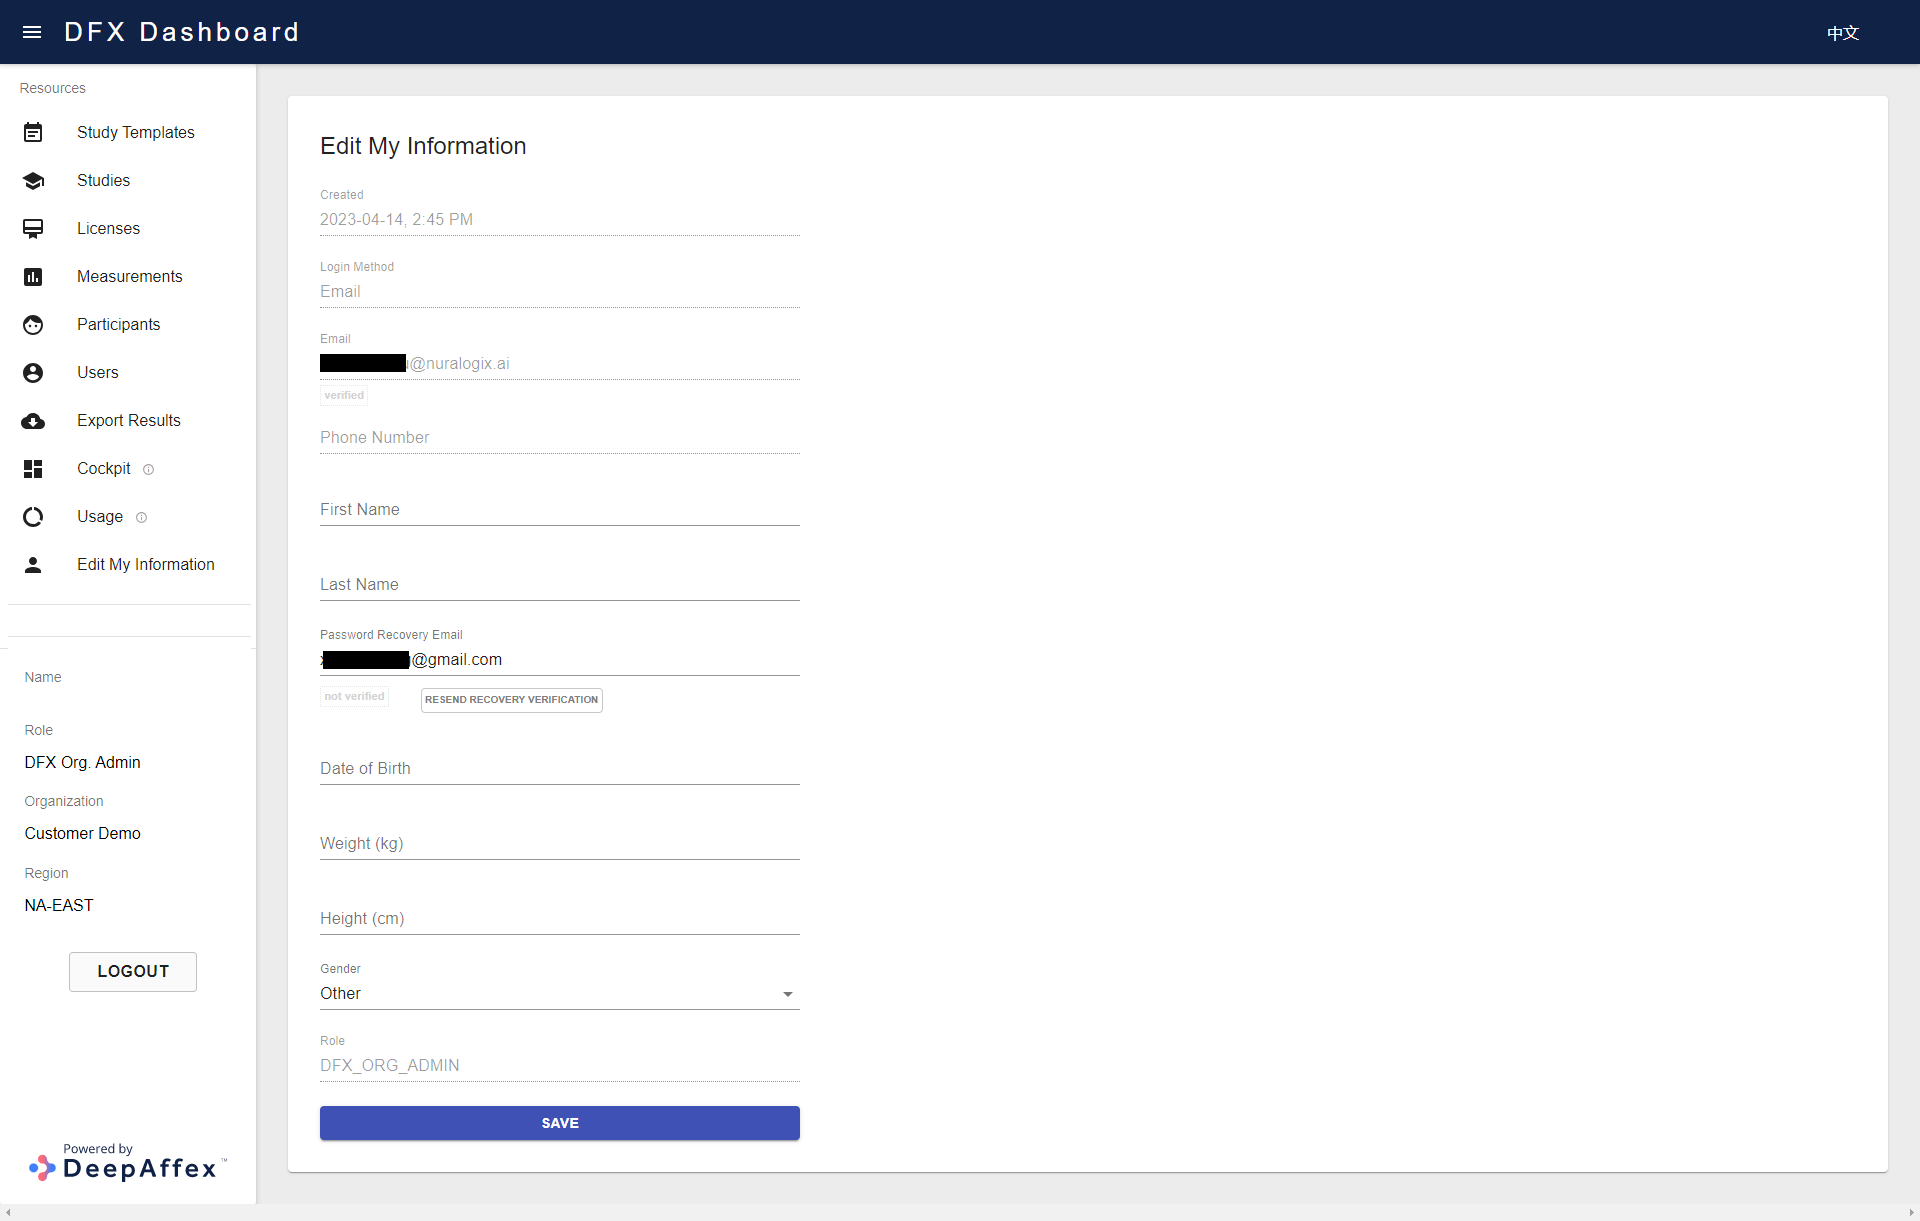
(Click here to open a larger version of this picture in a new window)
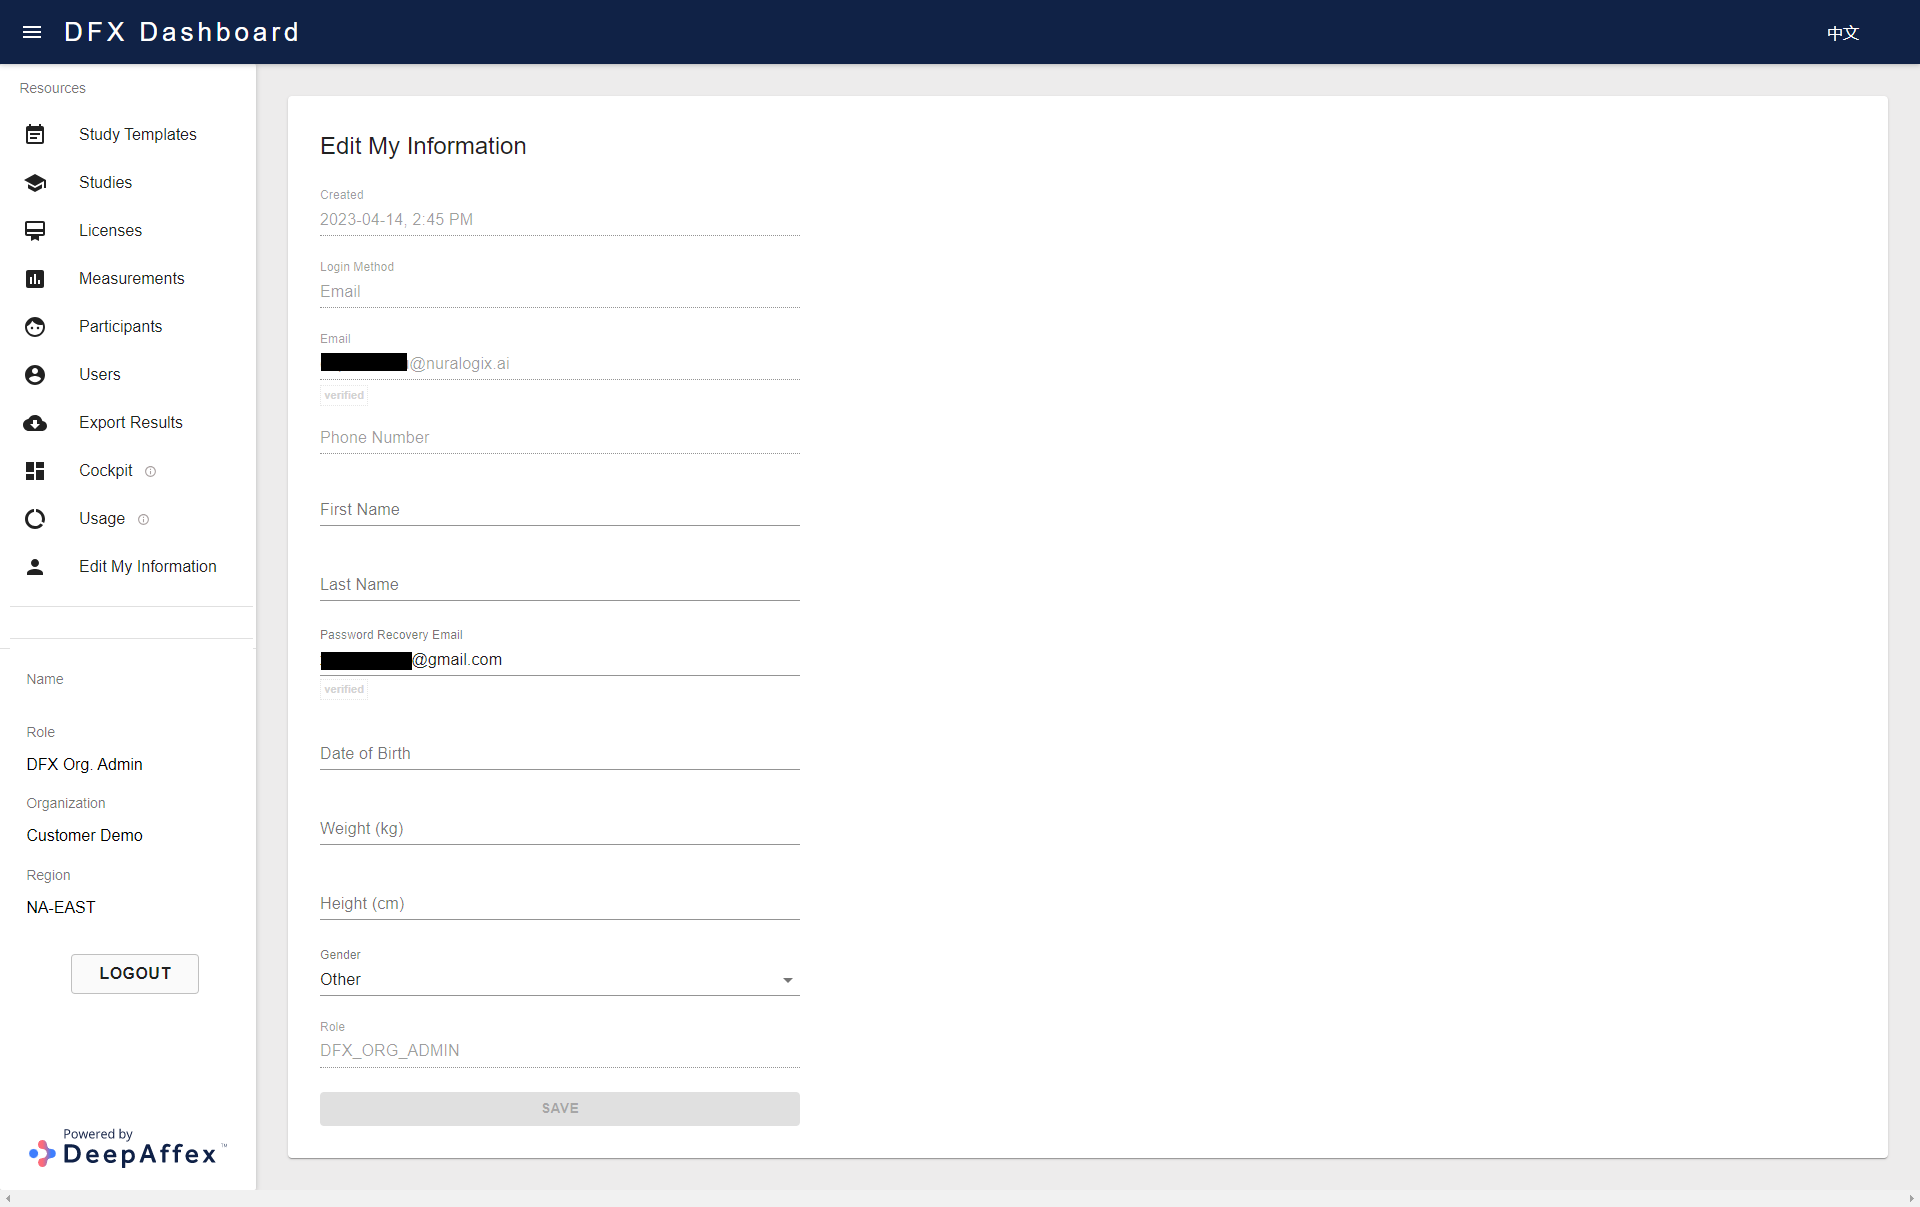
(Click here to open a larger version of this picture in a new window)
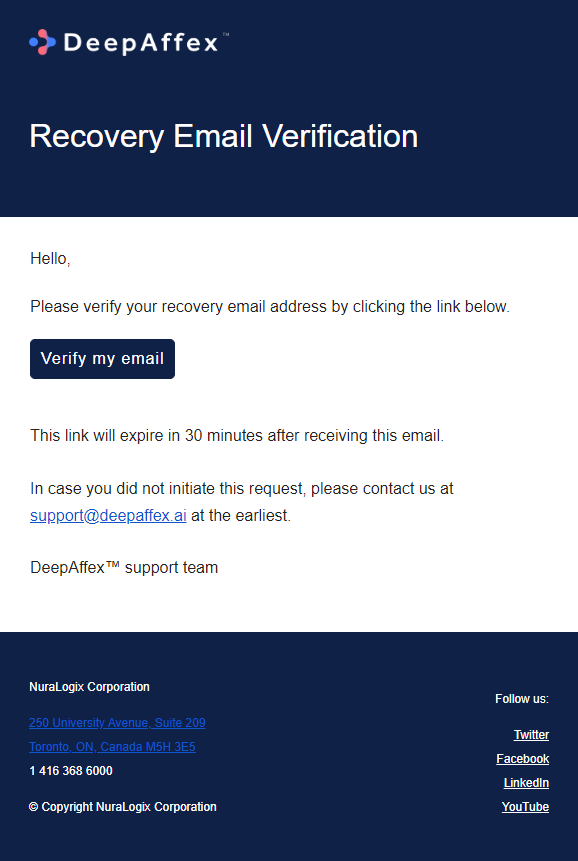
(Click here to open a larger version of this picture in a new window)
You can also update your Recovery Email this page. Once updated by clicking the Save button, a new verification email will be sent to the new Recovery Email for verification. Please note that once a Recovery Email is added, it cannot be removed but can only be updated, ensuring that your password reset information remains protected.
If a password reset is initiated with the verified Recovery Email, you will get a One-Time Password (OTP) on your Recovery Email in addition to the password reset link sent to your sign-up email. Click on the link in your sign-up email and enter the new passwords along with the OTP received in your Recovery Email to complete the password reset process.
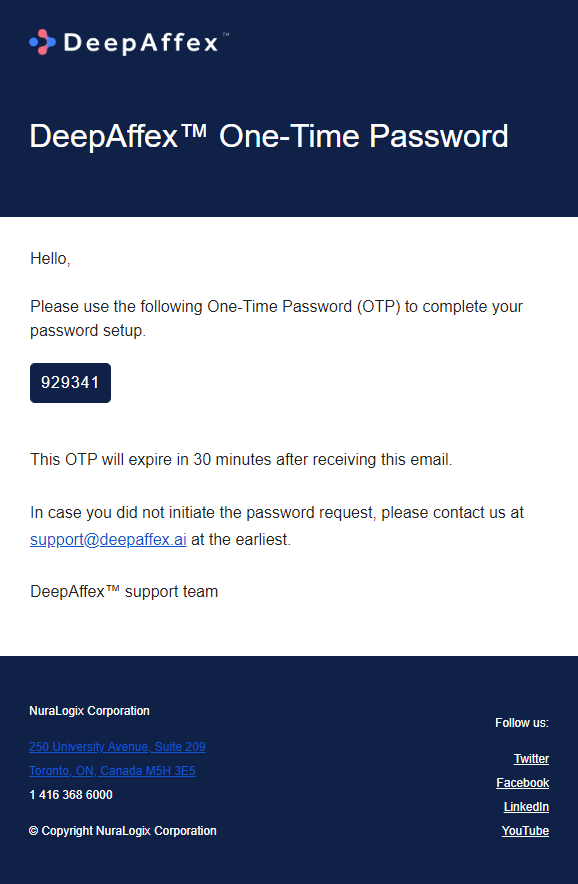
(Click here to open a larger version of this picture in a new window)
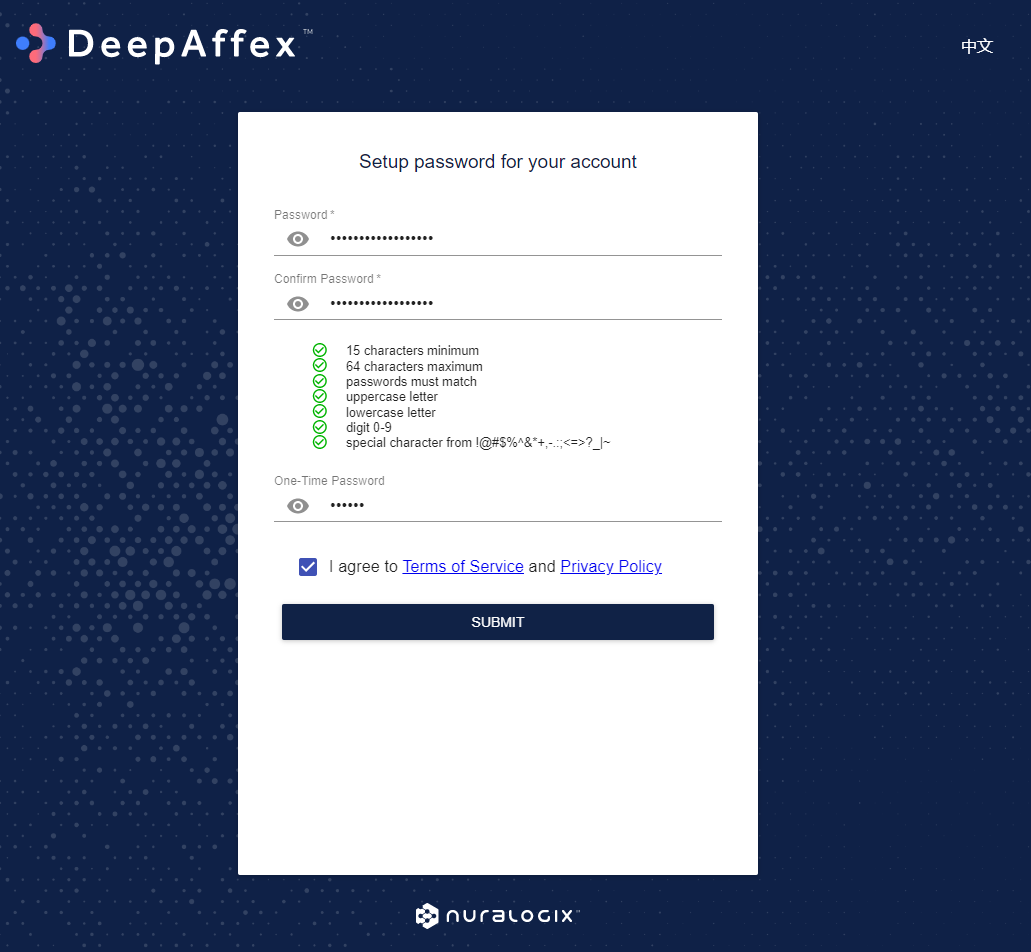
(Click here to open a larger version of this picture in a new window)
Troubleshooting
SNR-related issues
If you get a Signal-to-Noise Ratio (SNR) of less than 0.5 dB then DeepAffex will not be able to compute any results. Please try the following options to improve your SNR:
-
Avoid movement: Please remain as still as possible during the scan; small movements are acceptable but large movements will reduce the SNR. The camera should also remain stationary e.g., mobile phones should be in a stand.
-
Improve lighting: Make sure that your face is well lit with even lighting on both the left and right side and minimal shadows. Due to the physical basis of how TOI™ works, individuals with darker skin tones will need even more light incident on their faces than others.
-
Move closer to the camera: Move as close to the camera as possible while ensuring the face tracker can track you. If your device can be rotated, then rotate it so that your face is in portrait mode in the camera. The closer you are to the camera, the higher the SNR will be.
-
Remove obstructions from the face: Objects that block parts of the face may affect measurements. Please remove obstructions like eye-glasses, makeup, sunscreen, caps, jewelry etc.
-
Clean your camera lens: Often, phone, tablet and webcam lenses accumulate fingerprints, grease and dirt. Please clean your camera lens.
-
Try a different camera: Some cameras have sensors that introduce a lot of noise or don't provide a stable frame rate. If possible, please try using a different device.
Star Rating is an estimate of overall optical quality.
A high Star Rating may lead to a high SNR. But in some situations, SNR may be unrelated to Star Rating. This may happen because Star Rating is computed on the device and depends upon the image and camera information, whereas SNR is computed on the DeepAffex™ Cloud and depends upon blood-flow information.
We are working to improve the Star Rating to be a better indicator of signal quality.
Measurement Questionnaire
User Profile Questionnaire
DeepAffex™ can use subject profile information to further enhance the accuracy of measurement results. The following information is used:
| Question | Key | Value |
|---|---|---|
| Age | "age" | 13-120 (years) |
| Sex assigned at birth | "gender" | "male" / "female" |
| Height | "height" | 120-220 (cm) |
| Weight | "weight" | 30-300 (kg) |
In addition to these ranges, please make sure that the values of height and
weight entered result in a Calculated BMI value that is within the acceptable
range of 10 to 65. Also, note that the Calculated BMI is not an input field in
the questionnaire but is calculated based on the height and weight entered.
It is described in more detail here.
Medical History Questionnaire
DeepAffex™ can also use subject medical history information to further improve the accuracies of cardiovascular disease risk, heart attack risk and stroke risk. The following questionnaire should be used:
| Question | Key | Value |
|---|---|---|
| Do you smoke? | "smoking" | 0 / 1 |
| Are you taking blood pressure medication? | "bloodpressuremedication" | 0 / 1 |
| Are you diabetic? | "diabetes" | "0" / "type1" / "type2" |
-
The question "Do you have hypertension?" (
antihypertensive) is deprecated and no longer required. -
Both keys and values used in the measurement questionnaires must be lowercase. Also, please make sure that the keys are exactly the same as shown in the above tables.
DFX Points
Please refer to the Introduction page in our DFX Points Reference for a table with all available DFX Points.
Glossary
Transdermal Optical Imaging (TOI™): An imaging technology by NuraLogix that uses a digital camera and advanced image processing to extract facial blood-flow data from a human subject.
DeepAffex Point: A biosignal of interest that can be extracted, computed or
estimated from facial blood-flow data that is assigned a unique name on the
DeepAffex™ Cloud. (e.g., HR_BPM is the Point for pulse rate.) A Point can
be a Source, Signal, Feature, Algorithm, Model or Classifier.
- Source: Point calculated from a "raw" or minimally processed data stream.
- Feature: Point extracted by a NuraLogix™ developed feature.
- Algorithm: Point calculated from a NuraLogix™ developed algorithm.
- Model: Point estimated by a NuraLogix™ developed machine learning model.
- Classifier: Point produced by a NuraLogix™ developed classifier.
DeepAffex Study Template: A group of Points used to create a DeepAffex Study. Study Templates can only be created by NuraLogix™.
DeepAffex Study: A group of Points that are computed in one Measurement. A Study is based on a Study Template and can be created by an Organization.
DeepAffex Measurement: A group of results computed by the DeepAffex™ Cloud based on a single Study. The process of extracting facial blood-flow from a sequence of images and sending it to the DeepAffex™ Cloud for processing is called making a measurement.
Organization Key: A unique identifier that is linked to your organization on the DeepAffex™ Dashboard.
DeepAffex™ Developers Guide Changelog
1.26.0 - 2024-03-01
- Updated the notice on the usage page in the dashboard tutorial
- Updated the descriptions of different measurement statuses
1.25.0 - 2024-02-13
- Updated the usage page in the dashboard tutorial
1.24.0 - 2023-12-04
- Updated the notice about the DeepAffex™ Cloud API changes
1.23.0 - 2023-11-07
- Updated the notice about upcoming DeepAffex™ Cloud API changes
- Fixed a broken link on the Cockpit page
1.22.0 - 2023-09-29
- Updated the notice about upcoming DeepAffex™ Cloud API changes
1.21.0 - 2023-09-20
- Improved the description on the Introduction and the DeepAffex™ Extraction Library pages
1.20.0 - 2023-08-31
- Improved the explanation of measurments left in the dashboard tutorial
- Improved the export results page in the dashboard tutorial
- Added a notice about upcoming DeepAffex™ Cloud API changes in the authentication page
- Language edits
1.19.0 - 2023-08-04
- Updated the measurement flow and token lifecycle diagrams
1.18.0 - 2023-07-13
- Explained the
Measurements.Listendpoint on the measurements page - Updated dashboard tutorial screenshots
- Removed Groups from the Role Based Access table
- Added Org Key definition in Glossary
- Removed User Token mandate when RoleID is SDK_DEVICE
1.17.0 - 2023-05-29
- Updated
PartnerIDexplanation on the Users page - Added PENDING status and updated description of other statuses in the measurement status table
- Updated dashboard tutorial as per the latest dashboard release
1.16.0 - 2023-04-19
- Added an edit my information page in the dashboard tutorial
- Updated dashboard tutorial as per the latest dashboard release
- Added a reference to error codes table on the measurements page
- Updated SNR-related issues section on the troubleshooting page
1.15.0 - 2023-03-06
- Updated measurements, participants, users and results export pages in the dashboard tutorial
- Added cockpit and usage pages in the dashboard tutorial
- Updated the Verify Token endpoint description on the authentication page
- Deleted groups page from the dashboard tutorial
1.14.0 - 2023-02-14
- Updated the measurement flowchart on the getting started chapter
- Updated face tracker to MediaPipe on the getting started chapter
- Updated introduction page in the dashboard tutorial
- Updated role-based access, navigation, studies and licenses pages in the dashboard tutorial
- Added a study templates page in the dashboard tutorial
- Deleted devices page from the dashboard tutorial
- Updated the NOTES table on the measurements page
- Fixed a broken link on the authentication page
- Updated
Measurements.RetrieveEndpoint explanation on the measurements page
1.13.0 - 2023-01-18
- Added information about the NOTES returned as part of the results
- Added information that keys and values used in the measurement questionnaires are case sensitive
- Added a reference to anonymous measurements section in the authentication chapter
- Added information about the different Errors received from the DeepAffex™ backend
1.12.0 - 2022-11-28
- Updated the questionnaire section
- Removed content from the Available DFX points page and added reference to the new points reference
- Updated references to the results section of the Anura core guide
- Added a disclaimer page
1.11.0 - 2022-10-31
- Added explanation about retrieve results endpoints
- Added note about dark skin/TOI and lens cleaning
- Added a note about Star rating
- Some word edits
- Formatting improvements
1.10.0 - 2022-09-29
- Added a troubleshooting guide
1.9.0 - 2022-08-15
- Corrected a changelog entry
- Corrected formatting of some words
1.8.0 - 2022-07-29
- Updated information related to JSON and Protobufs
- Added information about saving of measurement results
- Multiple updates related to tokens and device registration
1.7.0 - 2022-07-08
- Updated measurement status information
- Updated information about user tokens
- Added a changelog
1.6.0 - 2022-06-20
- Added a chapter on regions and clusters
- Added refresh tokens related information
1.5.0 - 2022-05-11
- Added a page on demographics
- Updated user phone number auth endpoints
- Updated links to demo repo and api docs
- Updated a command in constraints page
- Updated demo commands
1.4.0 - 2022-04-08
- Renamed SDK to Extraction Library
1.3.1 - 2021-12-17
- Removed some signals
1.3.0 - 2021-09-02
- Simplified URL with implied default port
- Fixed incorrect links
- Fixed broken links on Dashboard section
- Rewrites/edits in Users section
- Updated ports
- Added icon for SDK
- Added PartnerID and User Profile sections
1.2.0 - 2021-01-21
- Edits related to landmarks
- Added details about required facial points
1.1.1 - 2020-09-18
- Added some details and clarifications about tokens
1.1.0 - 2020-08-20
- Moved logo to sidebar and added dark logo
- Added a logo for each theme
- Added DFX logo
- Added a url and a small TM fix
- Added constraints chapter
- Fixed broken links
- Changed landing page title
1.0.0 - 2020-07-28
- Initial version